Craft in Style Subscription Instructions, DIY
Beginner’s Guide to Weaving Coasters on a Hand Loom

Sep
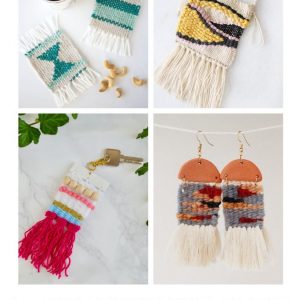
This is Part 2 of 5 of the Beginners Guide to Weaving with a Loom. The loom I used for this project can be found here. Read Part 1: Beginner’s Guide to Weaving. Read Part 3: 7+ Coaster Weaving Pattern Video Tutorials. Read Part 4: How to Make a Yarn Wall Hanging here. Read Part 5: 9+ Weaving Crafts You Can Make with a Loom here.
When getting started with weaving, the best thing to do is start with a small project that’s not too complicated. Making a wall hanging (linked above) is a great idea, but I may prefer making these Easy Woven Coasters because there practical, easy to use, and make a great gift!
You could give these to someone for a housewarming party, to a teacher for her desk at school, or make them for yourself. You can make them in any of your favorite colors and once you master this beginner friendly version here, try these different patterns here to make coasters that are perfectly your style!
So let’s craft!
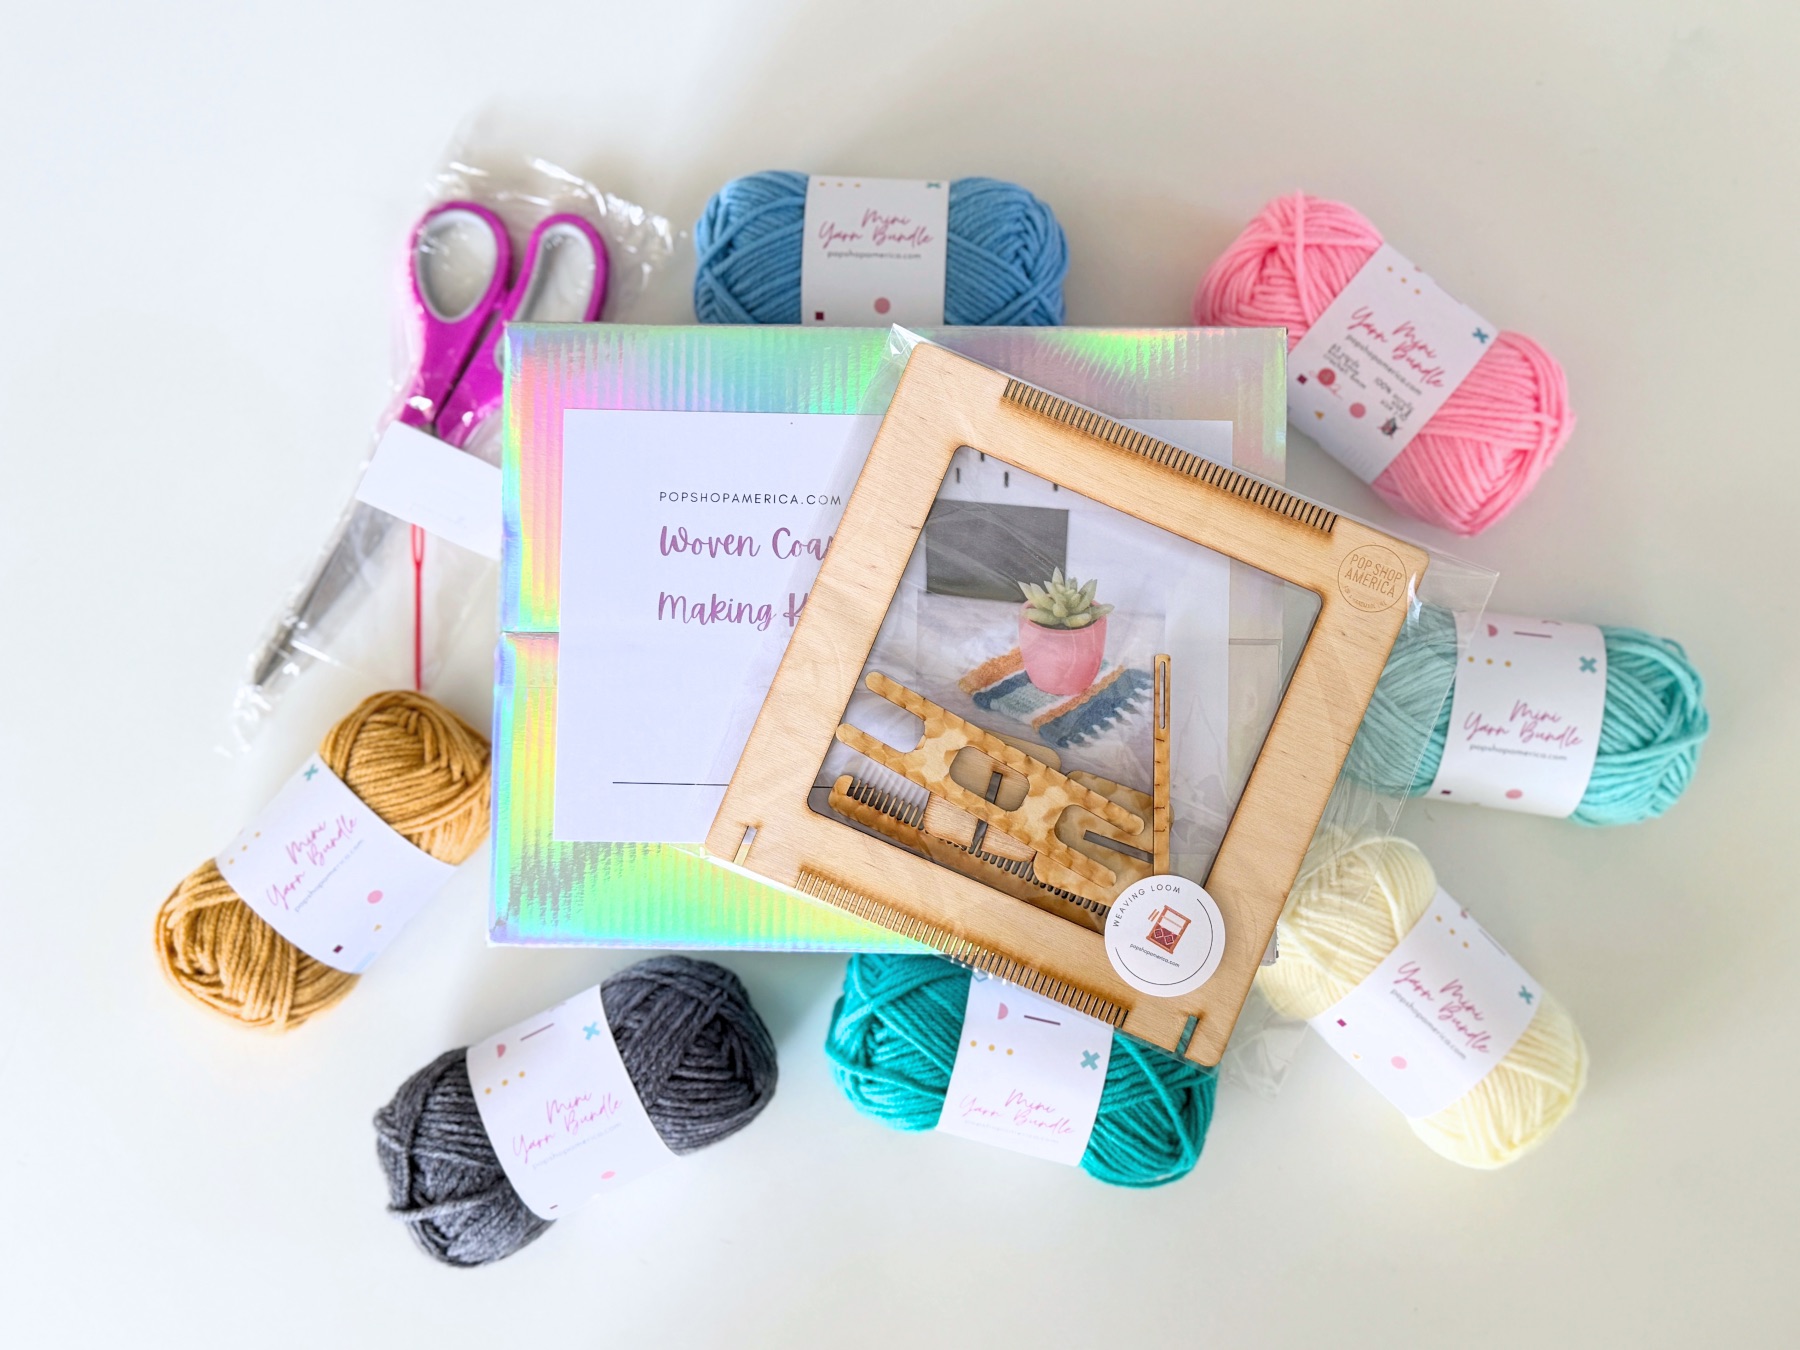
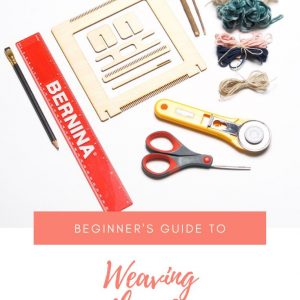
Supplies to Make these DIY Woven Coasters
This DIY Woven Coaster Making Kit
or
This 7 Inch Hand Loom
1-2 Skeins of Yarn in Your Favorite Colors (the size I used is:
The Tapestry Needle Included with Your Hand Loom
Scissors
Patience
I say patience because any weaving projects do require a bit of time and thus a bit of patience. There are 2 ways to create a faster weaving project for yourself: 1. Create a weaving that’s small – the larger the weaving the longer it will take. 2. Create a weaving with less colors – more colors and more patterns will make projects take longer.
How to Start a Weaving Project:
When starting a weaving project, you need to add your warp to the loom. If you don’t know the term warp – check out this blog post here which will help you through the basics of Getting Started with Weaving.
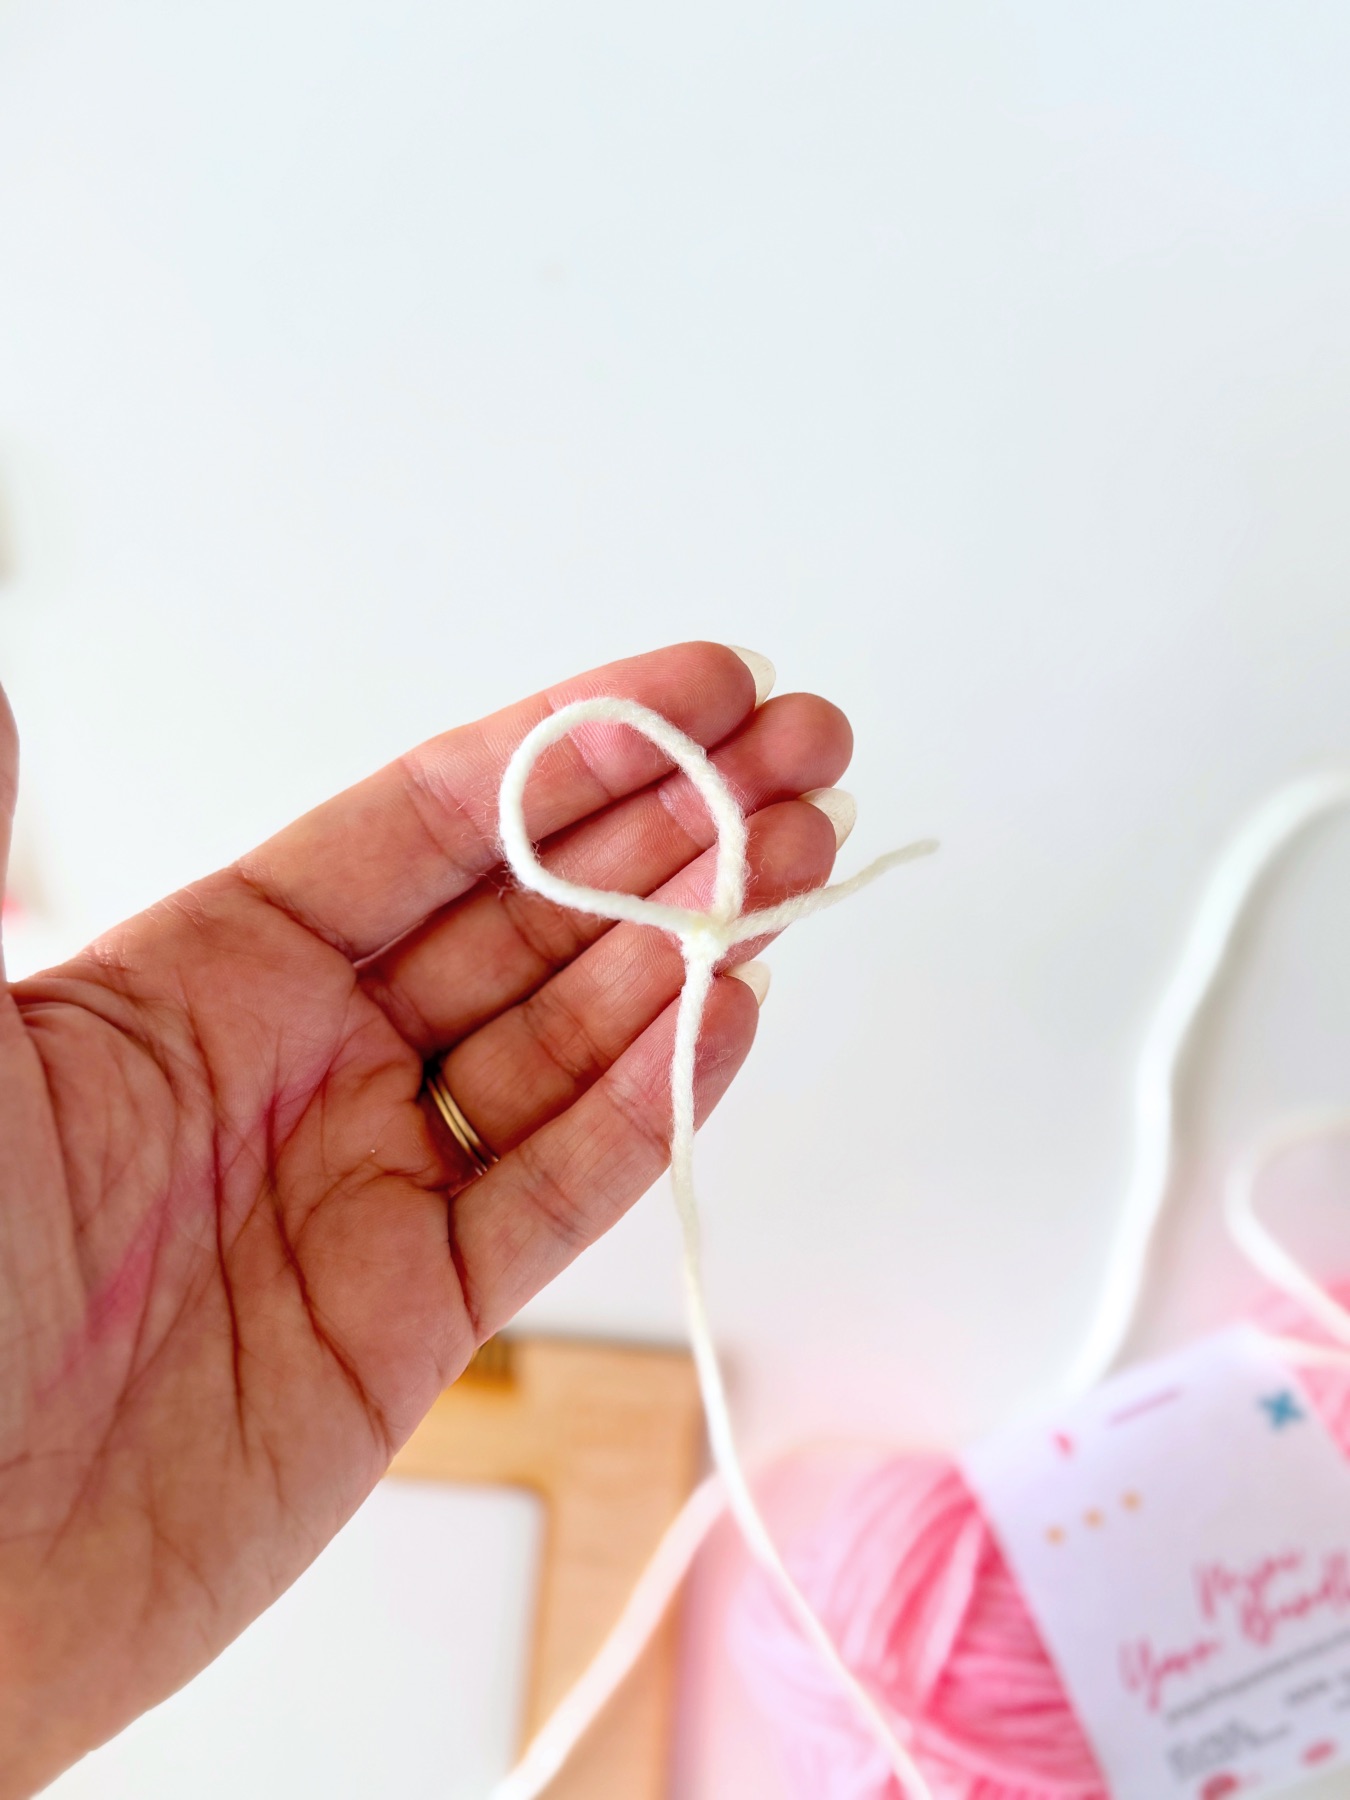
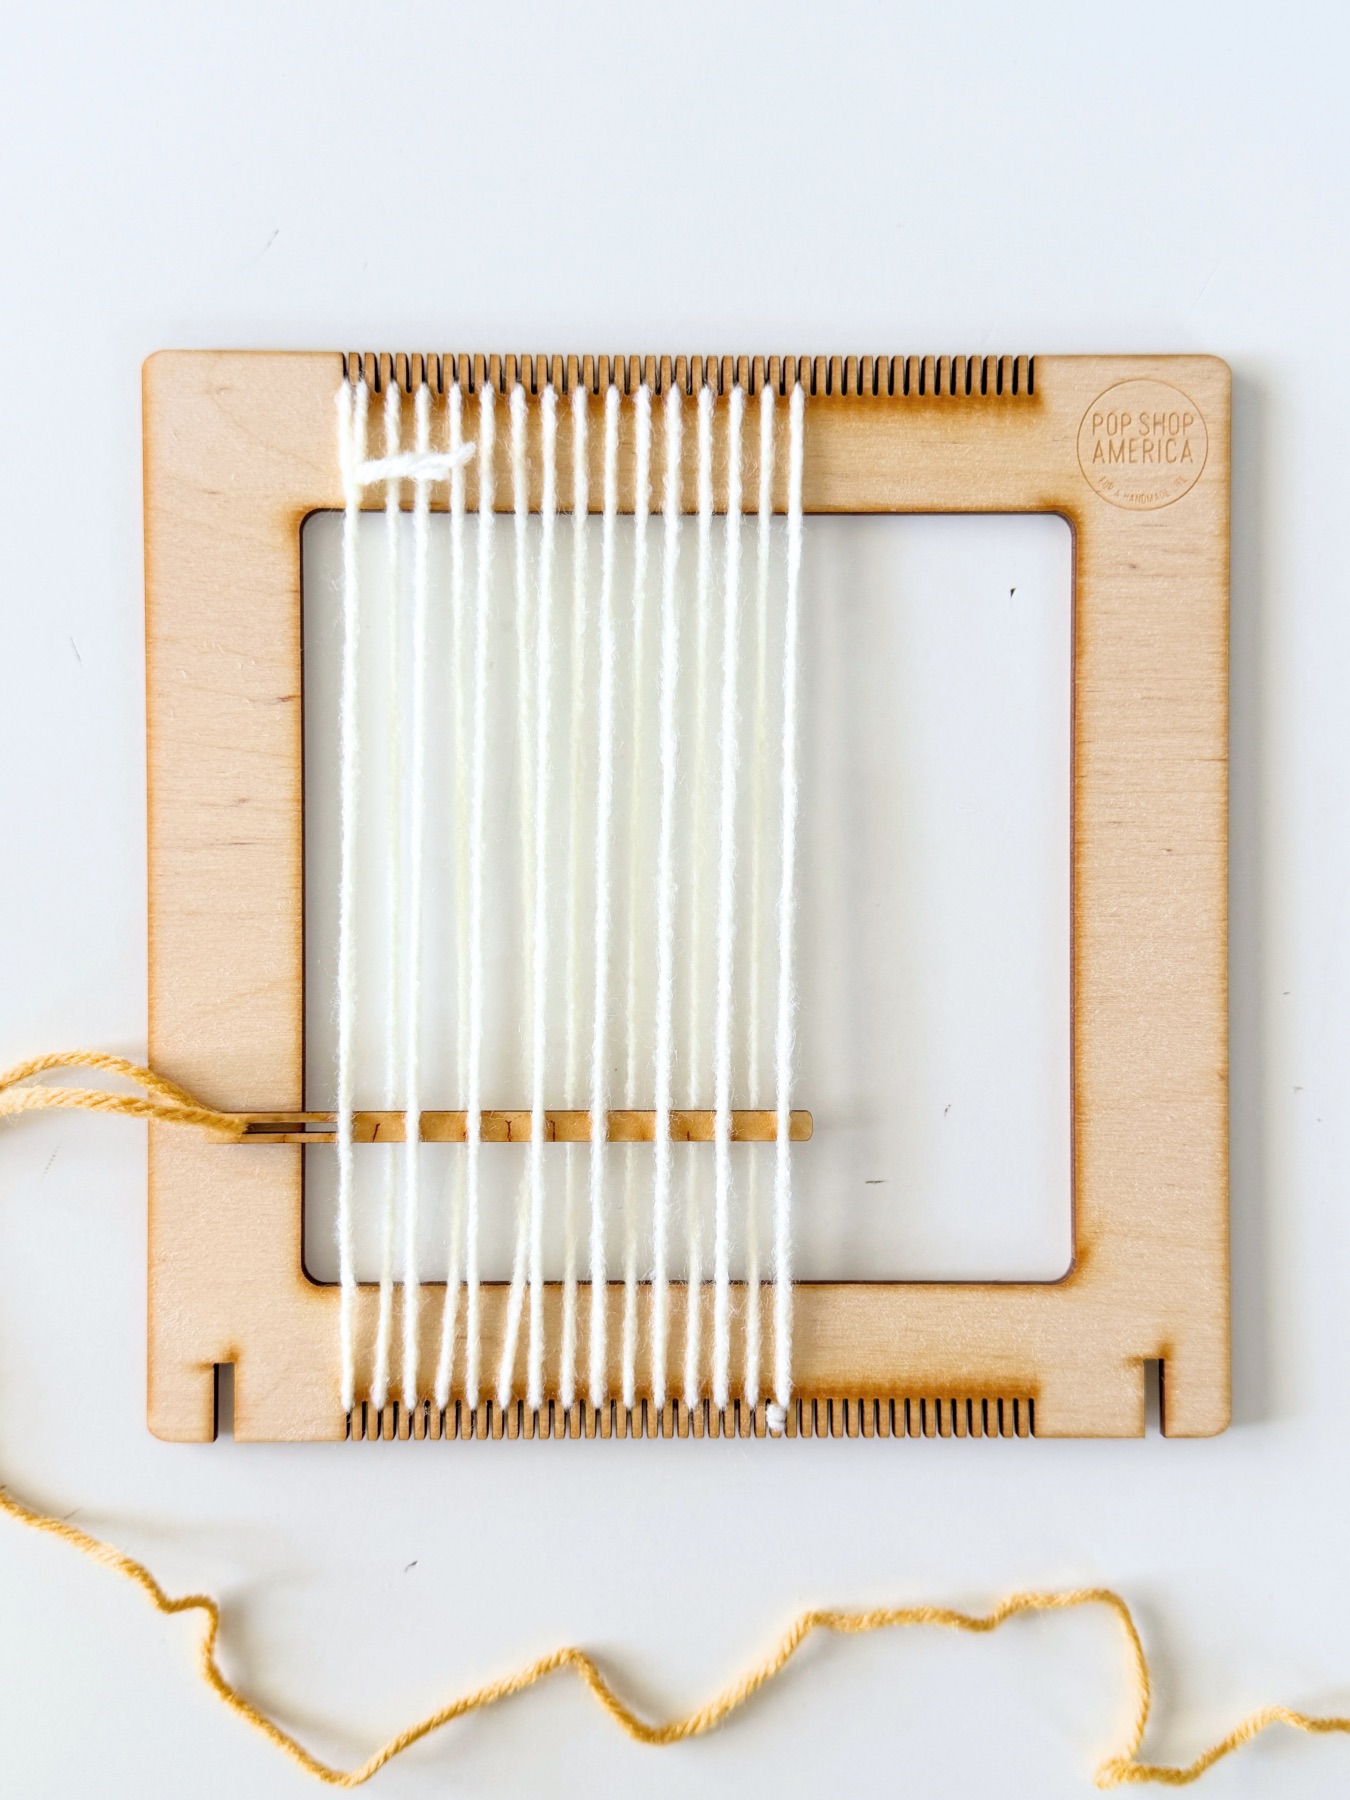
There are 2 ways to start the warp. You can wind your yarn around and around the end of the loom, but what I prefer is to cut a super long length of yarn and tie a knot on one end to create a small loop.
Hook that loop around the end of the loom through one of the loom’s teeth. I like to start on the upper left most tooth. But you can start at any corner.
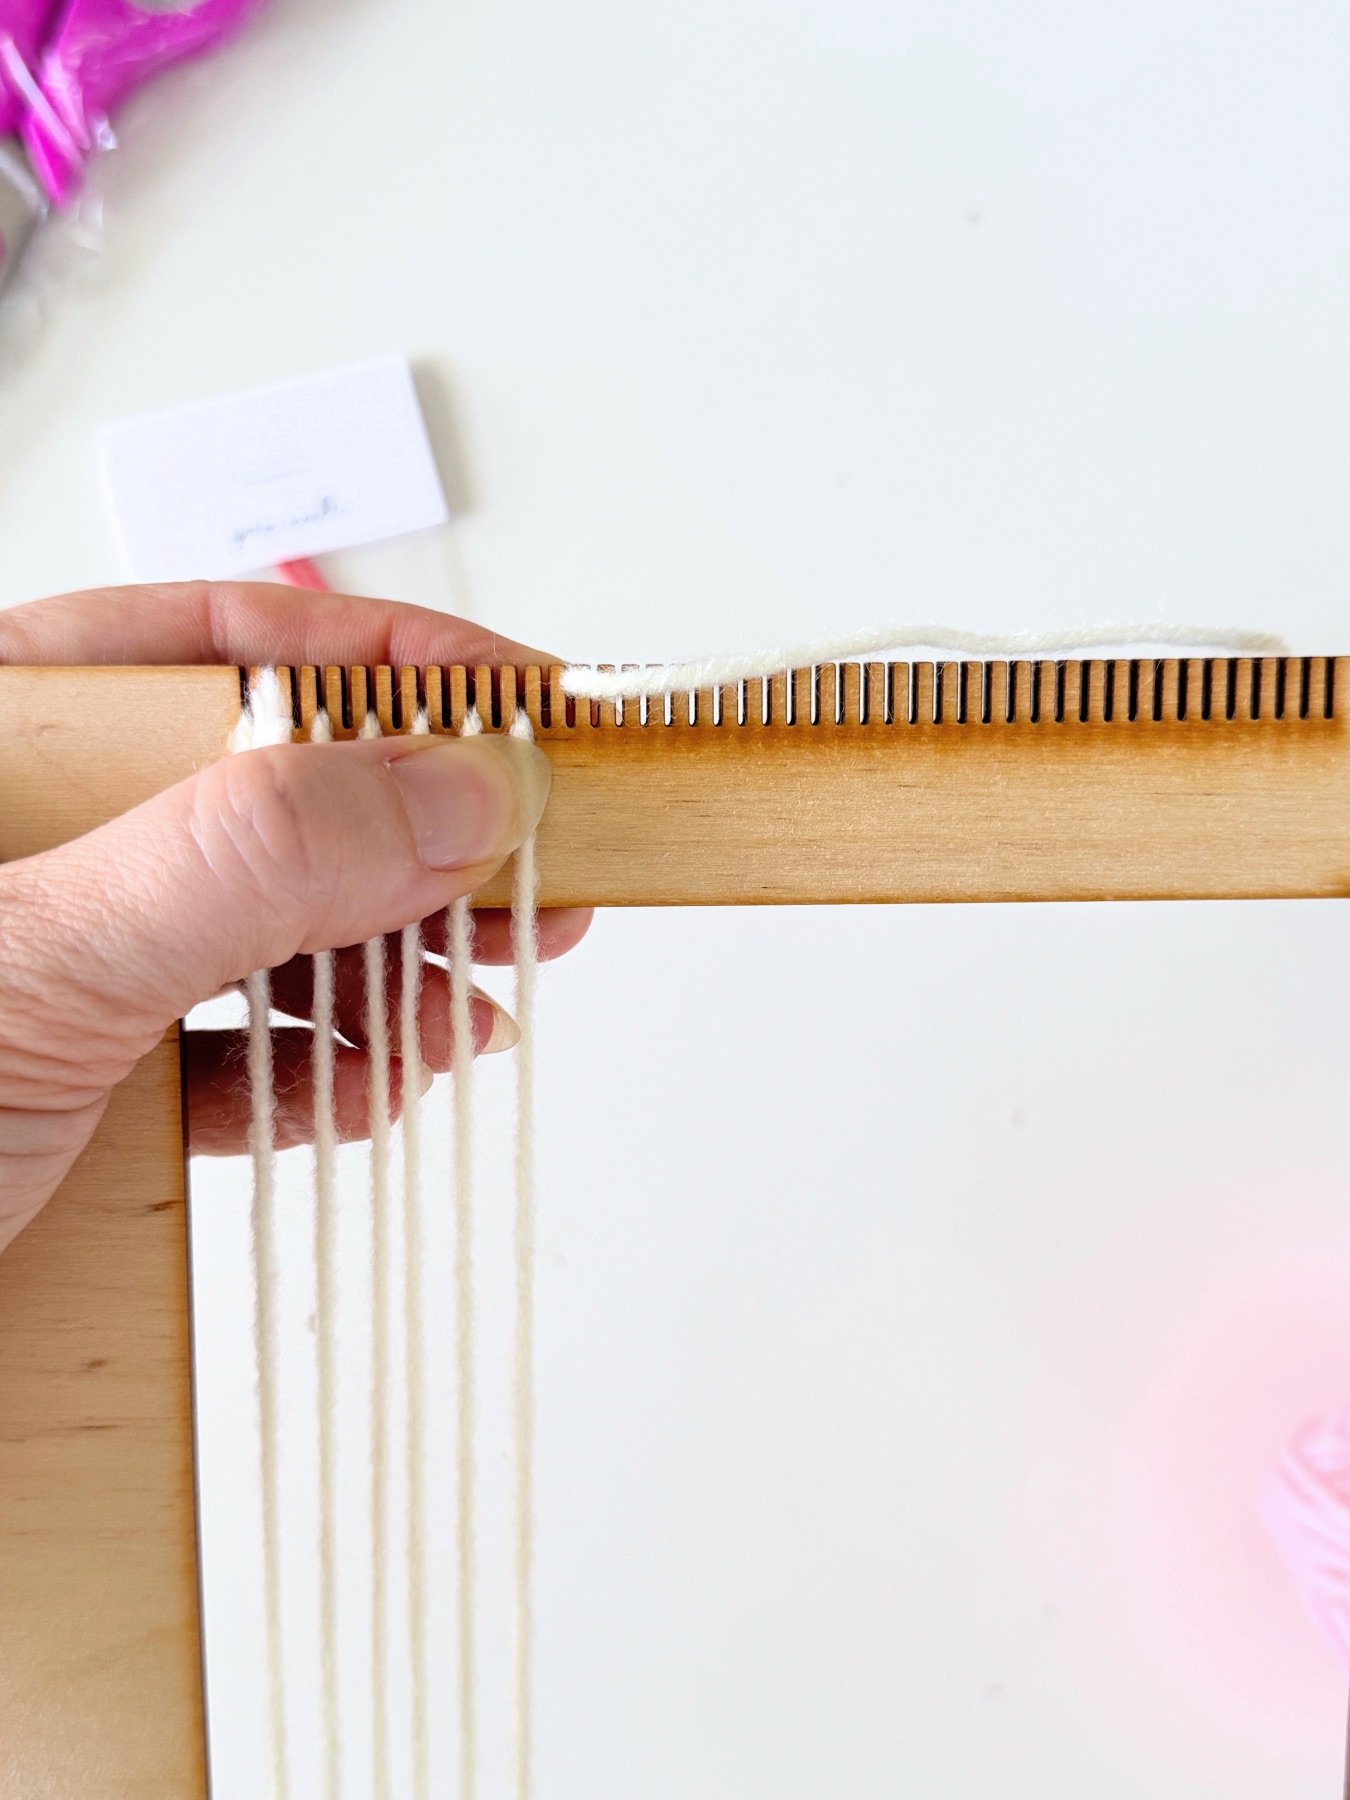
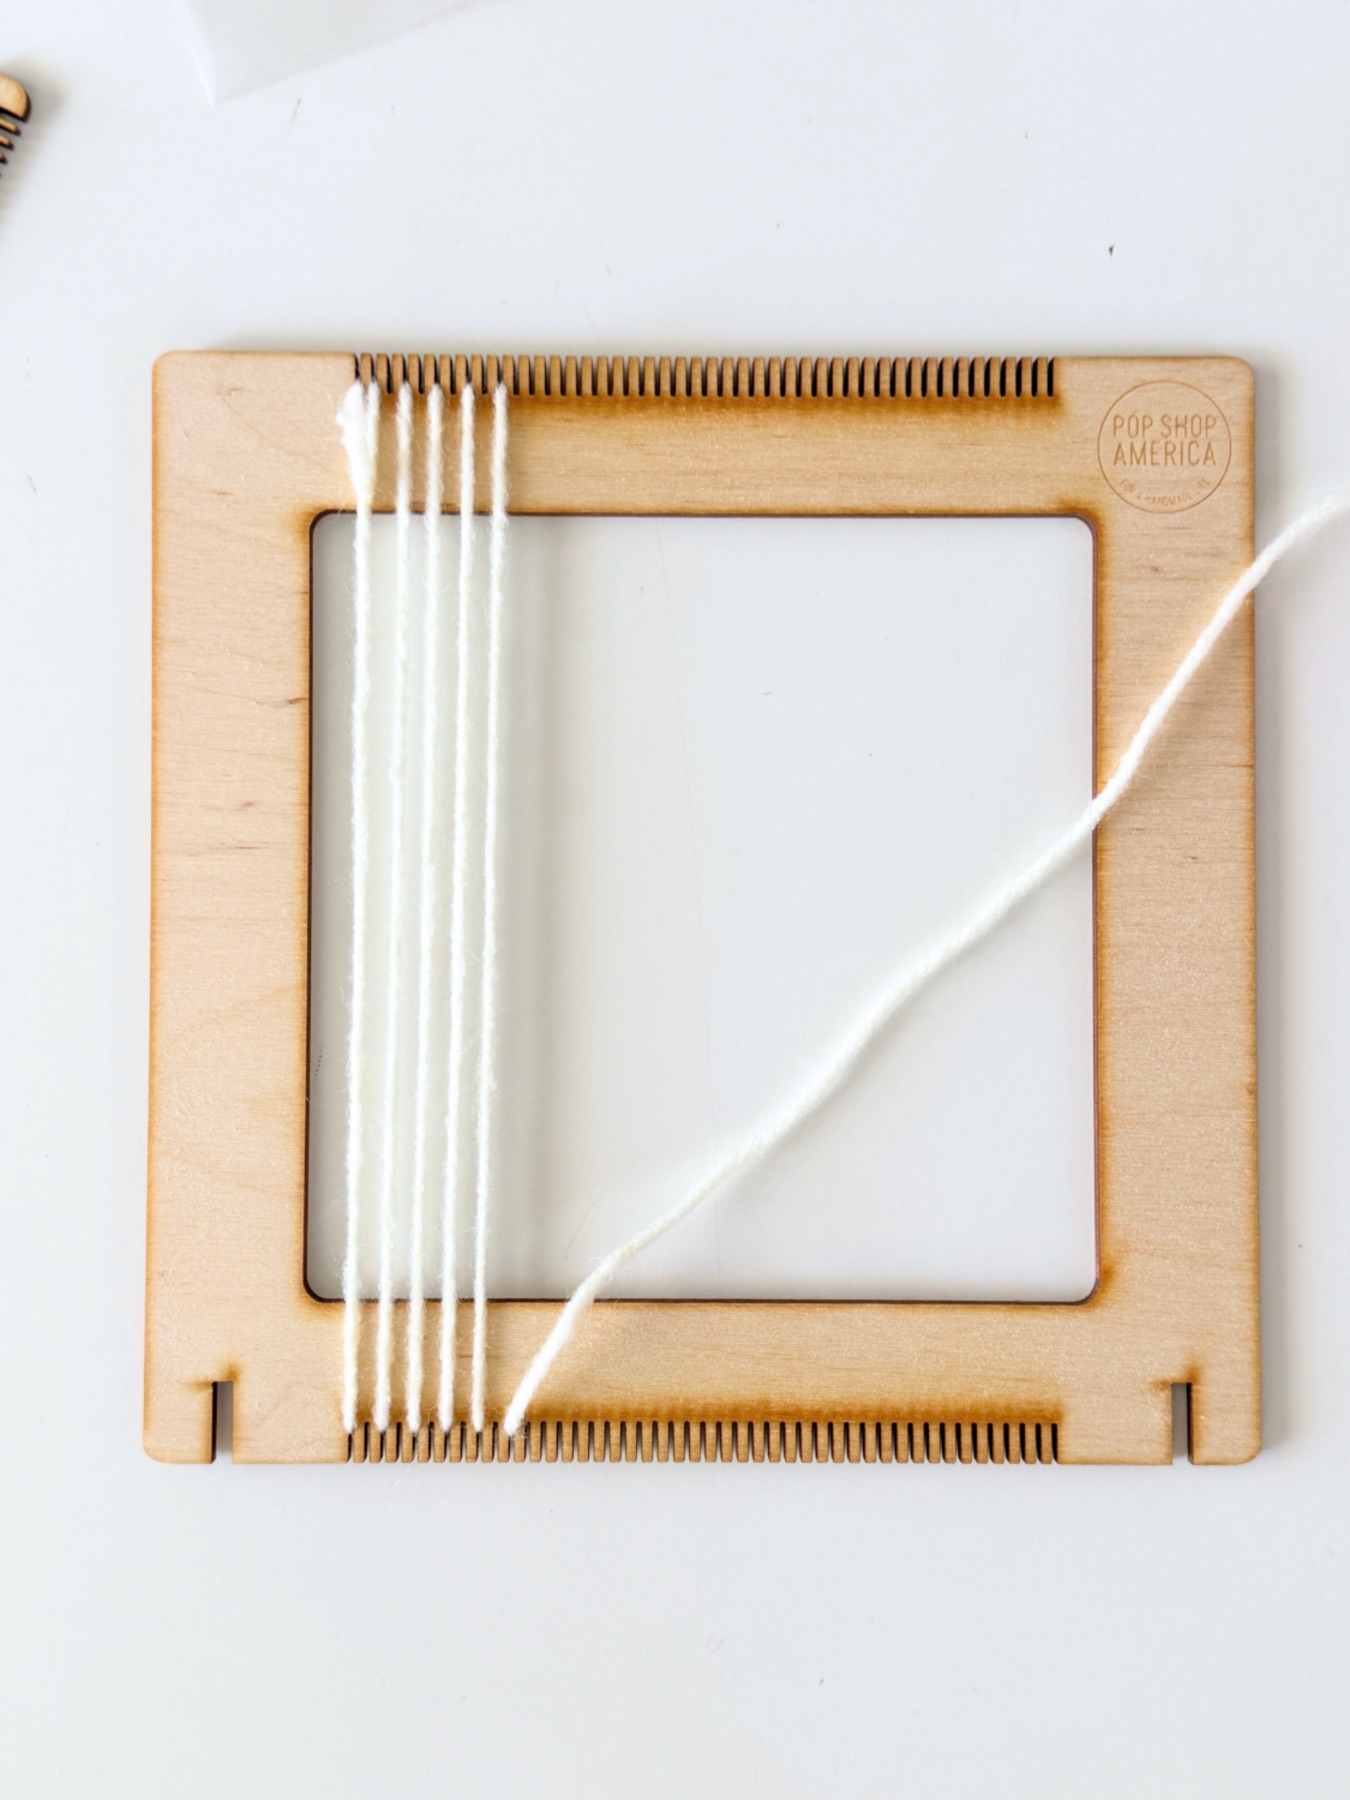
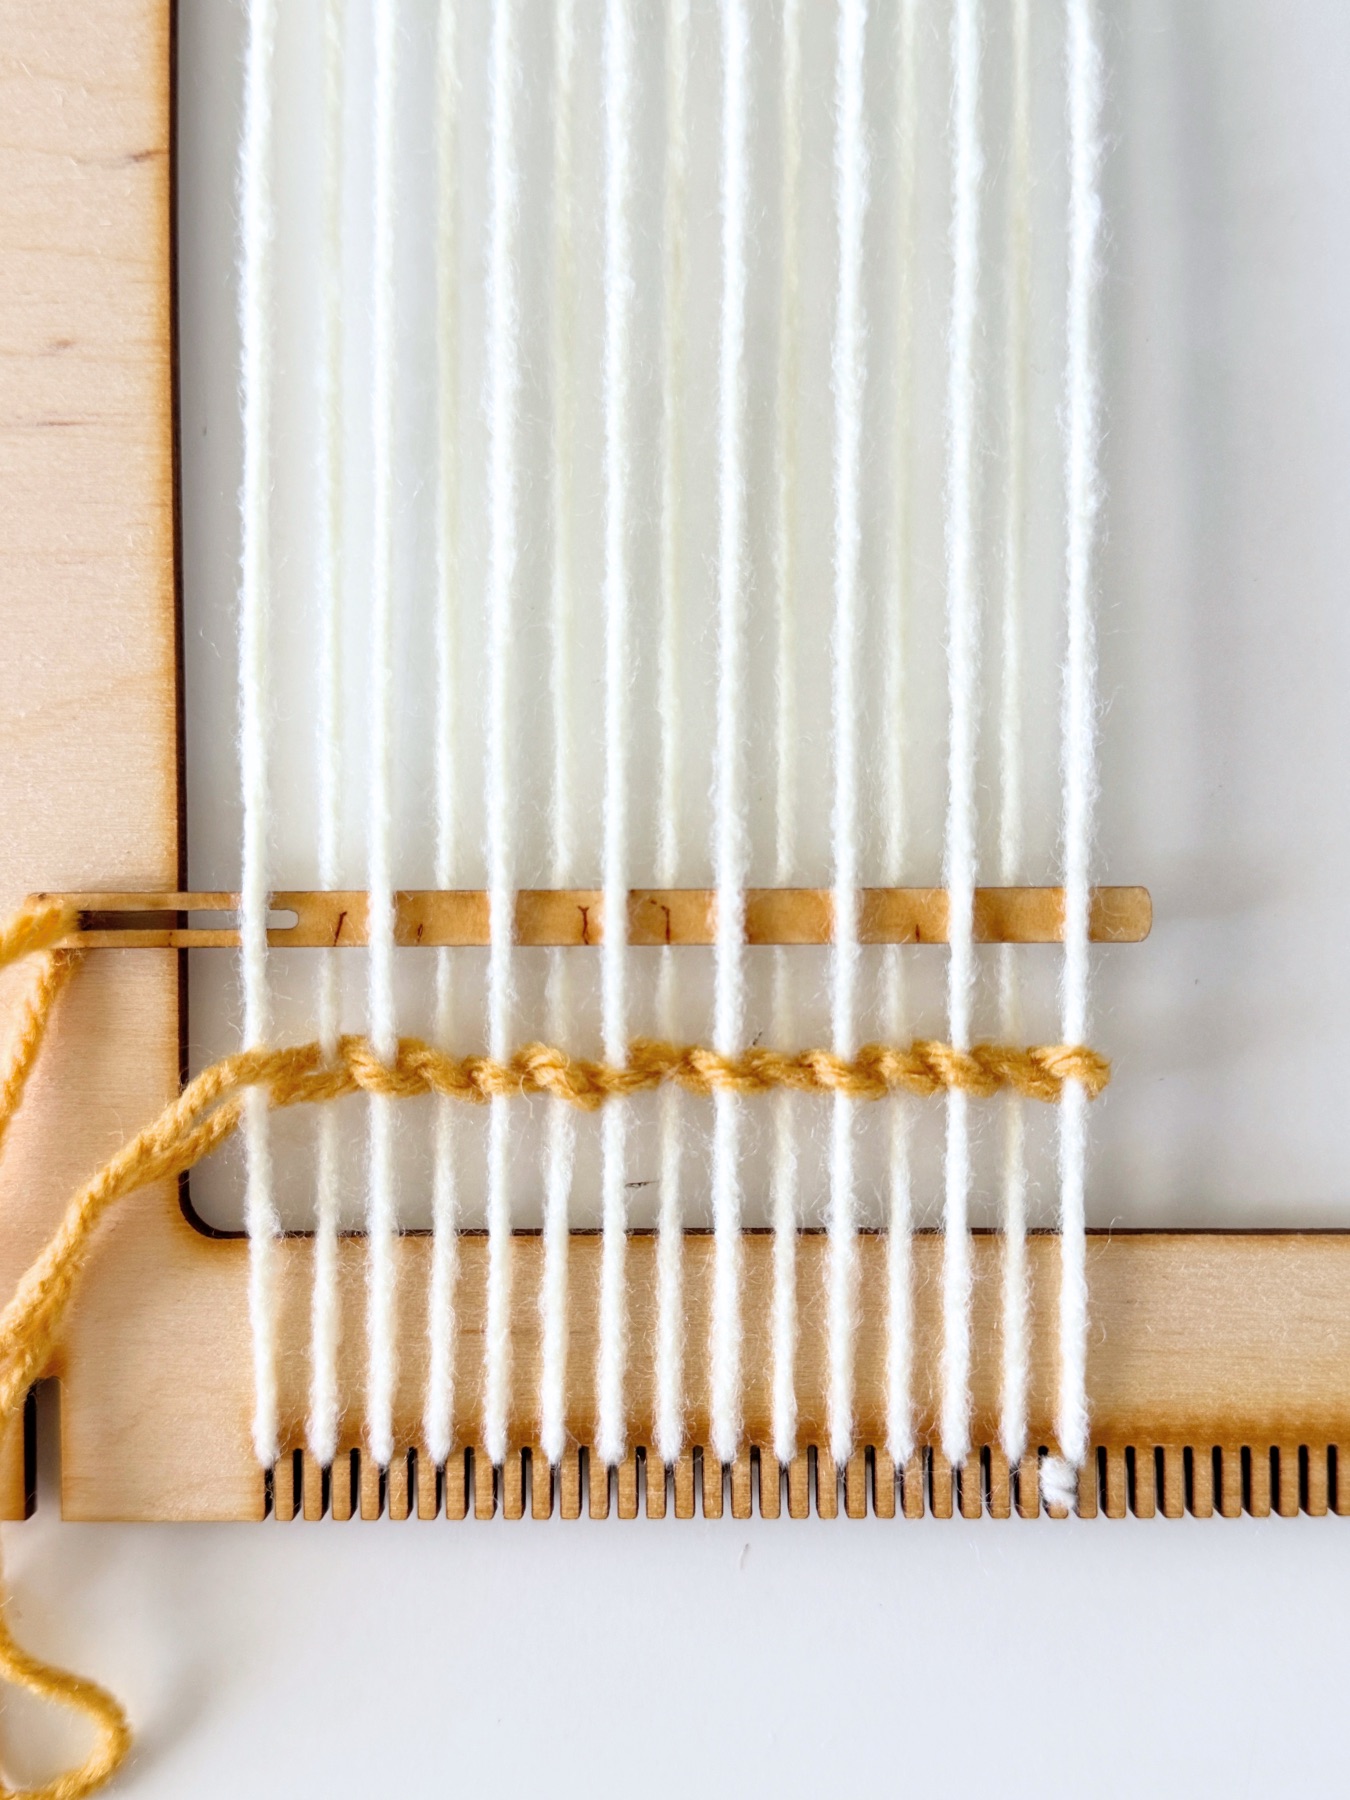
How to Create the Warp:
From there, wrap the yarn around the teeth. Don’t pull the yarn too taught. Instead pull the yarn just tight enough to where your warp doesn’t bow, move, or flex without a bit of pressure. If you started in the upper left like me the pattern is:
down, right, up, right, down, right, up, right…
Keep all of your warp threads on the front of the loom. You are not winding the threads in a circle around the back of the loom.

Don’t be like me and always make sure you have an even number of strands on both the top and bottom of your loom. So if you start in the upper left, you will finish in the lower right.
Pro Tip: You don’t need to use every tooth. For larger threads and wider yarns you may want to skip over some teeth and just use every other tooth or every 3rd tooth.
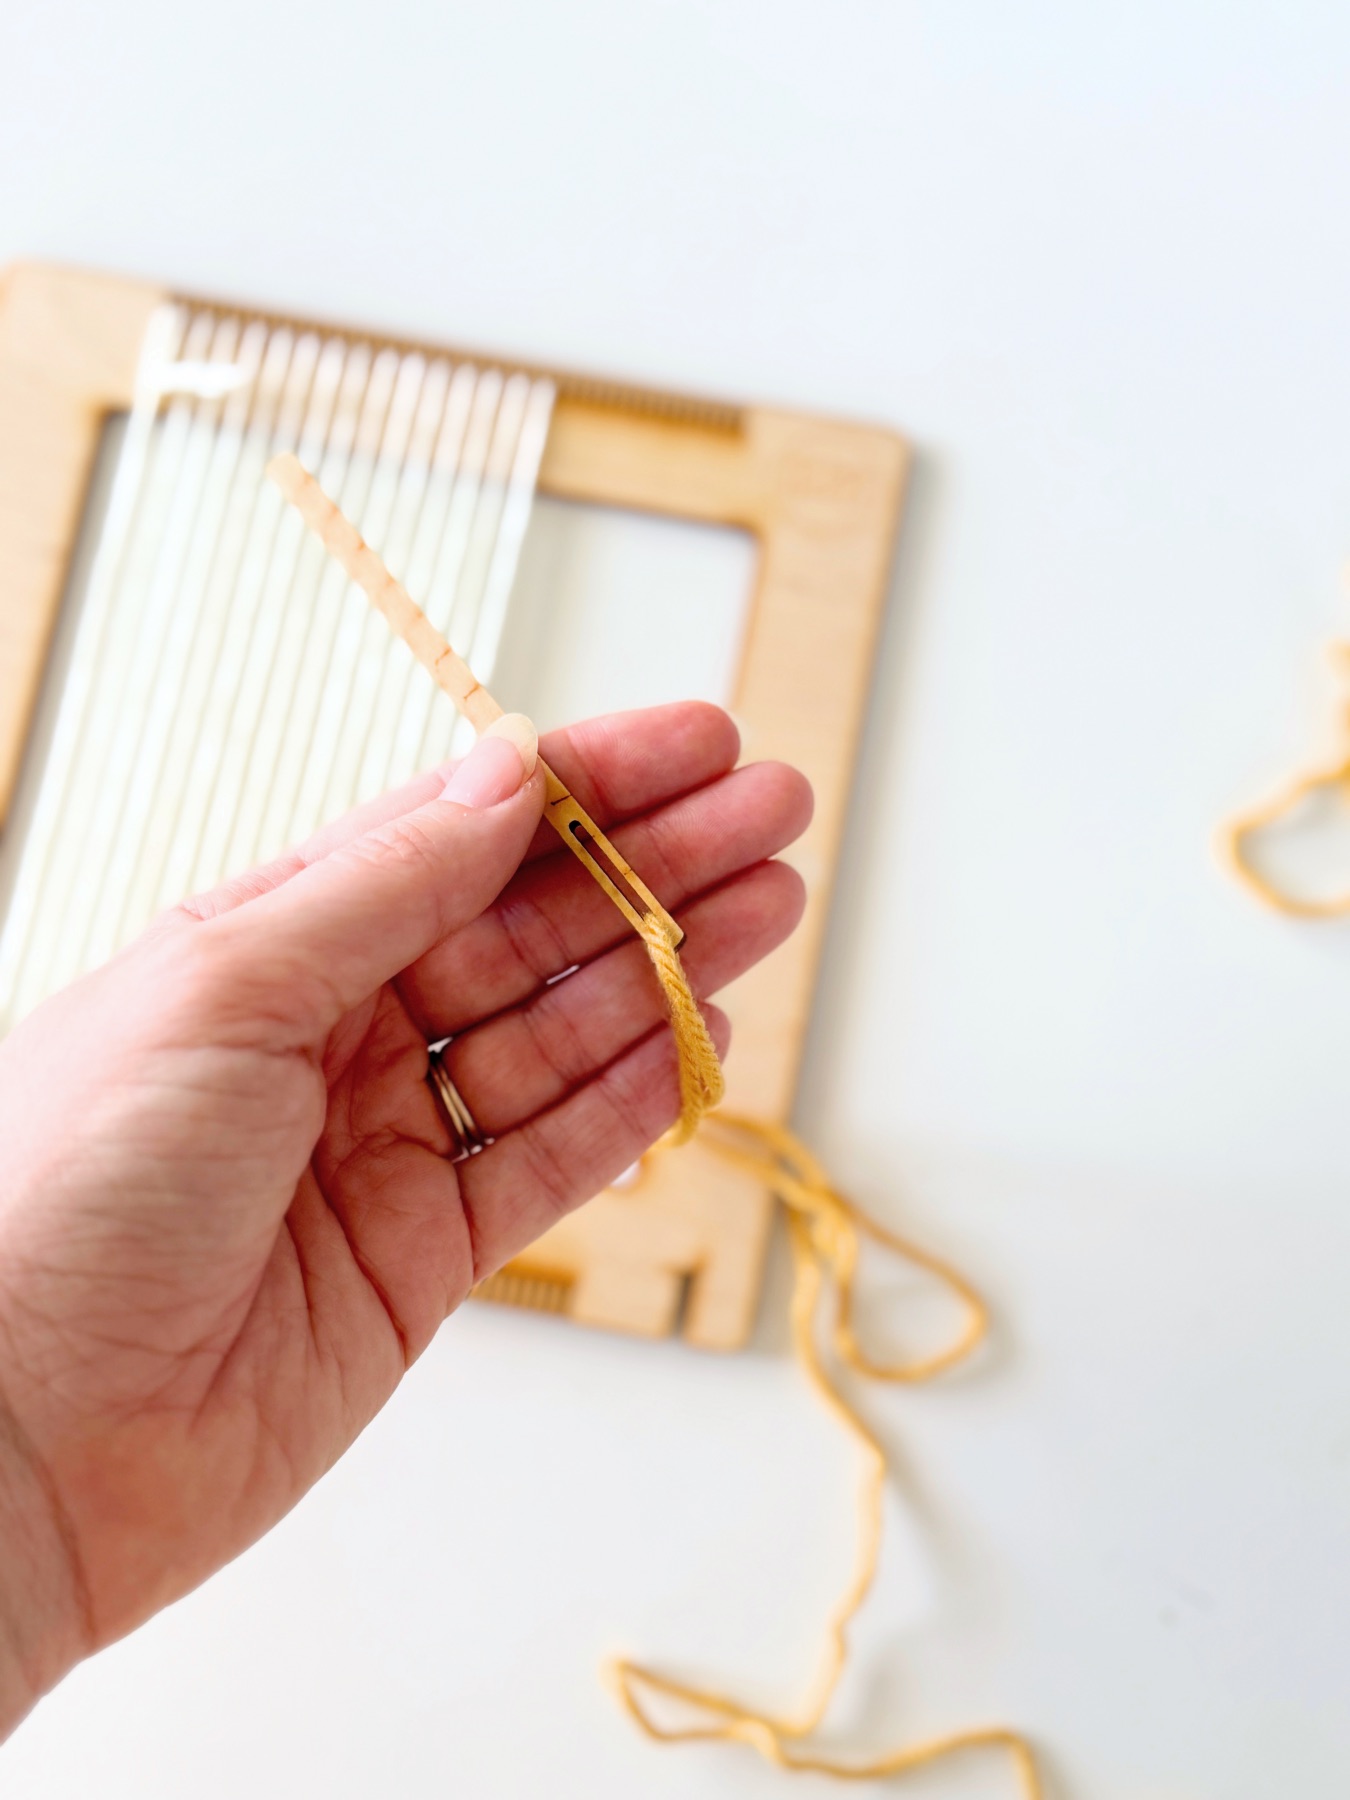
Thread the Tapestry Needle:
Next cut another long length of yarn and thread the tapestry needle. The tail of the yarn should just hang loose and just be around 1-2 inches long.
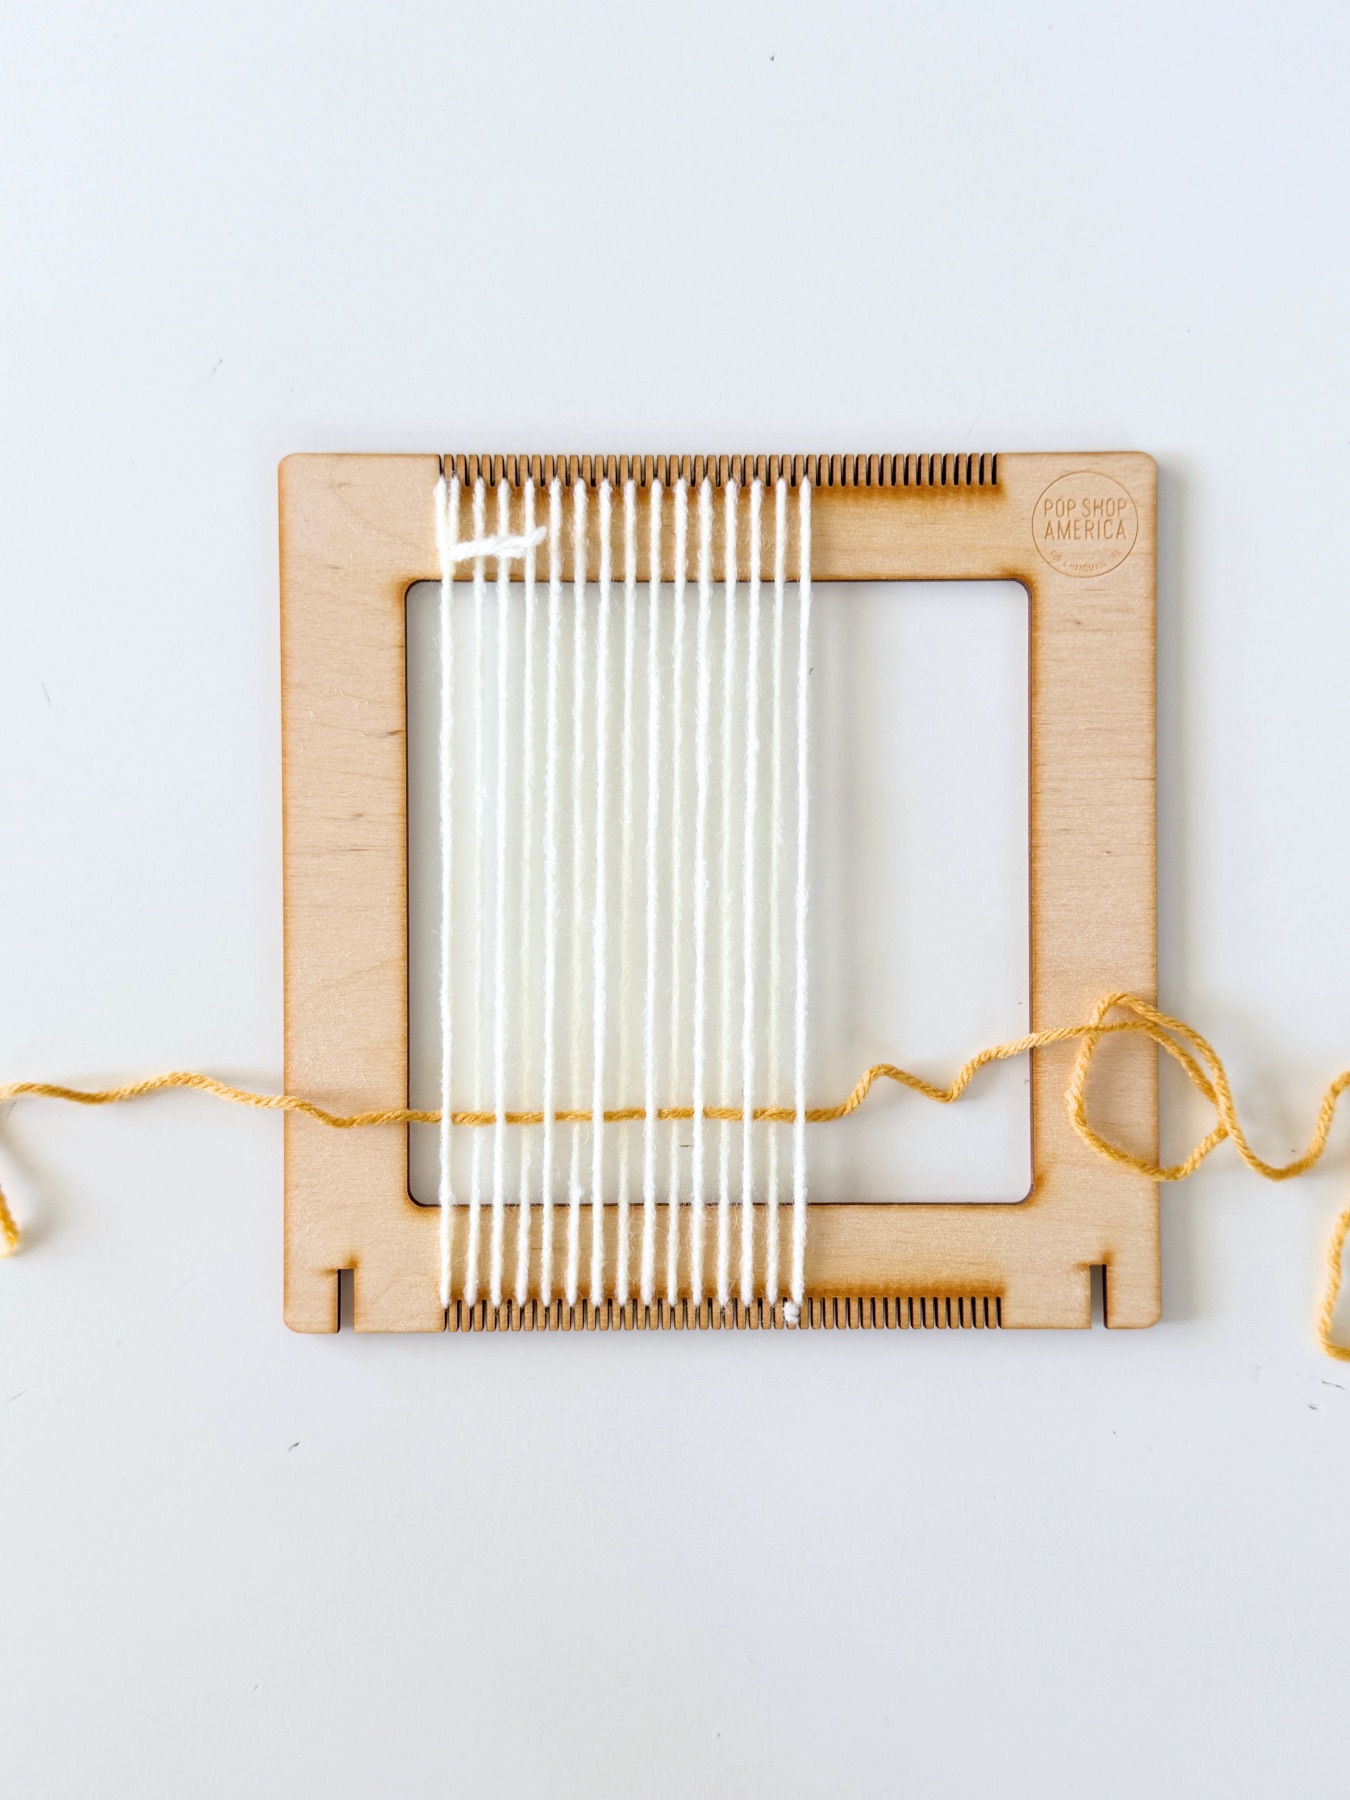
How to Create a Tabby Stitch
Start the Woven Coasters with a Tabby Stitch. If you don’t know what a Tabby Stitch is, now’s a good time to pop back over to the Beginner’s Guide here.
To summarize, a Tabby Stitch is the most simple of weaving stitches. It’s a simple over, under, over, under back and forth through your warp threads.
Leave a few inches of the end of your yarn hang loose. You may need to hold onto it for your first few rows of weft. But after that, it will hold on its own.
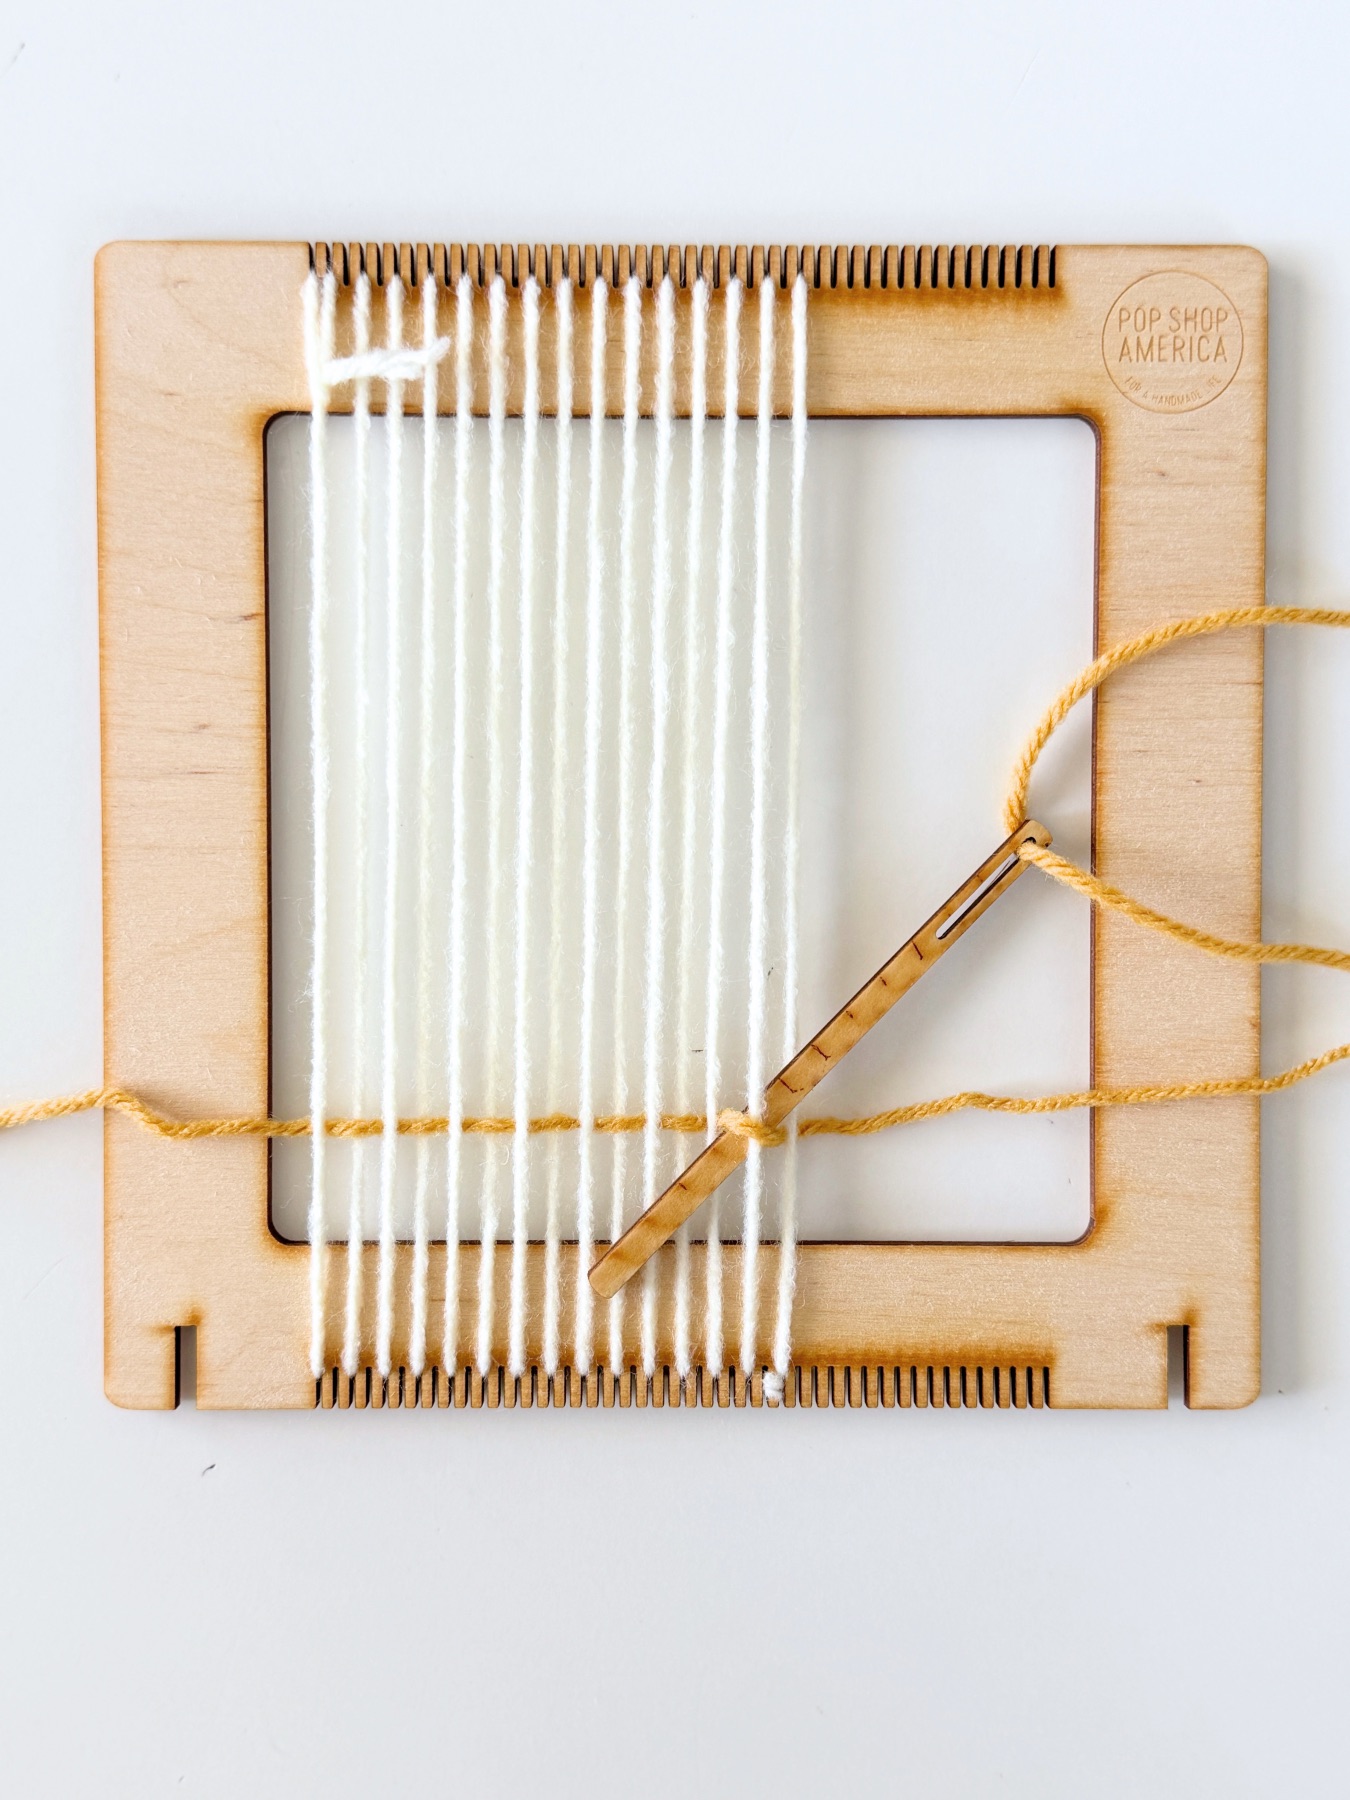
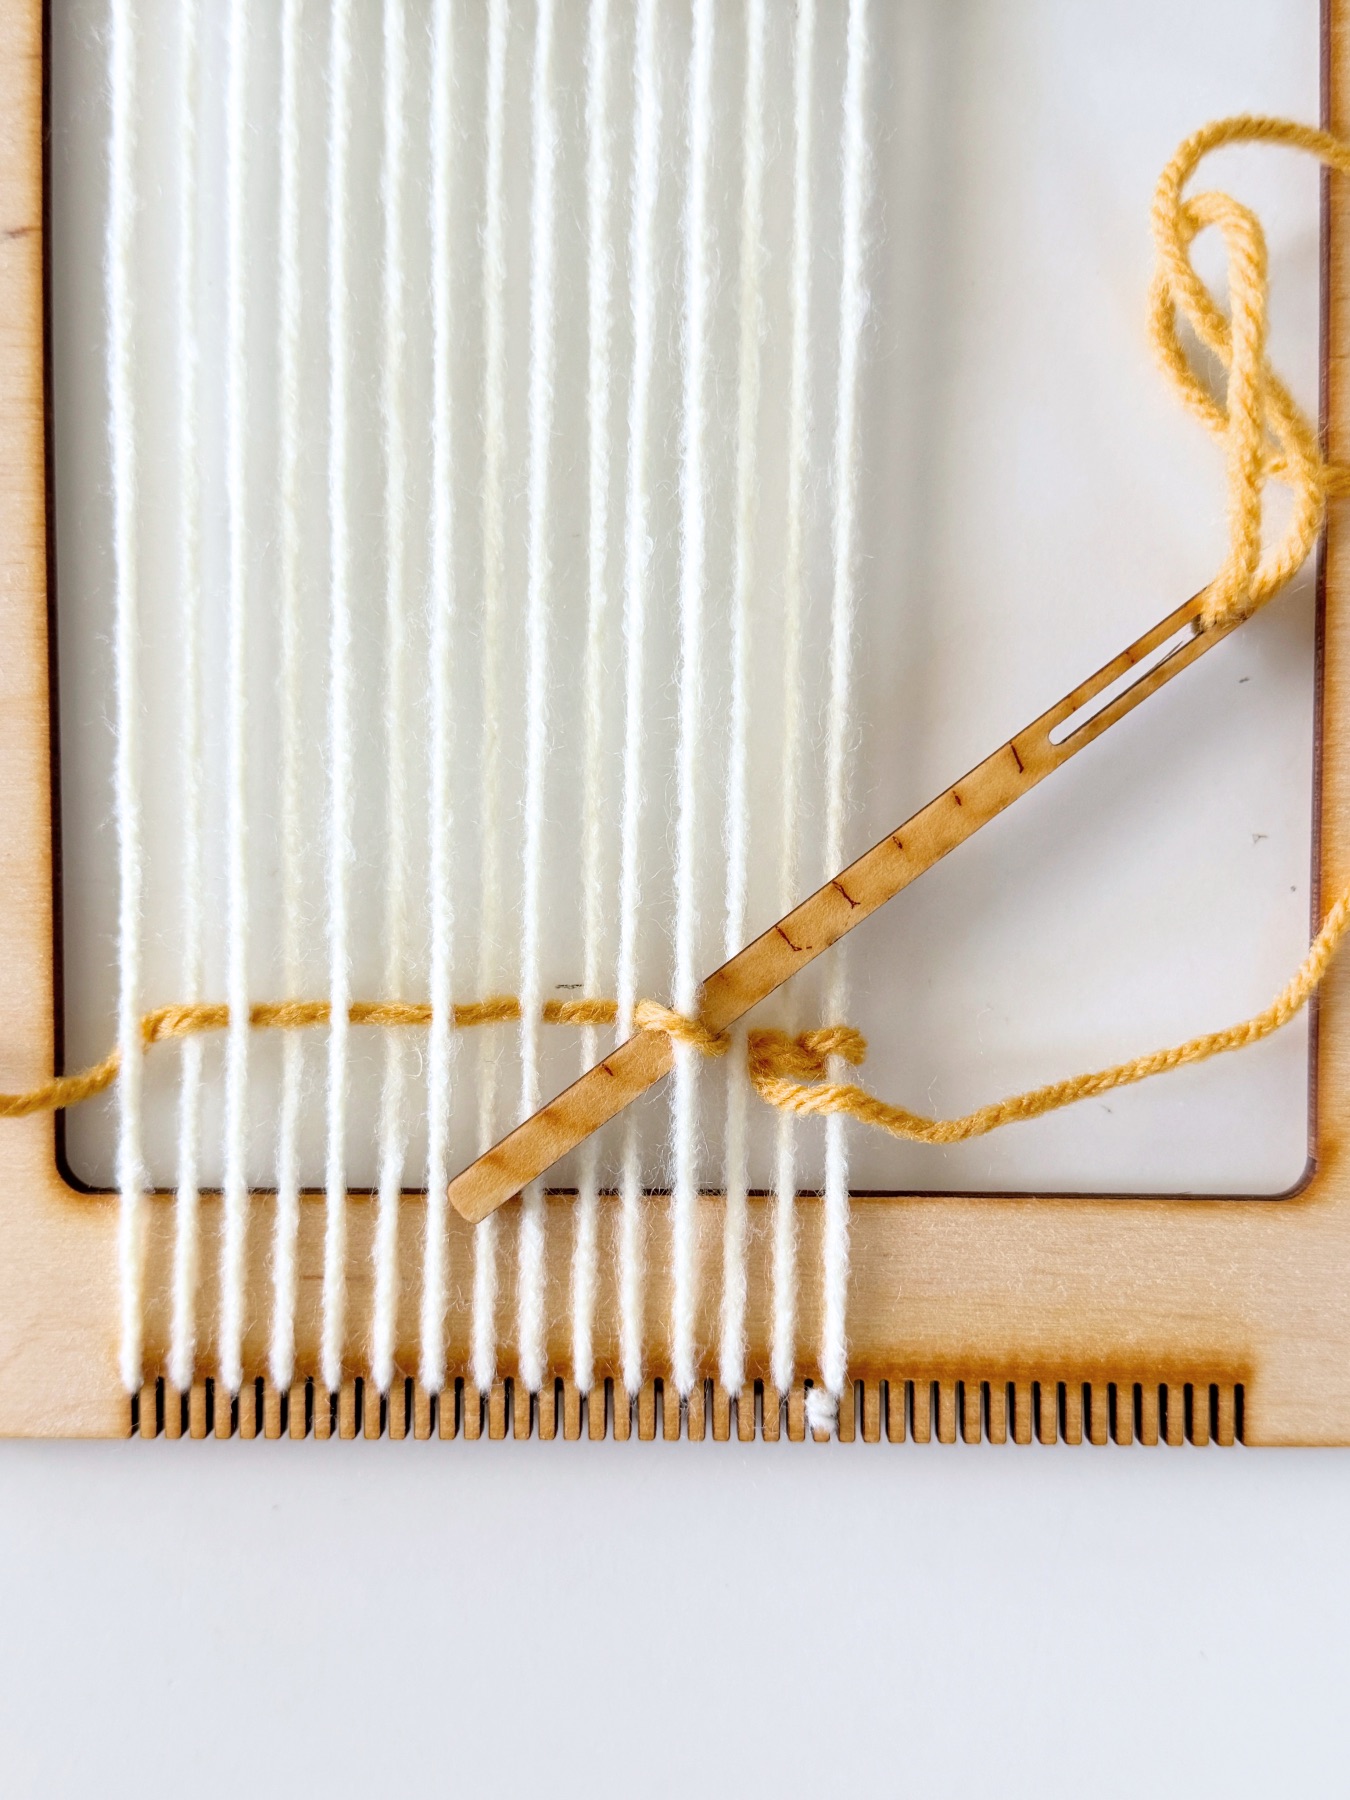
How to Create a Twining Stitch:
Your 2nd row of weft should be a twining stitch. A twining stitch will help lock your design in place. To create a twining stitch, angle your needle diagonally. Any stitches from your first row that rest above the warp, take your needle and thread underneath and downwards through the stitch. Repeat this pattern behind all your forward facing parts of your 1st row of the weft.
Now Repeat your Tabby Stitch
Once you have finished your 2nd row of weft, the Twining Stitch, you may want to create just 1 row of a Tabby Stitch and then after your 3rd full row, create a row of a Rya Stitch or Fringe. If so, scroll down to the section called “Rya” but if you don’t want fringe, continue your Tabby Stitch. With each new row be sure to weave in the opposite direction as the previous row.

Also be sure that your over under over under of your Tabby Stitch reverses for each row of the weft (if you don’t do this it will just undo the previous stitch so you will figure this out naturally).
Pro Tip: Don’t pull your stitches too hard. It’s important that as you weave, your warp threads always remain perfectly straight and aren’t pulled together.


What is the Comb Used for in Weaving?
As you weave, you can use your comb to push the yarn into the perfect position and keep your weft straight and even. To use your comb, make an arc with your weft, then use the comb to push the weft into place. You can make your rows super right, or leave them loose. But whatever you choose, repeat it with each row. So you don’t have one side of your coaster that’s denser with it’s weaving than the other side.

Continue weaving until you’ve reached your desired size of coaster. And remember bigger is often better! To test the size, grab one of your largest glasses or mugs and set it on the woven section of the loom to see how it looks.

How to Make a Rya Stitch/Fringe
Now if you want to make Rya Stitch, this will always be the 3rd row from the start and the 3rd from last row as you finish your weaving. To make the Rya, cut a section of any color of yarn.
Mine is around 6 inches long. And note, you can always cut your threads later.
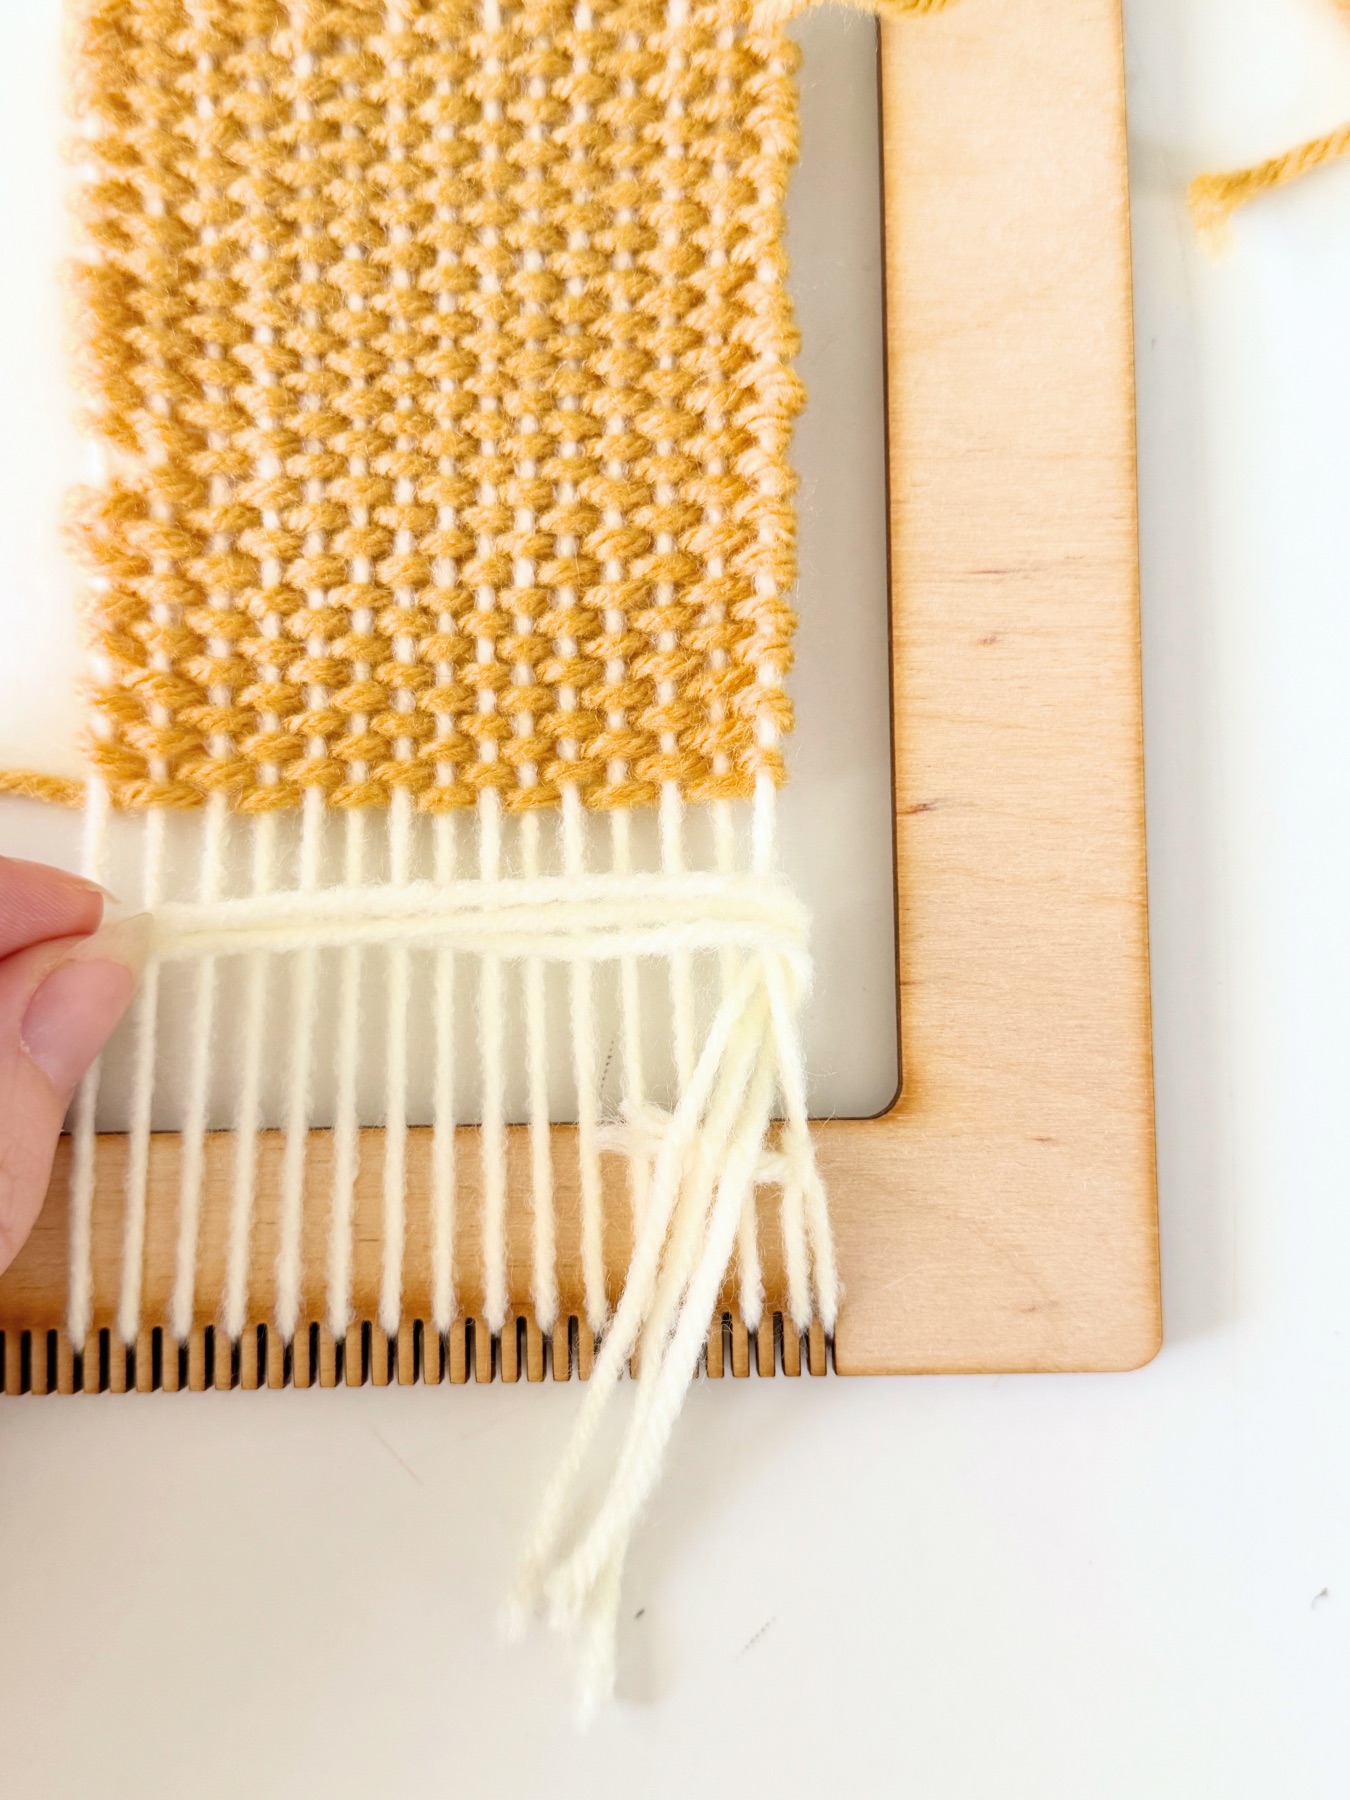
I recommend using 1 piece of yarn – not 3 like I show, because my fringe was crazy fluffy – maybe too fluffy!
Starting at one edge of loom, gather 2 warp thread together. Wrap your Rya Stitch across the front of the 2 warp threads and pull the Rya Stitch through the middle in between the 3 warp threads.

Continue this across your entire weaving. Because you are working with 2 threads at a time, this is a really great example on why having an even number of warp threads is so important!

Now remember that your Rya Stitch needs 3 more rows before the weaving is completed – 2 rows of a Tabby Stitch and then finish with a Twining Stitch.
Just comb your Fringe out of your way and continue stitching!

When we start our project we start with a Tabby Stitch then Twining Stitch – but we do not reverse the order to complete the end of the coaster.
That’s because your Tabby Stitch and Twining Stitch work together to make the edges sturdy. The order does not change. So next, your Twining Stitch will be the last stitch. Make sense?
Finish Your Weaving with a Twining Stitch
This time my Twining Stitch moved in the opposite direction as before from left to right. With each weft thread that falls on top of the warp, angle the needle diagonally behind the warp threads and pull through. Continue this across the entire piece.


So, the Twining Stitch only wraps around every other warp thread.

When the Twining Stitch is finished, it will look like a braid.

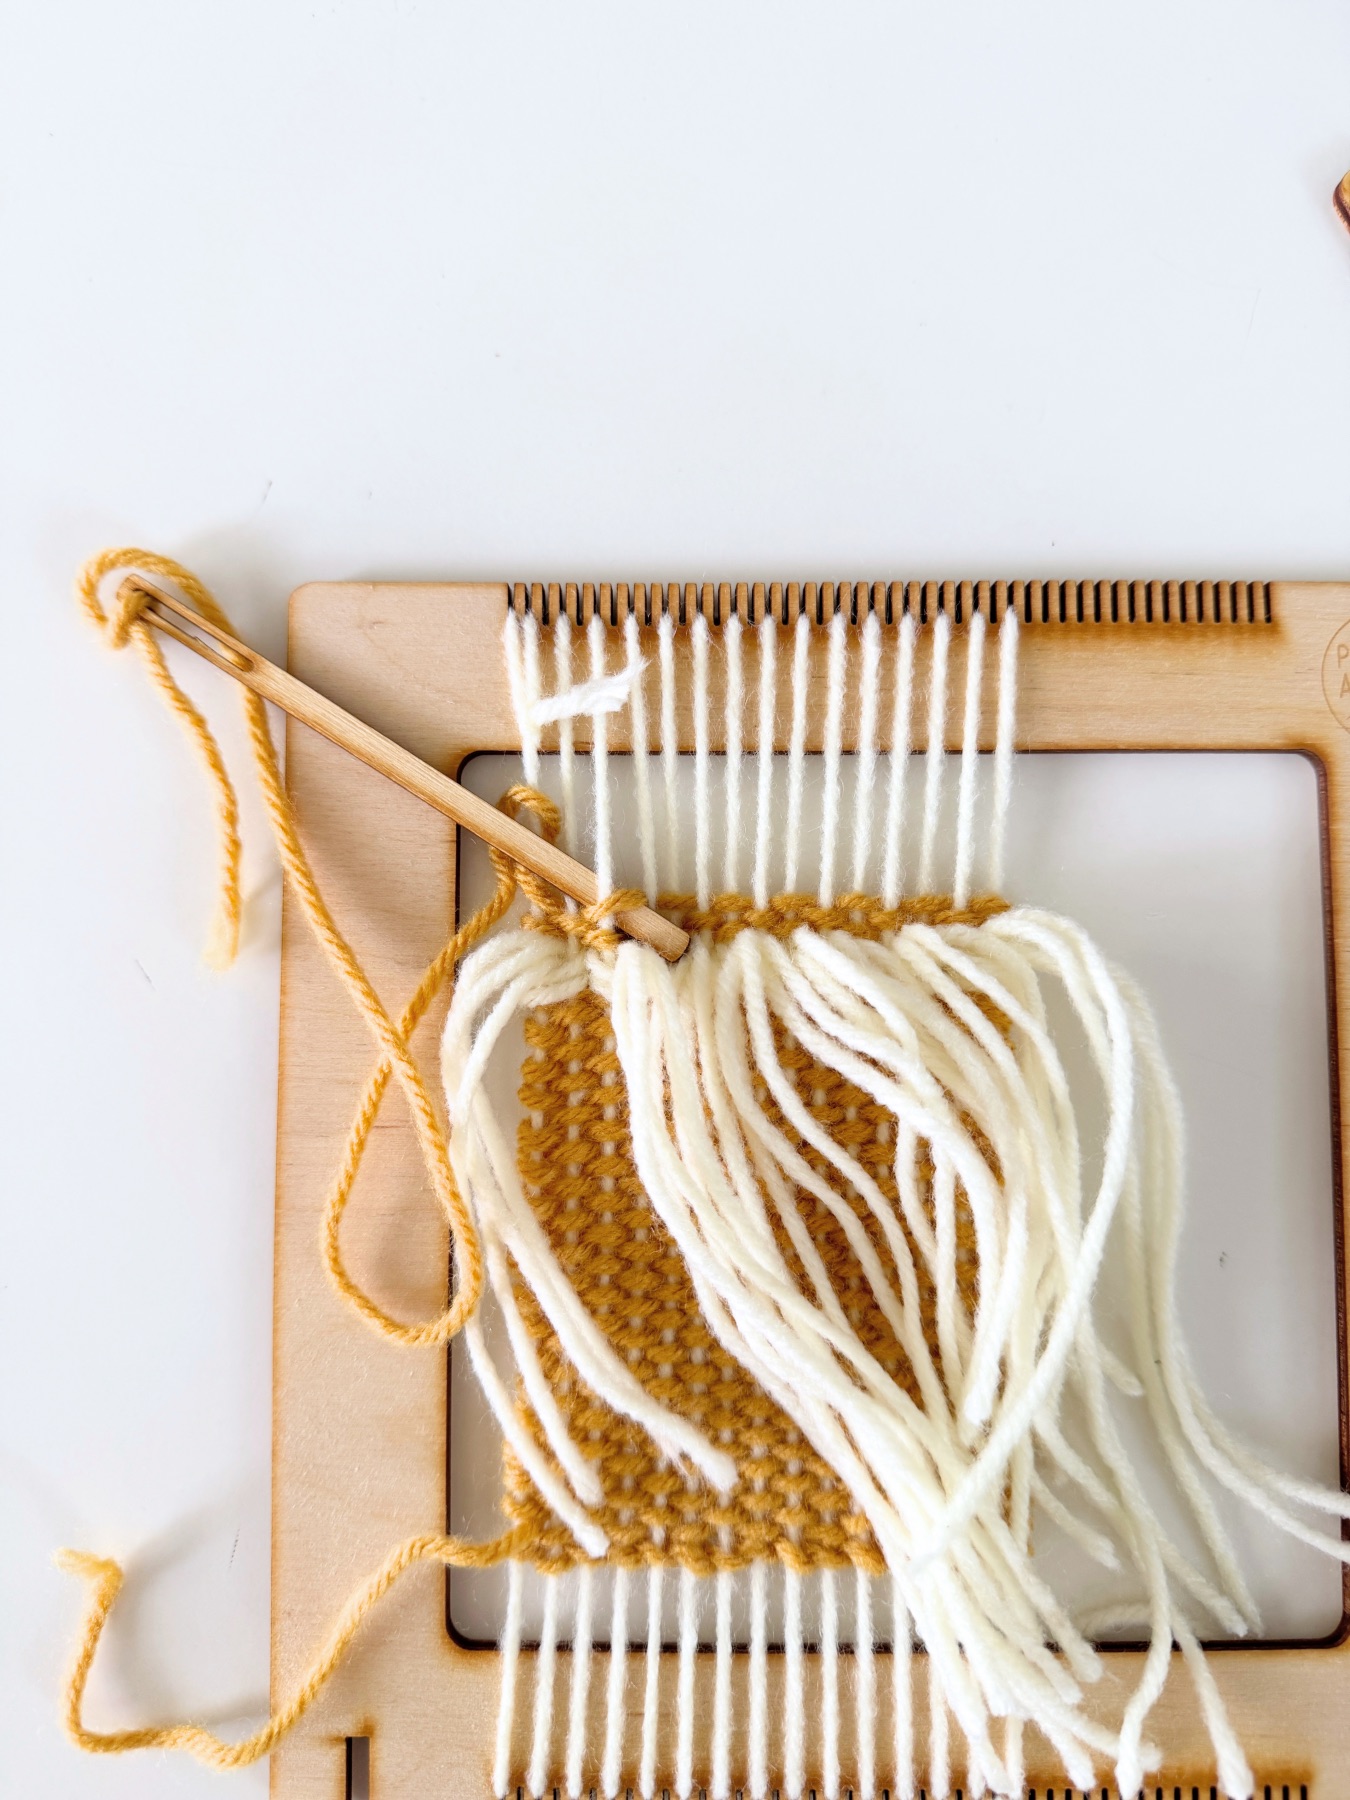
How to Remove Your Weaving from the Loom
Once you are finished with your last row of the Twining Stitch, you can remove the weaving from the loom but gently pulling the loops along the top or bottom. Once you remove one, the other side will just slide right off.


How to Tie the Ends of the Warp
To set the weaving, you need to tie off the ends of the warp threads. Just cut the loops and tie the 2 pieces you cut together in a knot.

This is another example of why even numbers are so helpful to work with!
Some people like to add a touch of glue to reinforce their knot. If you choose to do so any Crafty Glue, Super Glue or E6000 will work.

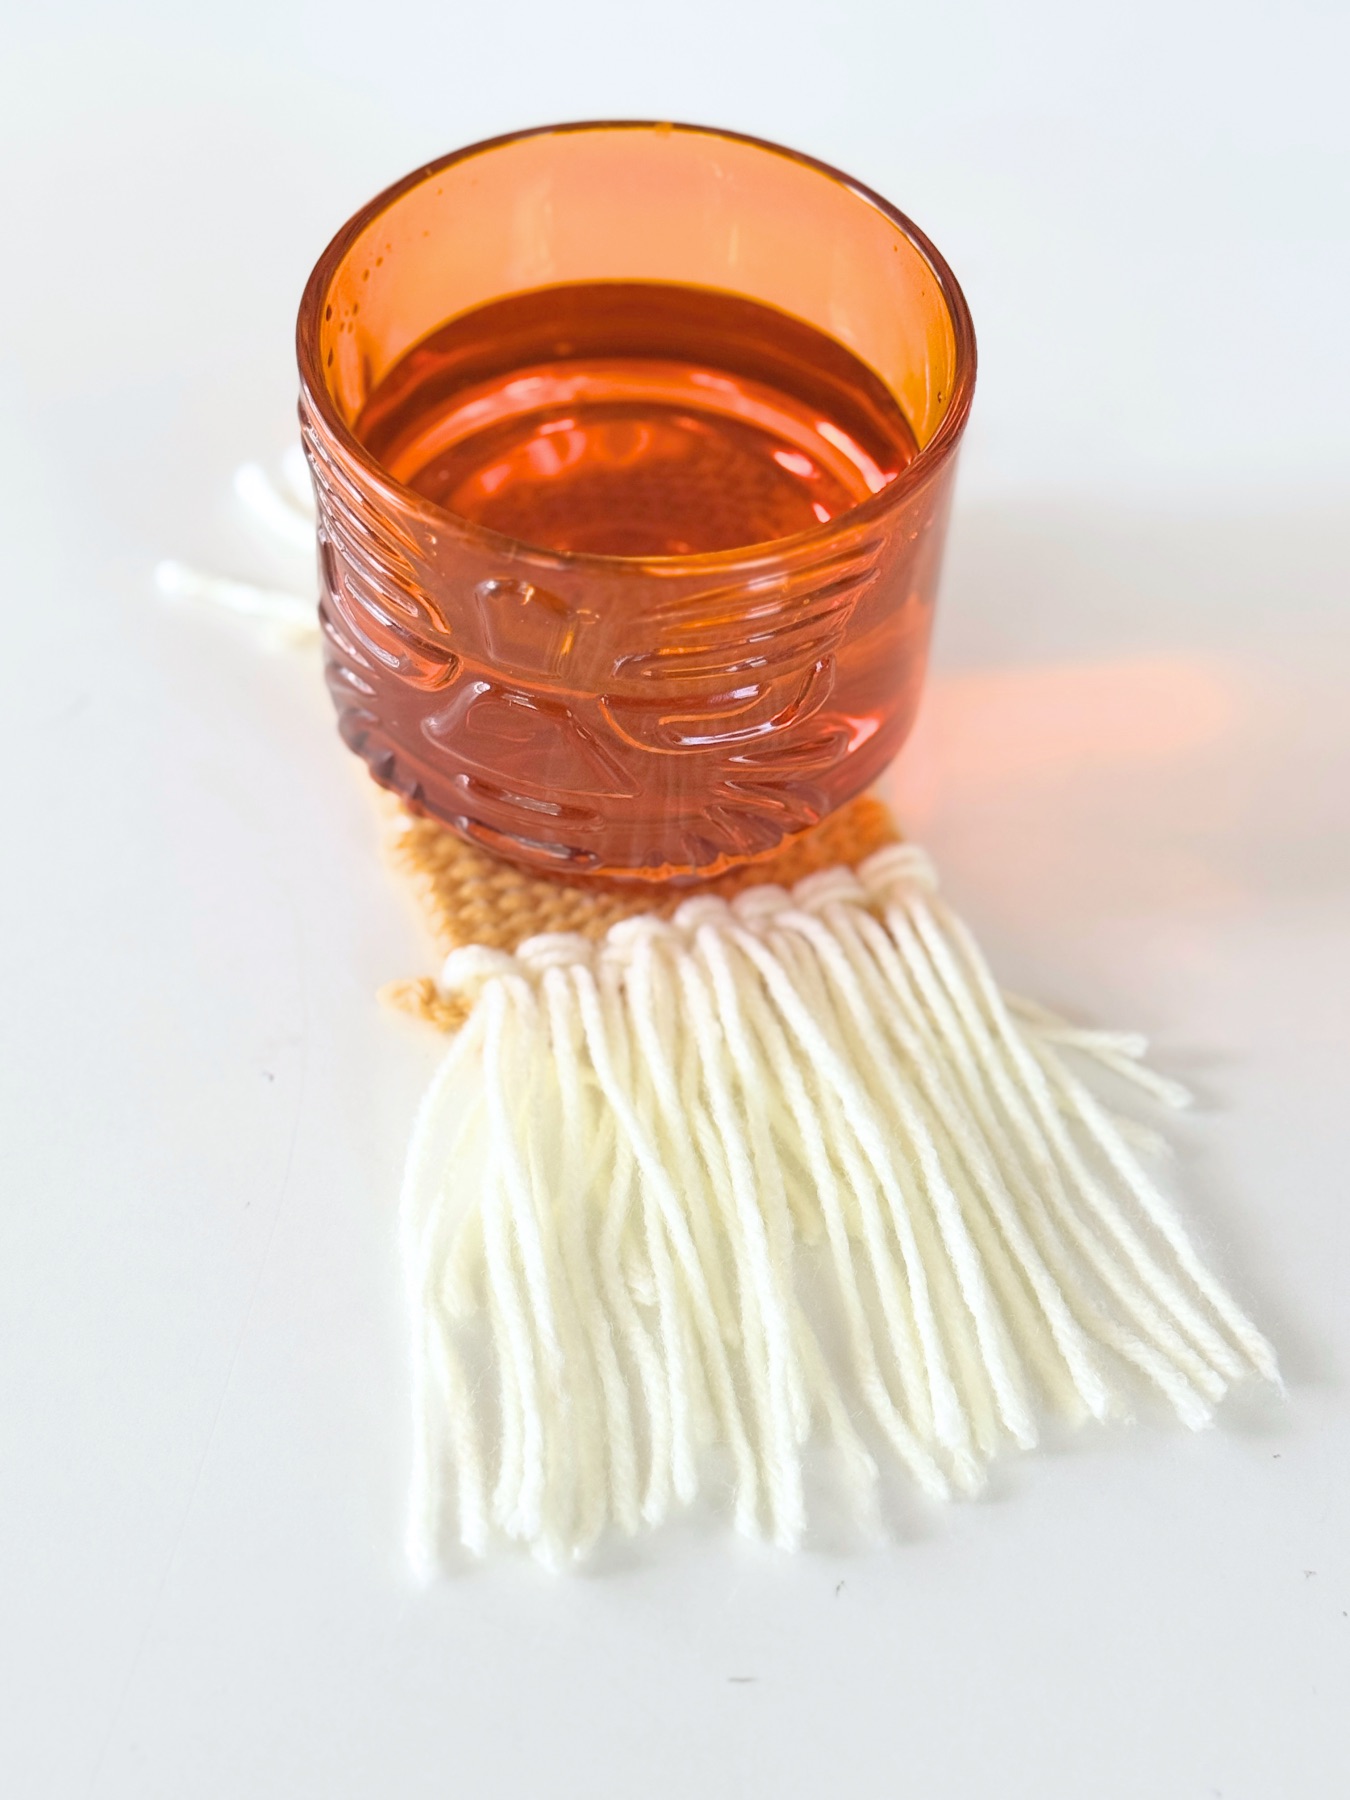
This is what your coaster will look like if you choose to not add Fringe. Hopefully you read this far, before starting the project so you can see which style you prefer!

And here is the finished coaster with the fringe!
Ready for more Loom Weaving Craft Tutorials? Check out the tutorials below and don’t forget to shop your own Loom here!
Let’s Stay Friends!
Insta | Pinterest | Enews | TikTok