DIY
DIY Recycled Yarn Woven Wall Hanging
One of the scariest things I’ve ever done in life is up and quitting my job without having another job lined up.
I did it once when I was 24 and started my blog.
Then I did it once when I was 30, not 3 months ago. After I quit that job I got very into making woven wall hangings.
I’ve always admired the woven wall hangings from Sunwoven so I decided that I wanted to learn how to weave more like her.
The First Weaving
A couple years ago I made a woven wall hanging to go above my couch. At that time, I had watched some videos and googled a couple of stitches, but I had no idea what I was doing. I even made the loom myself! It ended up being quite rickety and I strung it with super fine yarn. There were so many warp threads that I got them tangled a lot and ended up not having a very even weave in a lot of places. You can’t tell when you appreciate it from farther back, so I don’t mind. I also learned that it goes WAY faster if you’re using a larger gauge of yarn. It took me almost a year to finish it! It’s hanging above my bed in Calgary now and I think that’s the perfect spot for it!

So, after that experiment I didn’t weave for a few years.
Then, when I quit my job last year, I wanted to learn how to actually weave a woven wall hanging.
I started by buying a book so that I could learn all the different types of stitches. Then I bought a loom and a bunch of yarn.
The book that I bought is called On the Loom and it’s a great resource for anyone looking to start weaving.
Confetti Weavings
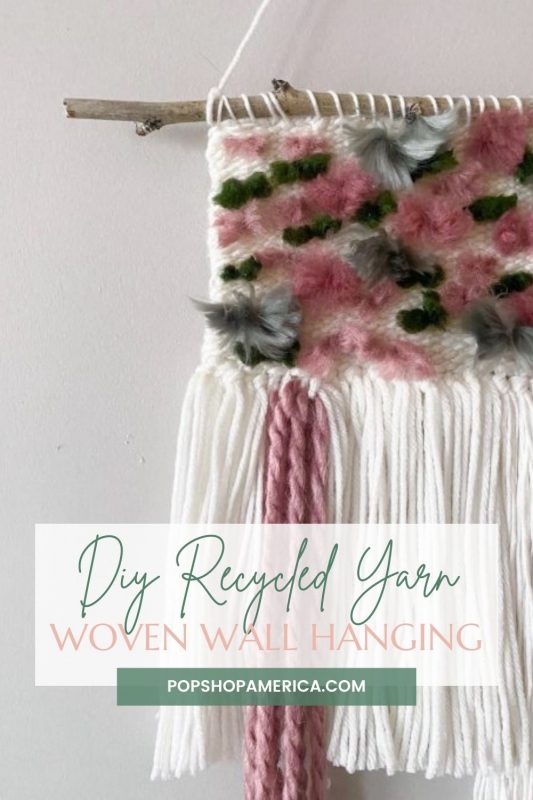
After making a few weavings I ended up with a lot of scraps from trimming the ends of the yarn and the tassels. It bothered me that there was so much waste, so I found a way to use it up! I started collecting all of my scraps in a bag and found that I could use them for what I call a confetti weaving.
Basically, you make a more neutral weaving and take a couple 1/2-1 inch pieces and add them in as part of your weft yarns. It ends up giving you a pop of colour with the raw ends sticking out.
So, without further ado, let’s get started on a confetti weaving!
DIY Confetti Weaving
If you’ve never done a weaving before this is the perfect beginner project! It’s really simple to master the weaving basics when doing this project. We’re even going to make our own looms! If you don’t want to make your own loom, this kit is a great idea!
Supplies:
- A piece of sturdy cardboard cut to about 6″ x 7″
- A cutting mat
- A ruler
- A Sharpie
- an X-Acto knife
- fine and medium weight yarn in the base colour of your choice (I chose cream)
- medium weight yarn in an accent colour
- various colours of scrap yarn in 1/2″ pieces. Weights and textures can vary – in fact this is encouraged!
- A tapestry needle
- Scissors
- A straight stick or wooden dowel approximately 10″ long
Making the Loom:
- We’re going to start by making our loom. Take a piece of sturdy cardboard and your ruler and make a small mark every 3/16 of an inch all along the 7″ side of the cardboard
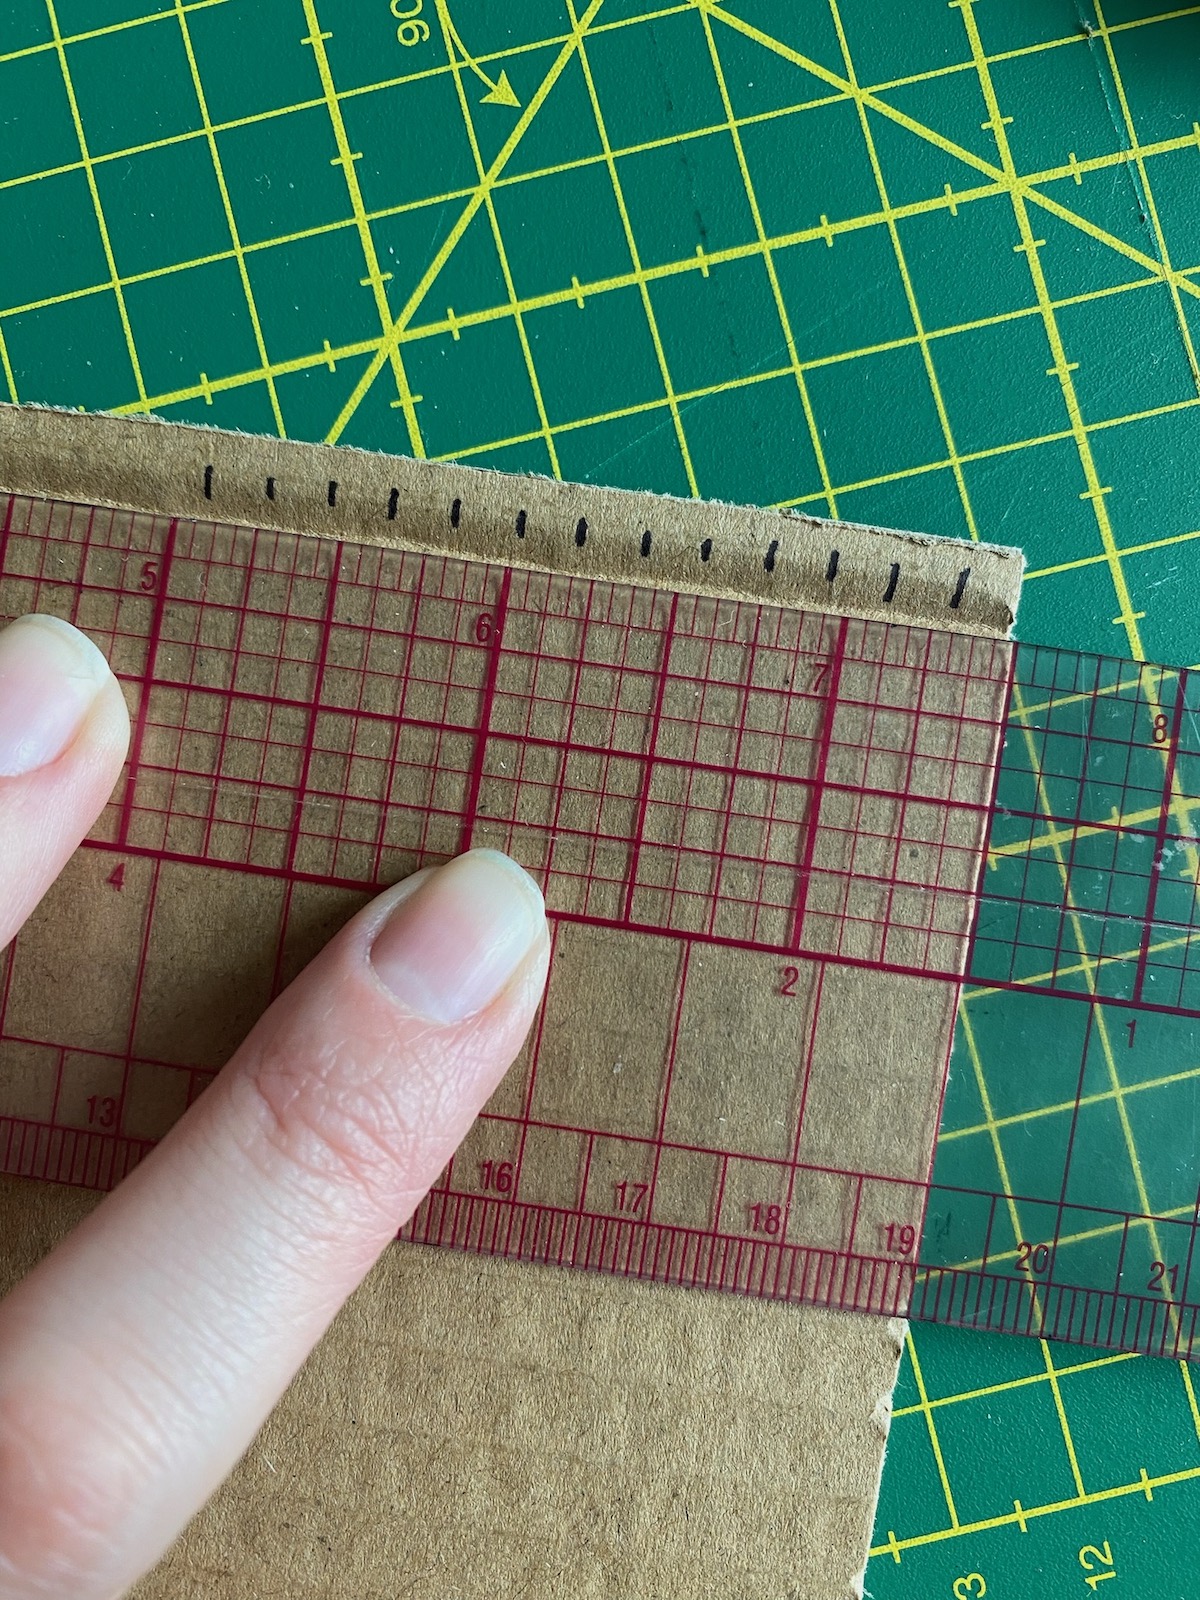
- Repeat on the opposite side making sure to line up your lines and cut the same amount of cuts on the top and the bottom.
- Then, take your X-Acto knife and cut each line about 1/2″ deep
- Once you have all your cuts made, it’s time to string the loom. Tie a knot in your fine weight yarn and place the knot behind the first cut on the upper left hand side.
- String the yarn down the loom and place it in the first cut on the bottom left hand side wrapping it under the first notch and then come up through the second notch. Pulling the string taut, loop the yarn around the second notch on the top and continue threading the notches until they’re all full.
- When you’re finished stringing your loom, cut the yarn about 2″ long and tie a knot as close to the last notch as possible on the back of your work.

Weave Your Foundation:
- To set up the foundation of your weaving, you’re going to start by taking your medium weight yarn and weaving three foundation rows. This helps to really solidify the piece and give it some structural integrity.
- To measure how much yarn you’ll need for the three foundation rows I usually loosely measure by placing the yarn across the weaving to measure the length. Do this 3 times without cutting the yarn, leaving a little extra for the tail ends. You’ll then have a piece of yarn that is a good length without having a lot of waste.
- Thread your yarn onto your tapestry needle and weave three rows in a basic weave going over the first warp yarn, and under the second warm yarn repeating till the end of the row. If you ended the row with the weft (horizontal) yarn on top then start the next row with the weft yarn underneath the warp yarn.

Making the Tassels:
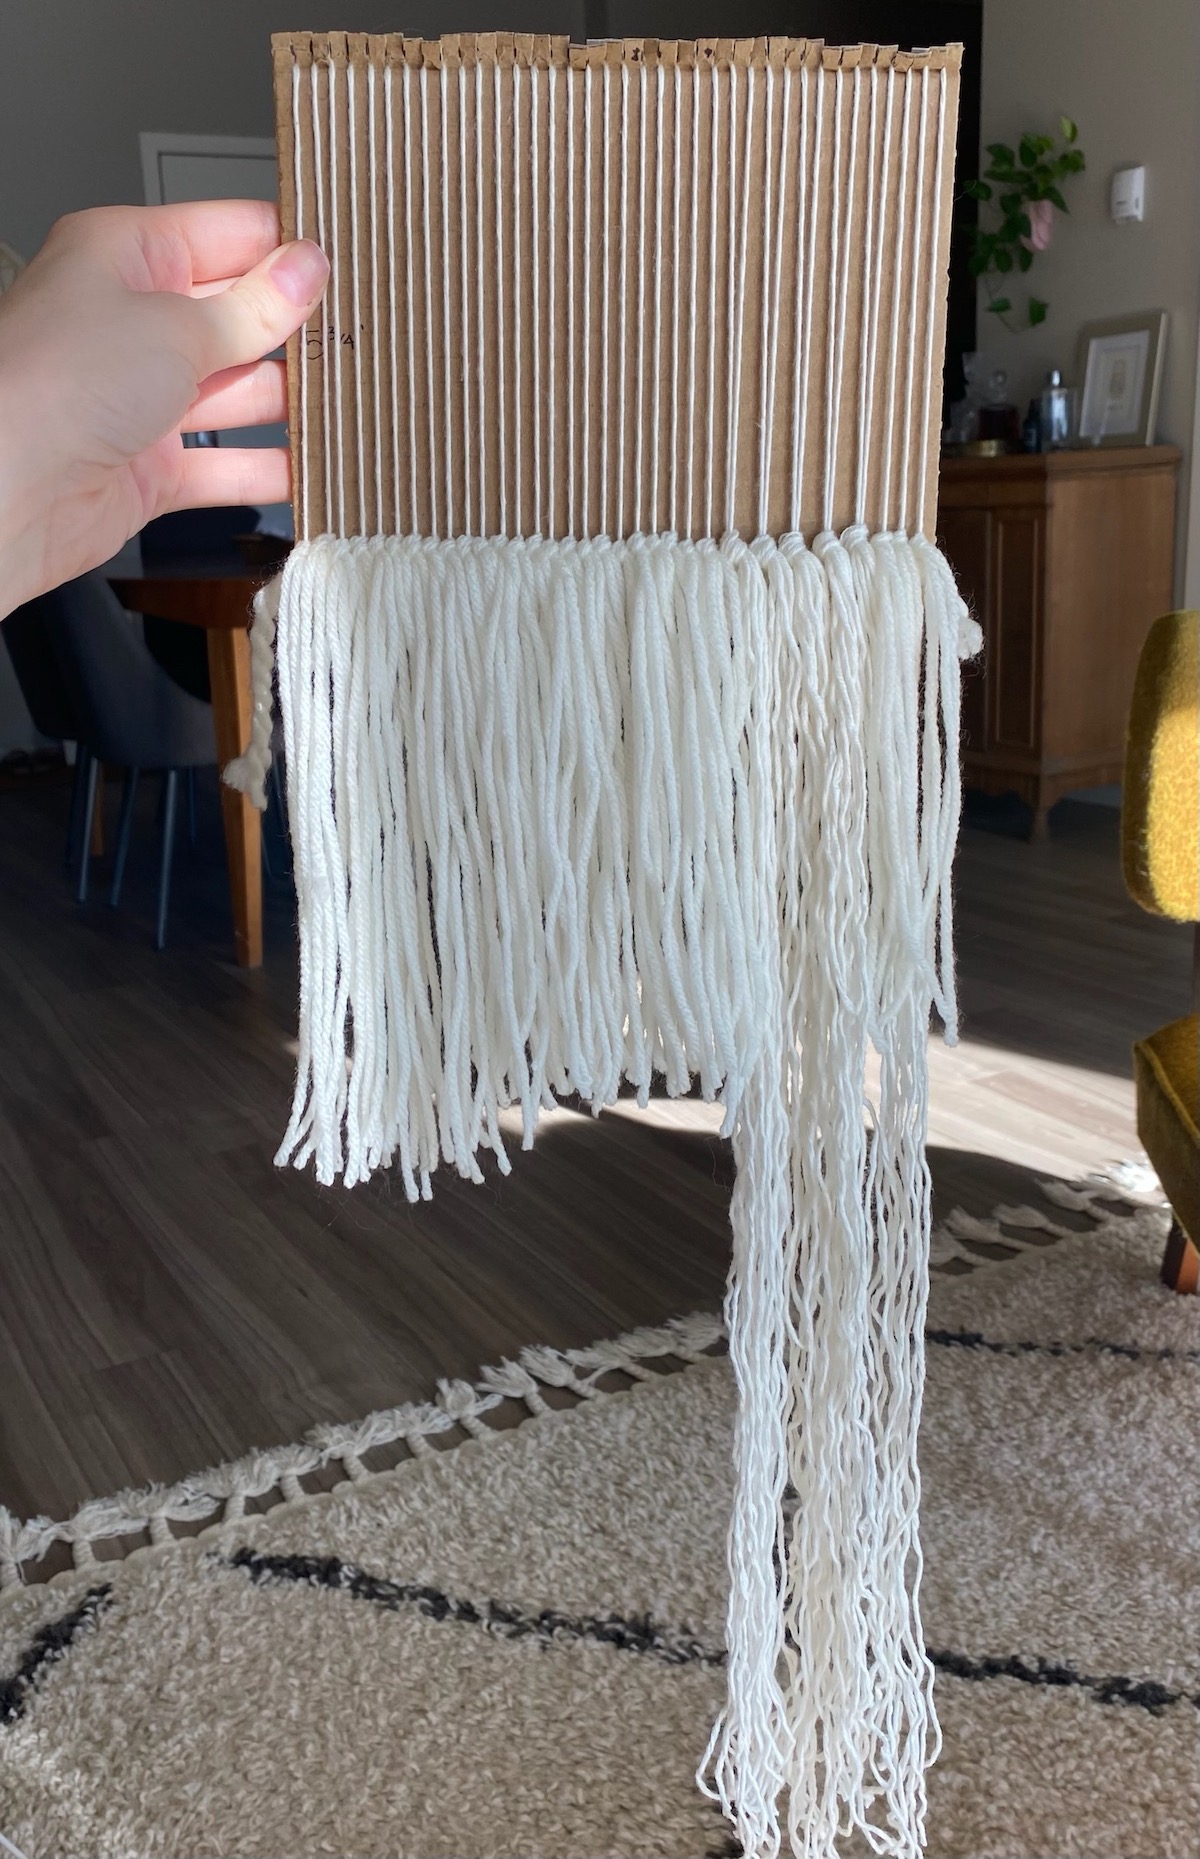
- Next, it’s time to make the tassels. You can choose to make them any length you wish, but I made mine three different lengths. The long fine white ones I cut 35″ pieces of yarn, the pink tassels (which I added later) I cut 25″ pieces of yarn, and the remaining medium white tassels are 22″ pieces of yarn. Remember, the finer the yarn, the more strands you’ll need to make a substantial tassel. For the fine white ones I used 4 strands of yarn for each tassel.
- To make a tassel, start on the left hand side. Take your strand(s) of yarn and fold them in half making a loop. Thread the loop under two of your warp threads. Pull the loop through a little and pull the ends of the strands through the loop to tighten it. Work your way across the bottom of the weaving until you have an entire row of tassels.


- You’re more than welcome to use one kind of yarn for all the tassels. Alternately, feel free to switch it up like I did.
Confetti Weaving:
- After you’ve finished your tassels, weave three more rows of basic weaving using your base colour.
- On the next row, start to add your “confetti” pieces. Every couple of inches, add a 3/4″ piece of yarn under one warp thread. Then continue with your basic weaving in the base colour to lock in each confetti piece.

- Continue on like this alternating the colour of the confetti pieces that you use until you’ve reached your desired size or are about 1″ away from the top of your loom.
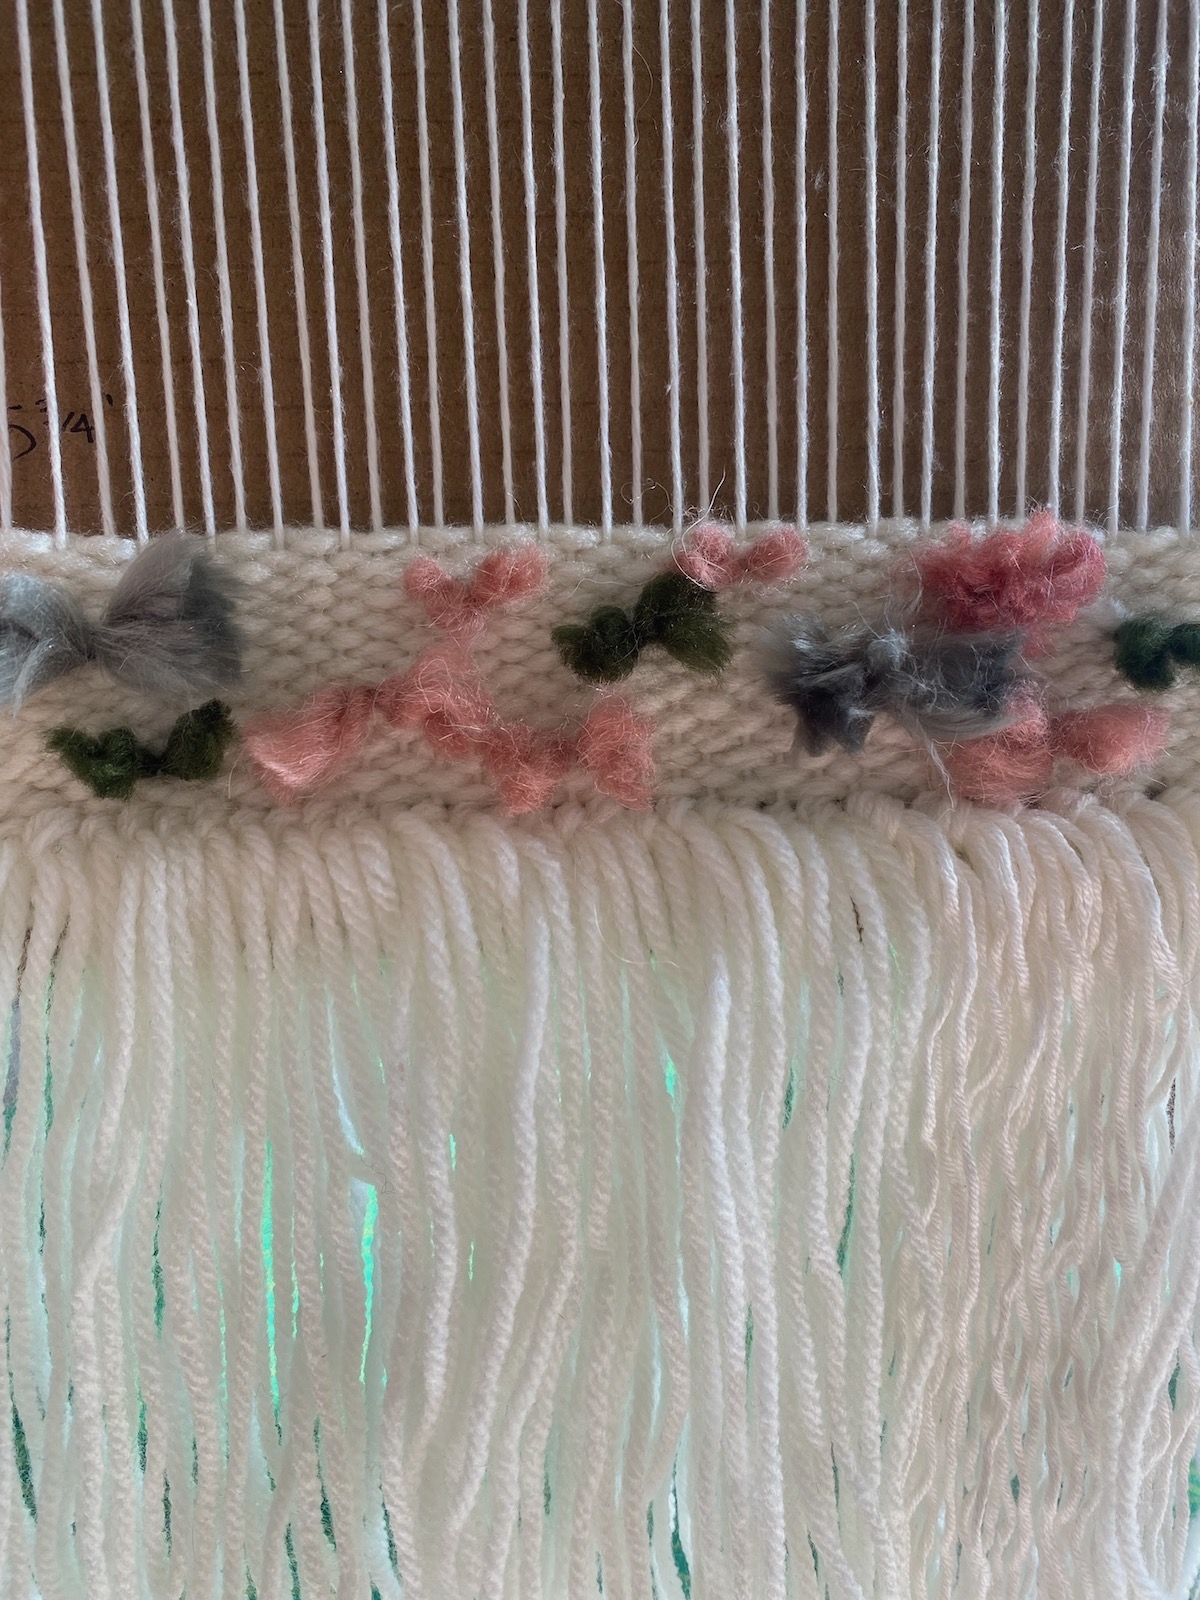
- At this point, finish off your work with 3 rows of basic weaving in your base colour.
- To make the confetti pieces look fluffier, I kind of unravelled the strands of yarn between my fingers and fluffed them up a bit.
Finishing the Weaving:
- Flip your weaving to the back side and remove the weaving from the loom by taking the loops off of the notches.
- Cut each bottom loop in half and then tie the ends together tightly. Repeat for the top of the weaving.
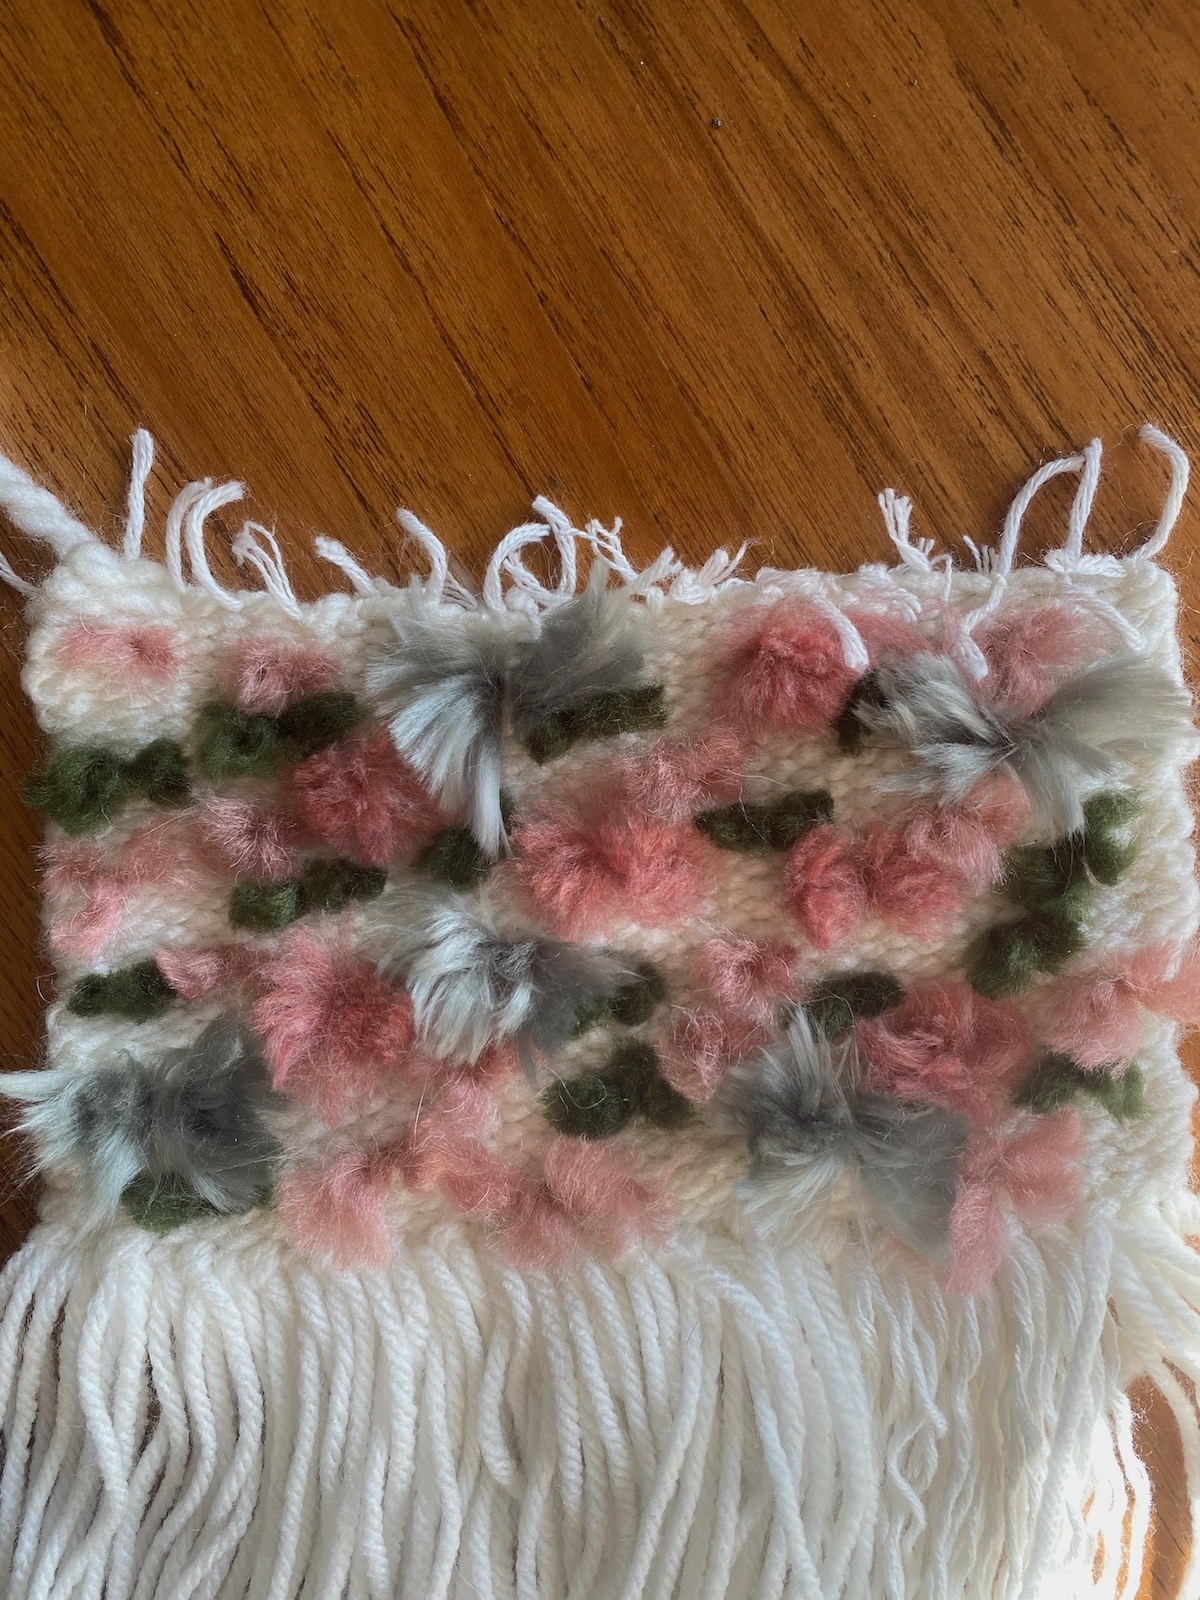
- On the top of the weaving, cut any long strands from when you tied off your work.
- Take your stick or dowel and centre your weaving on it.
- Cut a piece of thread about 2′ long and tie a knot in one end.
- Thread the yarn through your tapestry needle and then on the top right hand corner, thread the needle through the top of your weaving, around the dowel and into the weaving. Continue like this across the width of your weaving until it’s attached to the dowel. Tie a knot at the end. You should have enough to tie the yarn back on the right hand side and use this to hang your weaving.
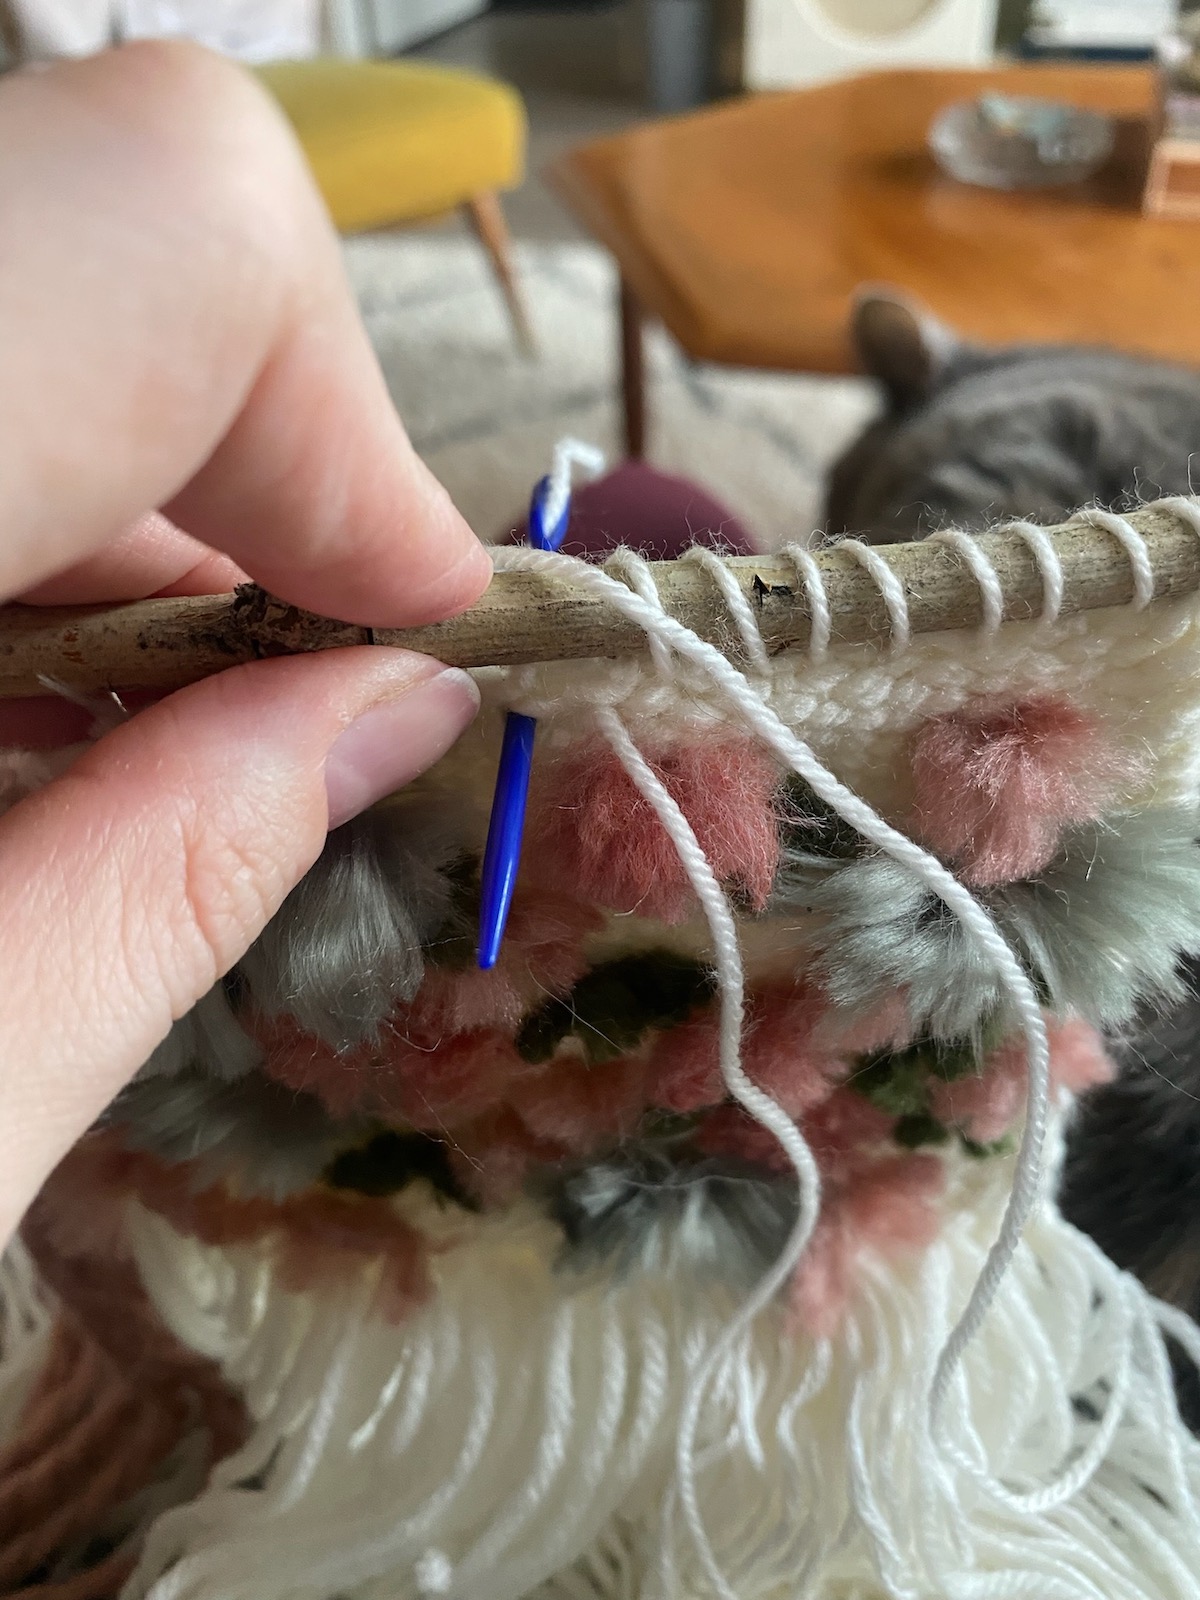
- Trim any loose ends on the sides and back of your work.
- Hang your weaving on a nail and trim the tassels with scissors so that they’re all even. (Hint: the bits you cut off can become more confetti weavings!)
- At this point, I felt like I wanted some pink in the tassels, so I took my darning needle and just strung some pink yarn through the tassels on the left hand side.

Now your confetti weaving should be done! All you have to do is find a place to hang it!
I loved this project because it’s such a good way to use up the smallest scraps of leftover yarn. By using them in a weaving like this, it prevents them from going in the trash!

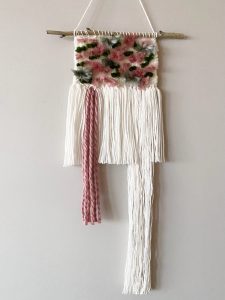

This kind of weaving would be super cute for a kids room, or a nursery. It’s also a great beginner weaving project!
I’d love to know if you’d try a project like this so let me know!
Tess xo
Let’s Stay Friends!
Insta | Pinterest | Enews | TikTok


