DIY
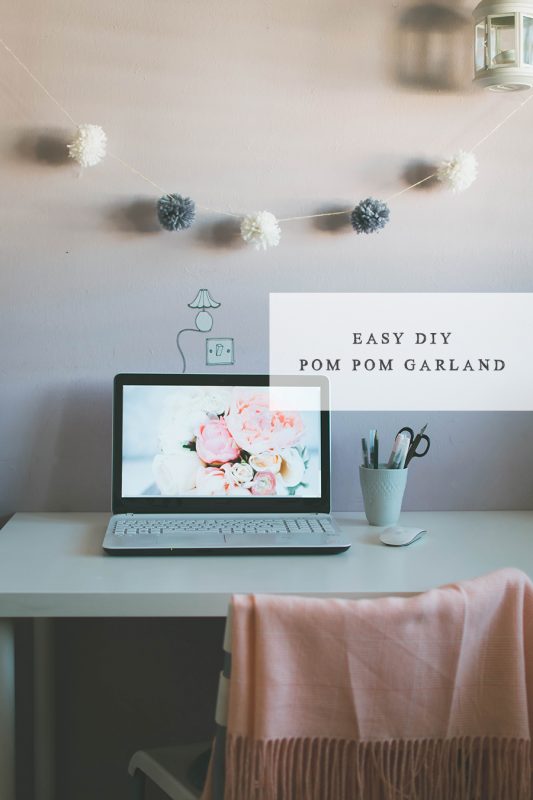
Easy DIY Pom Pom Garland
Mar
Ever since my obsession for knitting started back in Autumn, I began collecting more and more yarns until it became clear I wouldn’t have been able to knit that much during only one Winter! I also discovered the super fun art of making pom poms and, if only you could see my knitting storage basket, you’d say my obsession is real!
Now that Winter is almost over, I started thinking of how I could have used some of the leftover wool I’ve used for my knitting projects, and you’ll know by now how much I love garlands… So yes! After seeing pom pom garlands everywhere on Instagram and Pinterest, I decided I’d give it a go myself.
Today I’m sharing my process for making a super easy DIY pom pom garland! This project is super fun and simple, and can be great to involve children too. They (and you!) will love to hang the finished garland as a sweet decoration for any rooms really!

Easy DIY Pom Pom Garland Tutorial
Materials:
2 medium or bulky weight yarns (different colours)
Pom pom maker (find it on Amazon here) or two squares of thick cardboard
Scissors
Paper twine
Method:
01. Firstly, if you don’t have a pom pom maker at home, you can create one yourself with two pieces of cardboard. Here’s how:
Use a compass to draw a first circle of 7.5cm/3” in diameter on your first cardboard, then cut along the line. Draw another circle of 2.5cm/1” in diameter in the middle of the first big circle and cut a hole in your cardboard. Repeat on your other square of cardboard so that you have two doughnut shaped stencils.
To use them as a pom pom maker overlap the two circles and keep reading!
02. Cut a long strand of yarn, hold the two circles together and wind the yarn around the circle (from the centre to the outer border) until it runs out. Then cut another long strand and keep wrapping the yarn around the circle until you have a thick layer of yarn covering the cardboard surface all over.
You can decide how much yarn to use in this stage, the more the better as you’ll end up with a fuller, fluffier pom pom!

03. Using your scissors, cut the yarn between the two pieces of cardboard following the circle shape around the edge.
04. Then cut a medium strand of yarn in the same colour and tie it between the two cardboard circles with a double (or triple!) tight knot to secure the pom pom. Now remove the two pieces of cardboard and shape your pom pom into place!
05. Use your scissors to trim the longer pieces of yarn in your pom pom so that they all have the same length.


06. Keep making pom poms of alternated colours until you have enough to cover the length of your garland based on how long and full you want it to be.
07. Take a strand of paper twine long enough to be hanged in the corner of your room you prefer, and start attaching your pom poms, alternating the colours, tying them with the paper twine to secure them into place. Leave around 10 cm between each pom pom and keep going until they’re all attached.


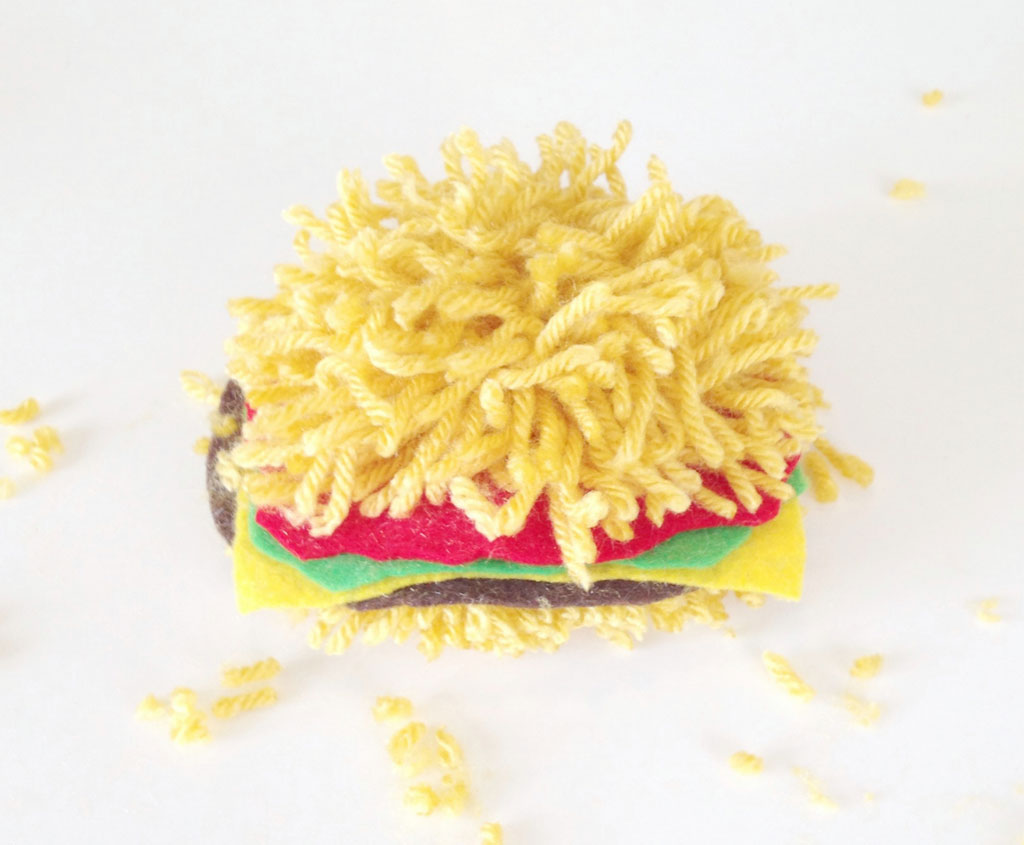
Now hang your beautiful pom pom garland in your room, right above your bed or desk, or anywhere you fancy! Hope you enjoyed, let me know if you give this project a try! And need more Pom Poms in your life? Check out our Pom Pom Burger Tutorial below!
Let’s Stay Friends!
Insta | Pinterest | Enews | TikTok