Craft in Style Subscription Instructions, DIY
DIY Sharpie Watercolor Tablecloth

May
This is Part 1 of the DIY Watercolor Table Runners Craft Supply Box by Pop Shop America. Find Part 2: How to Turn Acrylic Paint into Fabric Paint here.
Sharpies are one of those supplies that we always have around but may struggle to get truly creative with. Sure, they are fine for using as regular markers… well except for the fact that they bleed.
They do come in a wide range of colors…but then again Tombow Brush Pens come in a wider range of colors and don’t bleed.
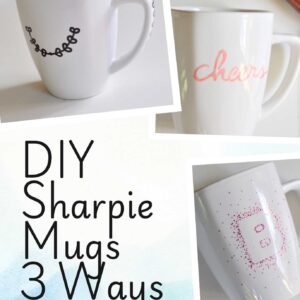
So what are Sharpies good for anyway? They are versatile and come be combined with other supplies to do cool things like this DIY Sharpie Watercolor Tablecloth.

What Type of Marker is a Sharpie?
A Sharpie is an alcohol based permanent marker. Alcohol Markers have a intense, vibrant and saturated color that is perfect for illustration. They can be used on lots of different papers like cardstock and vellum and have a smooth finish.
So when you are trying out this project, you don’t have to use Sharpie brand – in fact I didn’t! I just use the name Sharpie, to make the tutorial and the type of markers used, easier to understand.

Supplies to Make a DIY Sharpie Watercolor Tablecloth
Any Alcohol Based Markers
Cotton Tablecloth
Rubbing Alcohol in a Spray Bottle (Can Be Any Grade of Rubbing Alcohol)
Stencils or Templates for Your Design (These Templates Would Be Great)
Paper Sacks, Parchment, Cardboard (Anything Underneath Your Project to Prevent Bleeding)
And that’s all! The supplies are simple and the stencils or templates are optional.

How to Make a Sharpie Watercolor Tablecloth
Step 1: Plan Your Design
Before getting started, browse around the internet to look at tablecloths and table runners that you like. You may notice that just isolating 1-2 colors is common. It can help you match your decor and help the tablecloth blend in with other items.
You may notice that simple, repeated patterns are common too and look great on a tablecloth.

Step 2: Carefully Ink Your Design
Make sure you have your workspace set up so that the markers won’t bleed through to anything important. Then, stencil or ink your design in marker on the tablecloth. You will want to start in one area of the tablecloth and work in small sections.

Why Work in Small Sections?
I don’t recommend working in small sections because the marker ink needs to be wet to make the watercolor, it’s actually because this way will help you design your finished piece. As the watercolor is created, the image will spread and blur. So you may need to alter your spacing as you work. Thus, working in smaller sections is easier.

Step 3: Spritz the Ink with Rubbing Alcohol
Once your design is inked, mist it with a few pumps of rubbing alcohol. Watch the design begin to soften and obscure. Continue misting
with alcohol until you reach your desired amount of blur.
And voila! You have created a DIY Sharpie Watercolor!

Step 4: Continue this Process Across Your Tablecloth
Now all you need to do is continue with your pattern, spritzing as you go. Just note, ink won’t blur the exact same way with each spritz of alcohol. Some of your image may become muddier, and other sections more crisp. This will give it a gorgeous, handmade look. And that’s something that you should expect!

Stencil Pro Tip:
You don’t need to use all the sections of a stencil or template for a design. You can use small sections of a stencil or even overlay several stencils together to create a more multifaceted design.

How to Care for Your DIY Sharpie Watercolor Tablecloth
Once your tablecloth is dry, you may want to heat set the ink, to help its longevity.
With an Iron: Place a cotton item in between the tablecloth and the iron and iron on the cotton setting for 1-5 minutes.
In the Dryer: Or you can place the tablecloth in the dryer and tumble on high for around 15 minutes.
After the ink is heat set, you can treat it just like any normal tablecloth. Most cotton tablecloths, and the one that I used is machine washable.
If you machine wash yours, always do so on cold water. Hot water can fade the design and even alter the color. Don’t line dry the tablecloth because sun can also bleach the design.

What are Other Sharpie Watercolor DIYs
This is just one project you can try, but Sharpies or Alcohol Markers + Rubbing Alcohol can be used to make:
T Shirts
Coasters
Scarves
Paintings
Bookmarks
Nail Art
Canvas Sneakers
Plus a Ton of Other Creative Ideas

What is Sharpie Tie-Dye?
Sharpie Tie Dye is a similar process to Sharpie Watercolor. In it, you use alcohol marker and rubbing alcohol. But your designs may change to be more free spirited or you can work in small circles to create that tie-dye effect that we know and love.

Whatever design you choose or how you apply this to other project, be sure that you have fun making it and allow it to be an experiment! That’s part of the joy of crafting – just enjoying the moment and not worrying about the outcome too much.
But if your project does turn out great, tag us on social, so we can see and reshare your project!

Let’s Stay Friends!
Insta | Pinterest | Enews | TikTok