Jan
Whether you’re a blogger, a new photographer or just someone who enjoys curating a pretty Instagram feed, I’m sure you’ve wondered at least once in your life how is it that everyone has the prettiest surfaces for photos all the time! I’m talking of all those beautiful aged wooden tables or floorboards, or again all those amazing marble kitchen worktops that make food photography so incredible nice!
After years of taking pictures for my own blog, I decided it was about time to up my photography game and finally have some pretty surfaces for myself. And guess what: you don’t need a fancy kitchen worktop or a pricey table to have beautiful photography backgrounds for yourself, but you can actually recreate them at home from scratch and with minimum effort!
In particular I’ve recently made a white wooden distressed DIY photography background from plain wooden boards that I love a whole lot as it looks aged and imperfect and works perfectly for product photography; but I’ve also created a marble board that comes in very handy when I want to fake a fancy but subtle marble surface that could ideally be a great desk or fancy table to showcase your own recipe produces and take amazing photos of them!
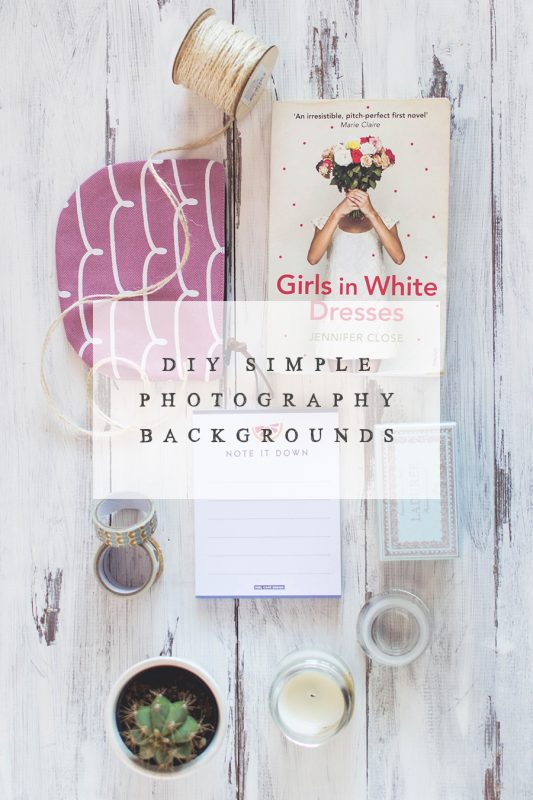
So today I’m sharing how you can make your own DIY photography background at home, no advanced skills needed, in two simple ways!


White Distressed Wooden DIY Photography Background
Materials:
– 6 aged wooden boards 24” in length (amazing bundle on Amazon here)
– 2 thin wooden boards 12” in length
– Wood nails (of measure ideal for the sum of the thickness big + thin wooden board you’ve picked)
– Dark wood stain (you can make your own natural stain with tea + apple cider vinegar – see instructions here)
– White paint (better if ideal for wooden surfaces)
– Spatula and sandpaper
Method:
01. Firstly, lay down your six longer wooden boards on a flat surface with the bottom facing the top. Measure 6” (20cm) from both the top and bottom of the board (shorter side), then take the two smaller boards and position them perpendicularly to the bigger boards right where you’ve just measured.
Use your wood nails and your hammer to attach the horizontal boards to the 6 vertical boards. Use one nail for each vertical board to secure them all. Do the same for the top and bottom side of the panel where you’ve measured.

02. Flip your panel upside down so that you’re facing the right side, place it on a solid surface protected with old paper, and start staining your board – the darker the better (it helps with creating a nice contrast against the white).
03. Let the panel dry completely as suggested on the stain package, then paint it all white with your white paint. It took us three coats to be completely happy with the colour – make sure you wait until the paint is completely dry before moving on with the next coat.
04. Once the paint is 100% dry, use a spatula and/or some sandpaper to distress the wood. In particular you want to remove the top white coat here and there, especially on the boards’ conjunctions to reveal the dark wood underneath – make sure you make it look like it’s distressed very naturally! Dust off any dried paint from the top and enjoy!
***


Marble DIY Photography Background
Materials:
– Thin plywood panel*
– Marble sticker paper (find it on Amazon here) – size to fit the panel you’ve picked
*The thinner the better, makes storing and carrying the panel around way easier
Method:
01. Simply lay down your plywood panel on a flat surface, then unroll your marble sticker paper. Remove the protective layer, starting with just a couple of centimeters. Stick the first 2cm of marble paper to the panel, then keep removing the protective layer a few centimeters per time and sticking the paper to the panel along the way, making sure you don’t create any air bubbles between the two (if so, unstick the marble paper and repeat).


02. Once all your plywood panel is covered in marble paper, cut the paper in correspondence of the panel angles to make folding the paper easier. Stick the extra paper to the back of the panel; we added a layer of clear tape on the back to make sure the marble paper won’t unstick in the future.
***
And that’s basically it! They’re very compact and easy to store in the back of my wardrobe and makes for perfect photography backgrounds whenever I fancy! Hopefully you’ll love them too!
Get More Lifestyle & Design Yumminess from Giada
Miel Cafe Blog | Miel Café Design | Twitter | Instagram | Bloglovin | Pinterest

Let’s Stay Friends!
Insta | Pinterest | Enews | TikTok