
Craft in Style Subscription Instructions, DIY
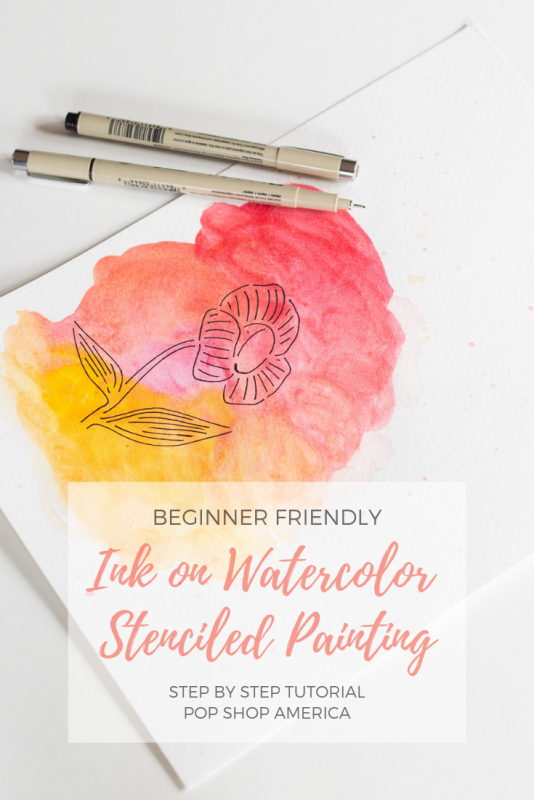
Ink on Watercolor Stenciled Painting Tutorial
Feb
I love the look of Ink on Watercolor. It’s such a fun way to get started with Watercolor Painting. If you are just learning blending and brush techniques start here. And if you are looking for the supplies for this Painting Tutorial, shop them here.
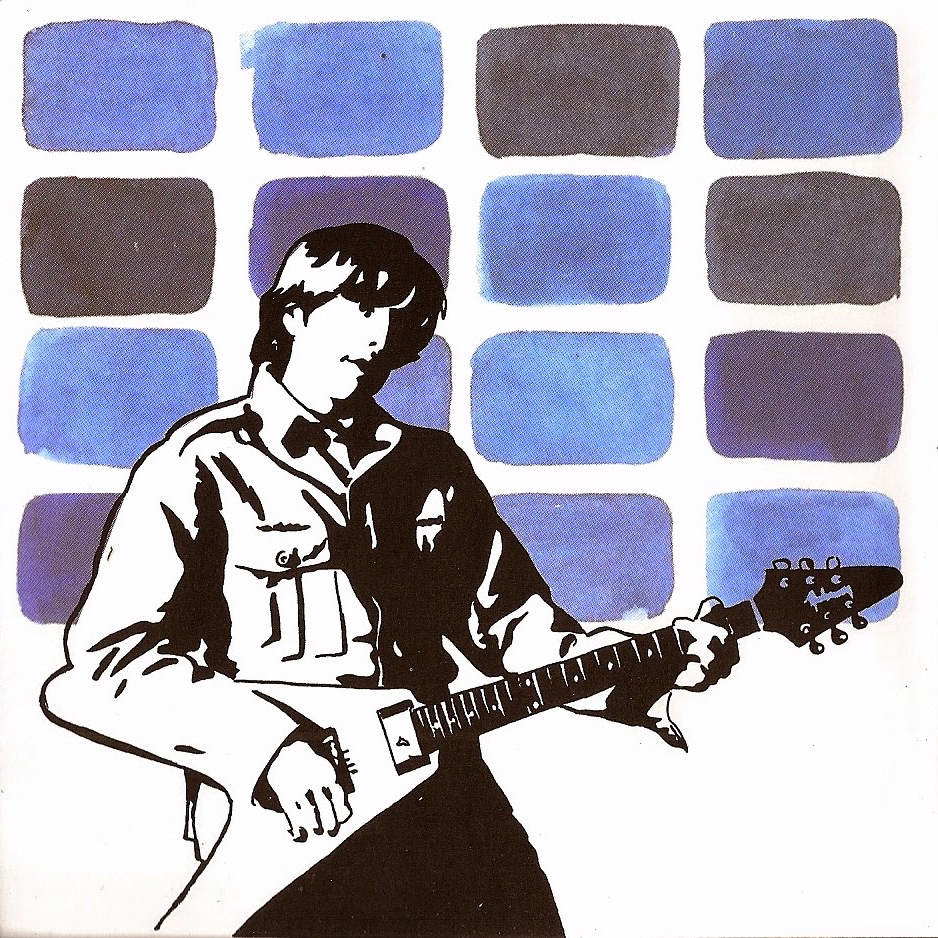
I’ve been obsessed with this style since the album Moon Safari by Air came out. I had never seen anything with sweet wispy brushstrokes of watercolor mixed with something stark black and white and highly graphic.
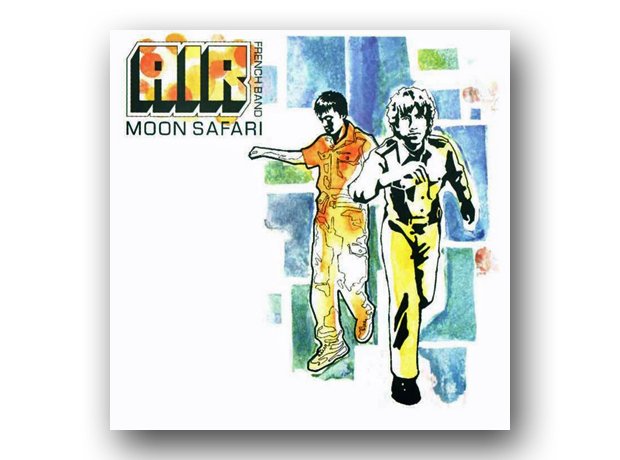
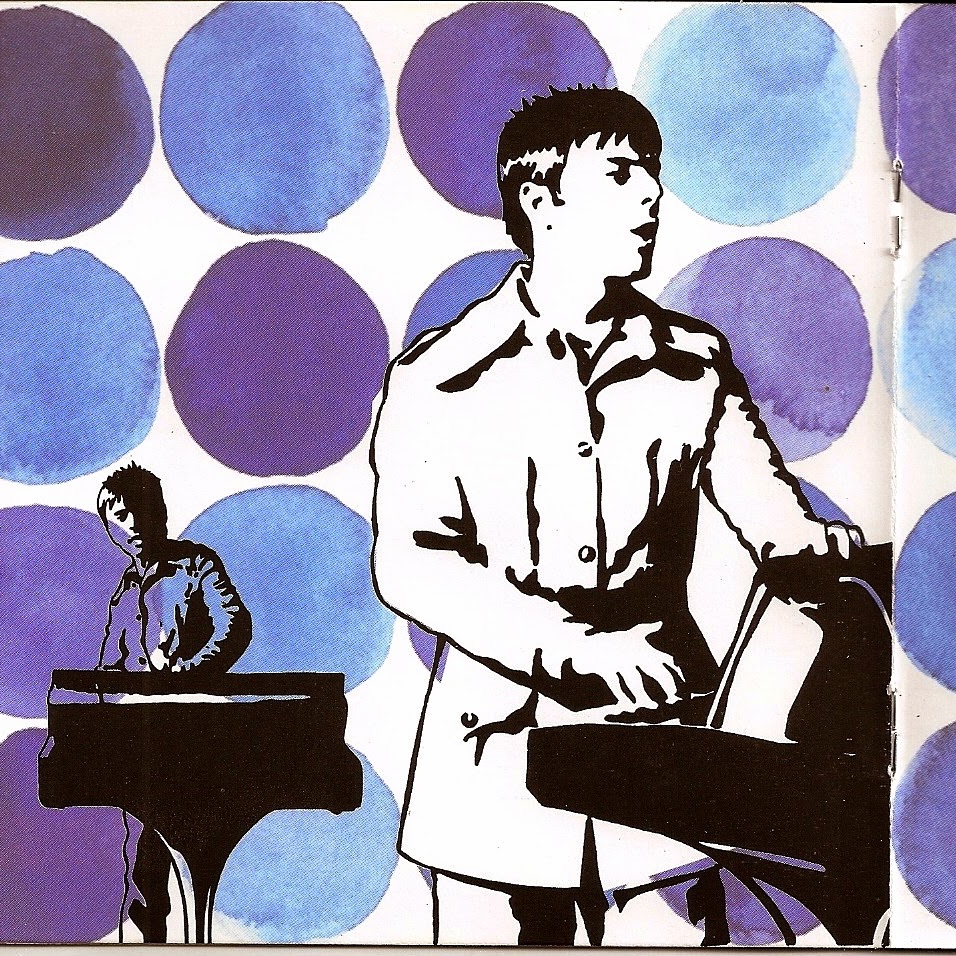
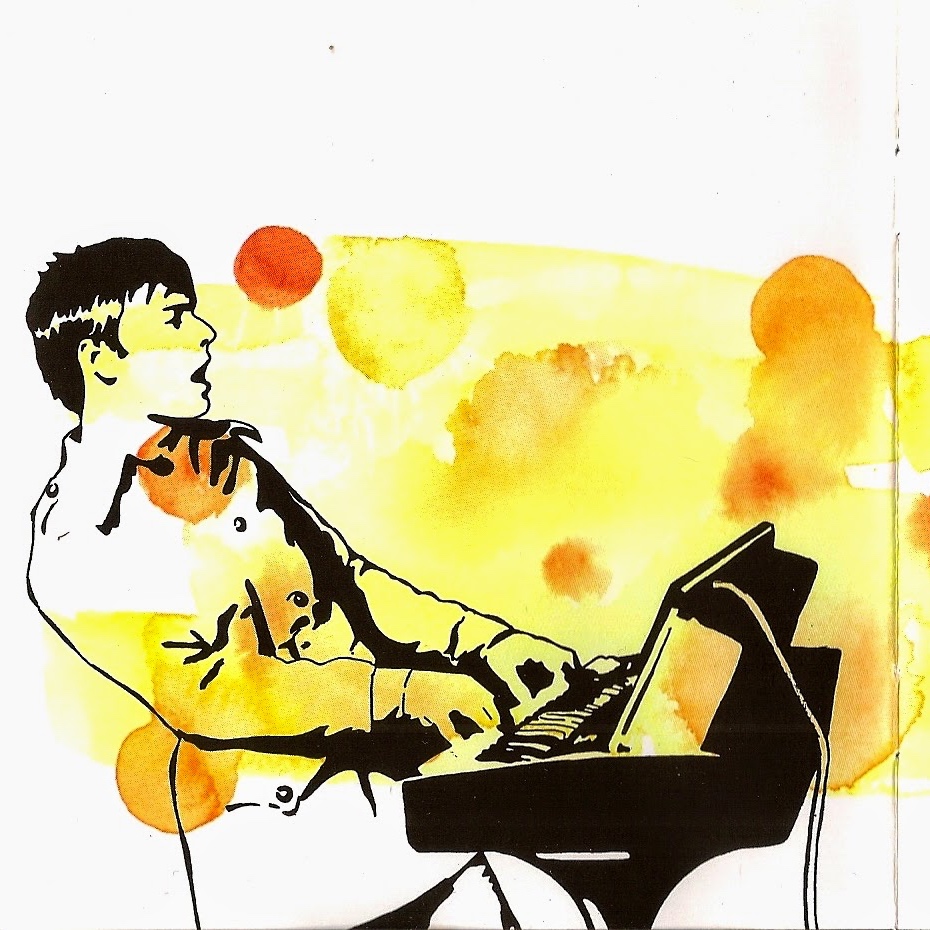
So cool right?! Here are a few more images from the cover art of Air’s Album Moon Safari just to get you excited about what you can make. Have a listen to this midcentury inspired French Pop that could be great music for your own Ink on Watercolor Stenciled Painting.
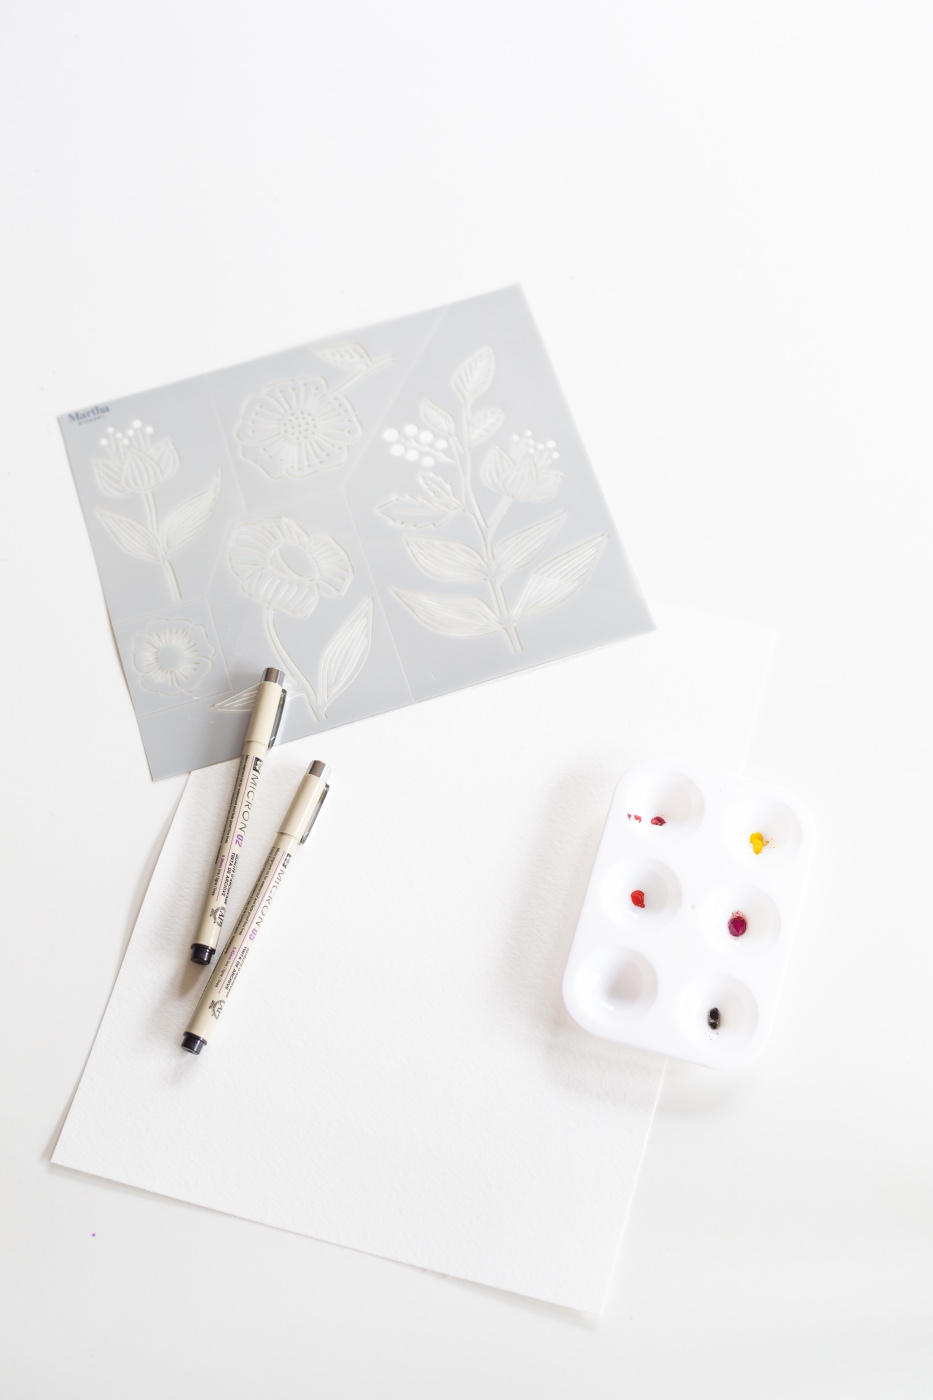
Supplies to Make this Ink on Watercolor Stenciled Painting
February 2019 Craft in Style Subscription Box
-or-
Watercolor Paper
Watercolor Paints
Water + Glass + Watercolor Brushes + Palette
Micron or any Technical Pen (Size 2 or So)
Any Stencils of Your Choice (I chose a Poppy)
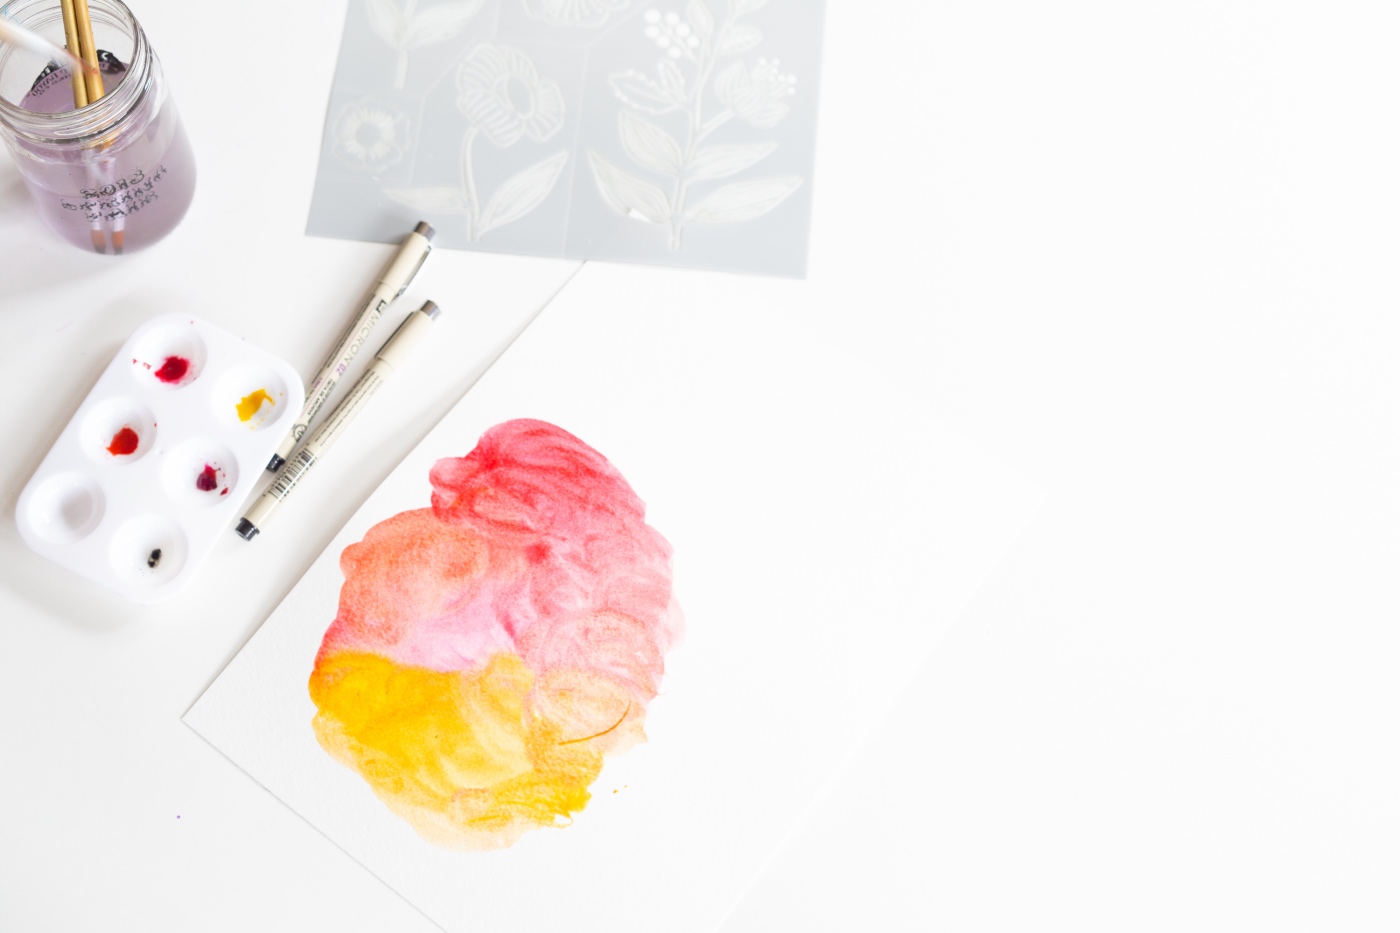
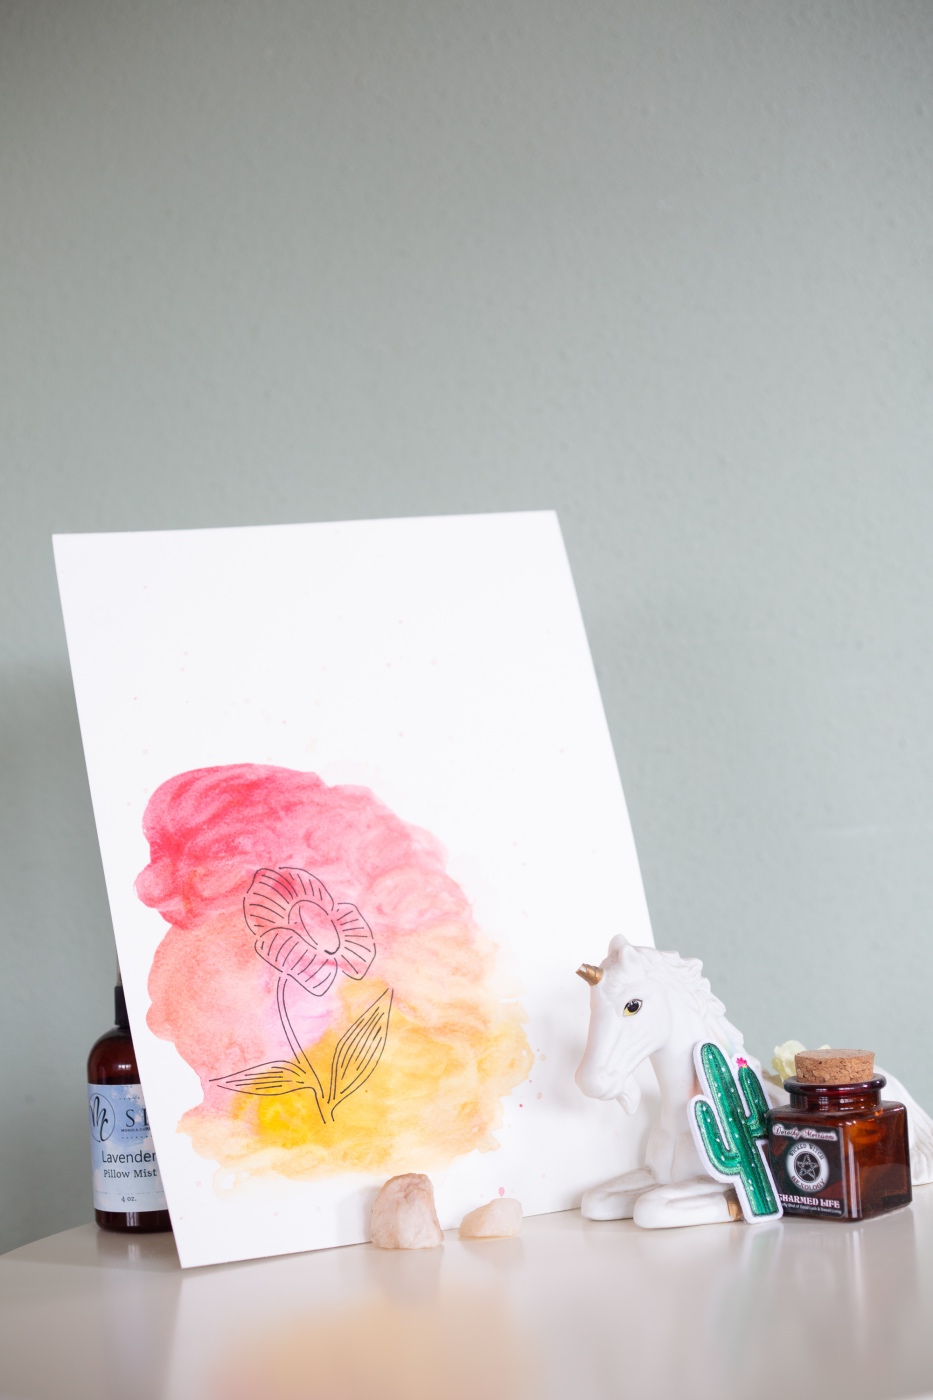
Before you get started, spend some time considering where you want to place the image. It doesn’t have to be in the center. Use your stencil as a guide. Move it around the paper until you find the right spot. Good composition is a bit part of what makes a painting great. And I chose to start my image in the lower left of the watercolor paper.
Consider your colors too. I chose a firey red palette that included oranges and yellows like an ombre. For the stencil, I found a poppy flower that I loved. But you can choose anything that you like! Using your own style is what this project is all about.
If you want to take it a bit slower, remember you can always revisit your Blending & Brush Basics here.
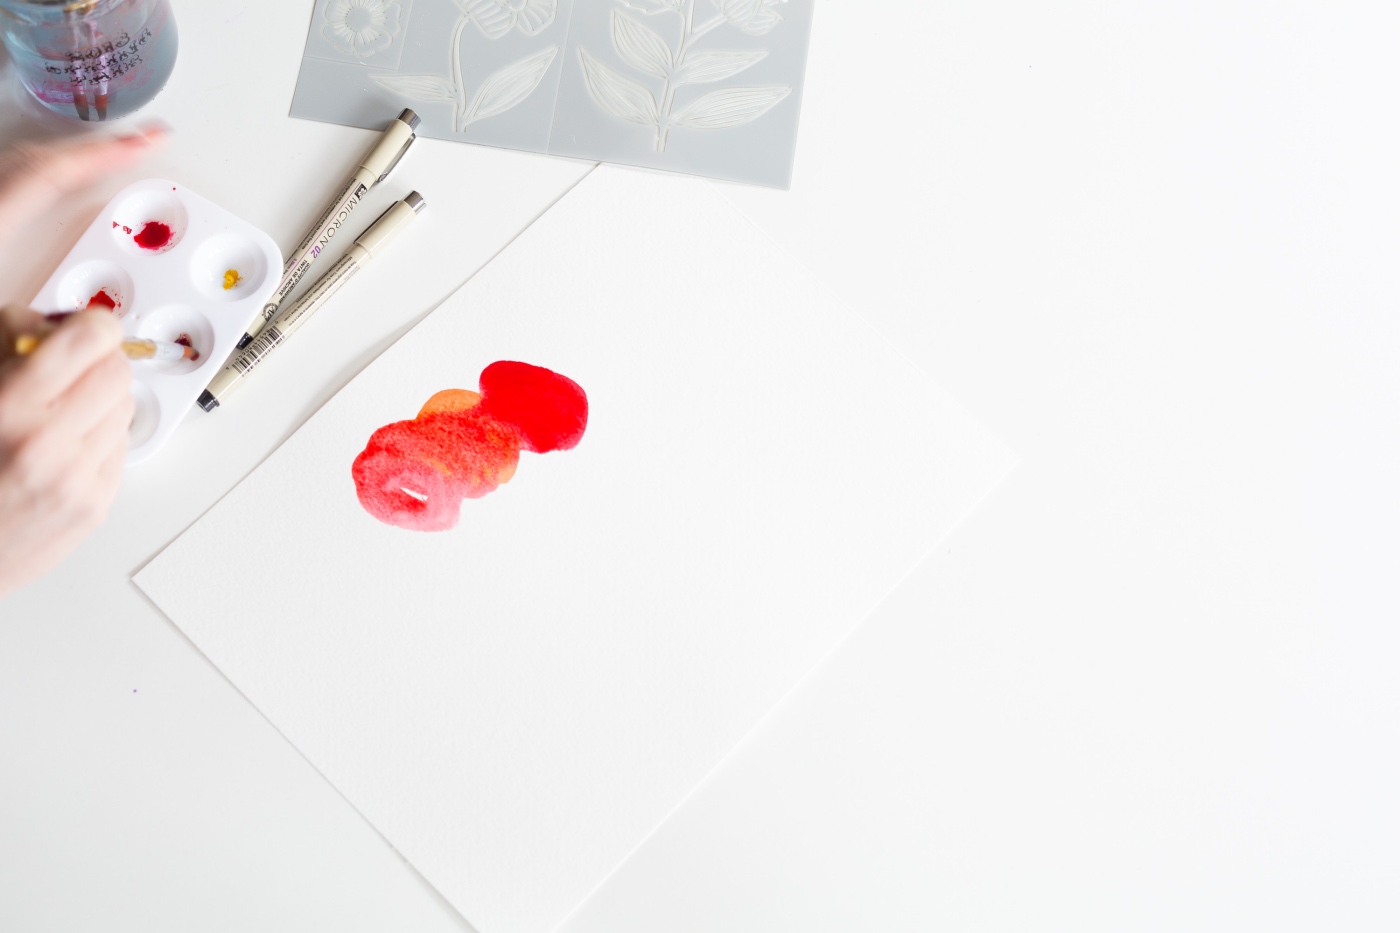
Start by painting a large section of the watercolor paper, a section that is larger than the stencil. The brush technique I used is a color blending/graded wash from the Blending Basics guide here. I used shades of pink, red, orange, and yellow. You could use any of the brush techniques and any color palette you like.
The important part is that it’s larger than the stencil you will use. So that the color field will become the background for the stencil.
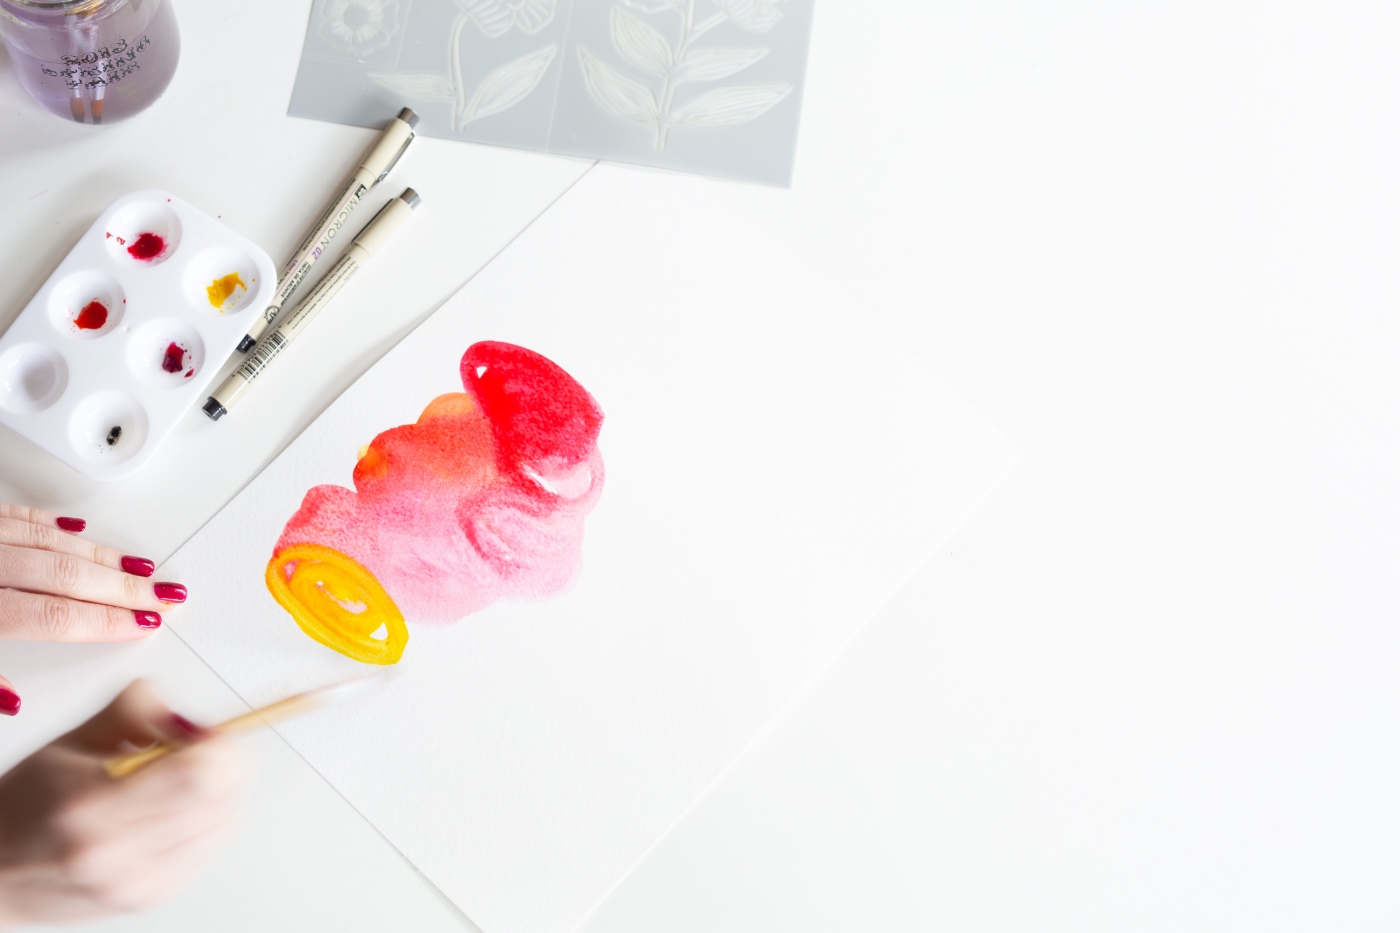
Now just fill in your watercolor until it’s to your desired doneness. And that’s all!
Before any of the next steps, you will need to let your watercolor painting dry completely. Watercolor dries quickly so this will only take about 30 minutes or so.
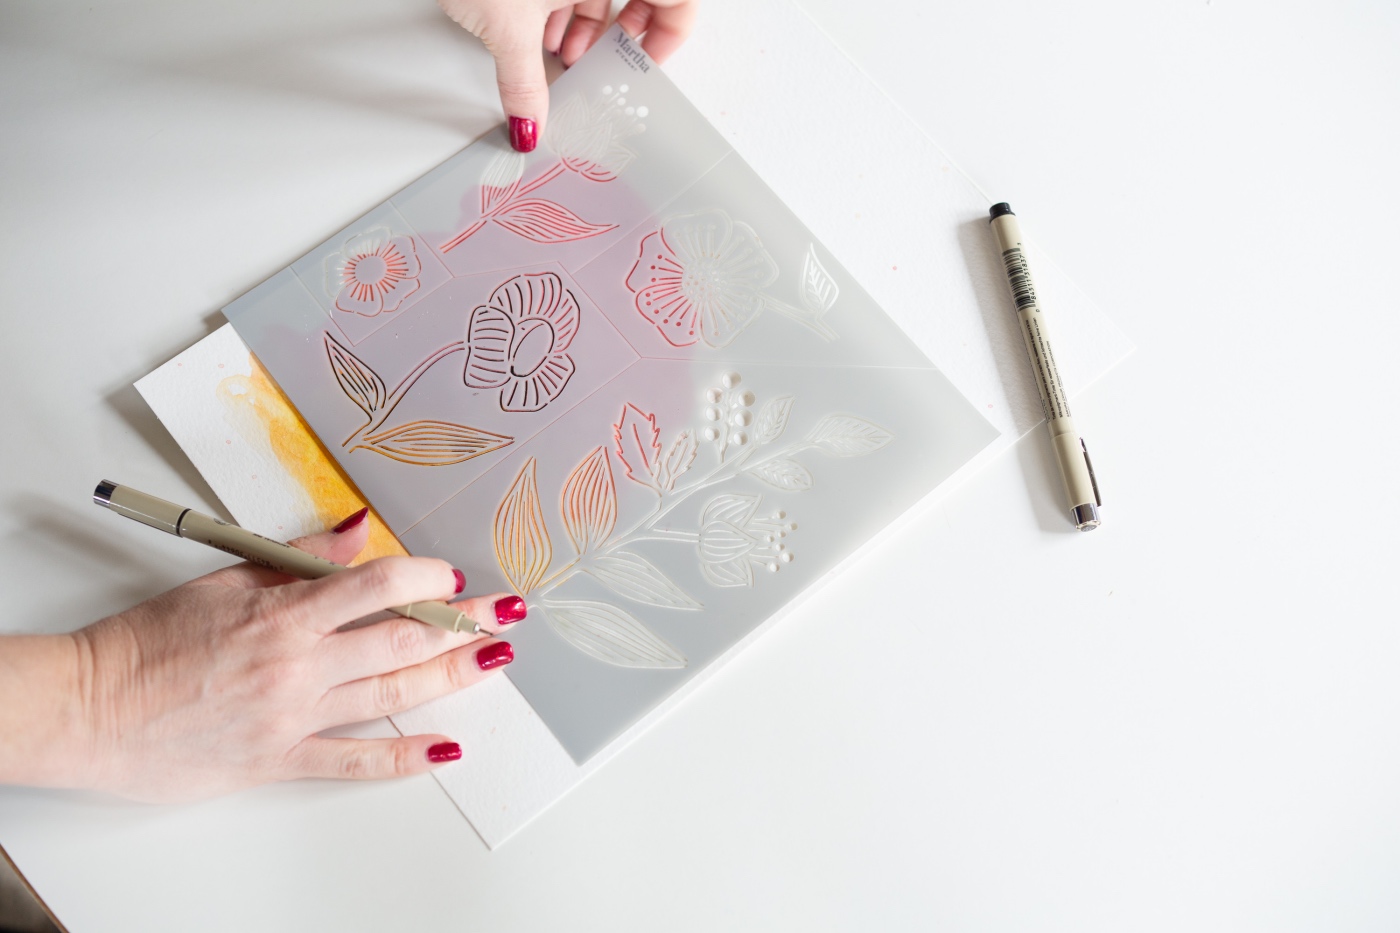
When you are ready to start stenciling, place the stencil carefully. It’s imperative to not let your stencil move as you are working.
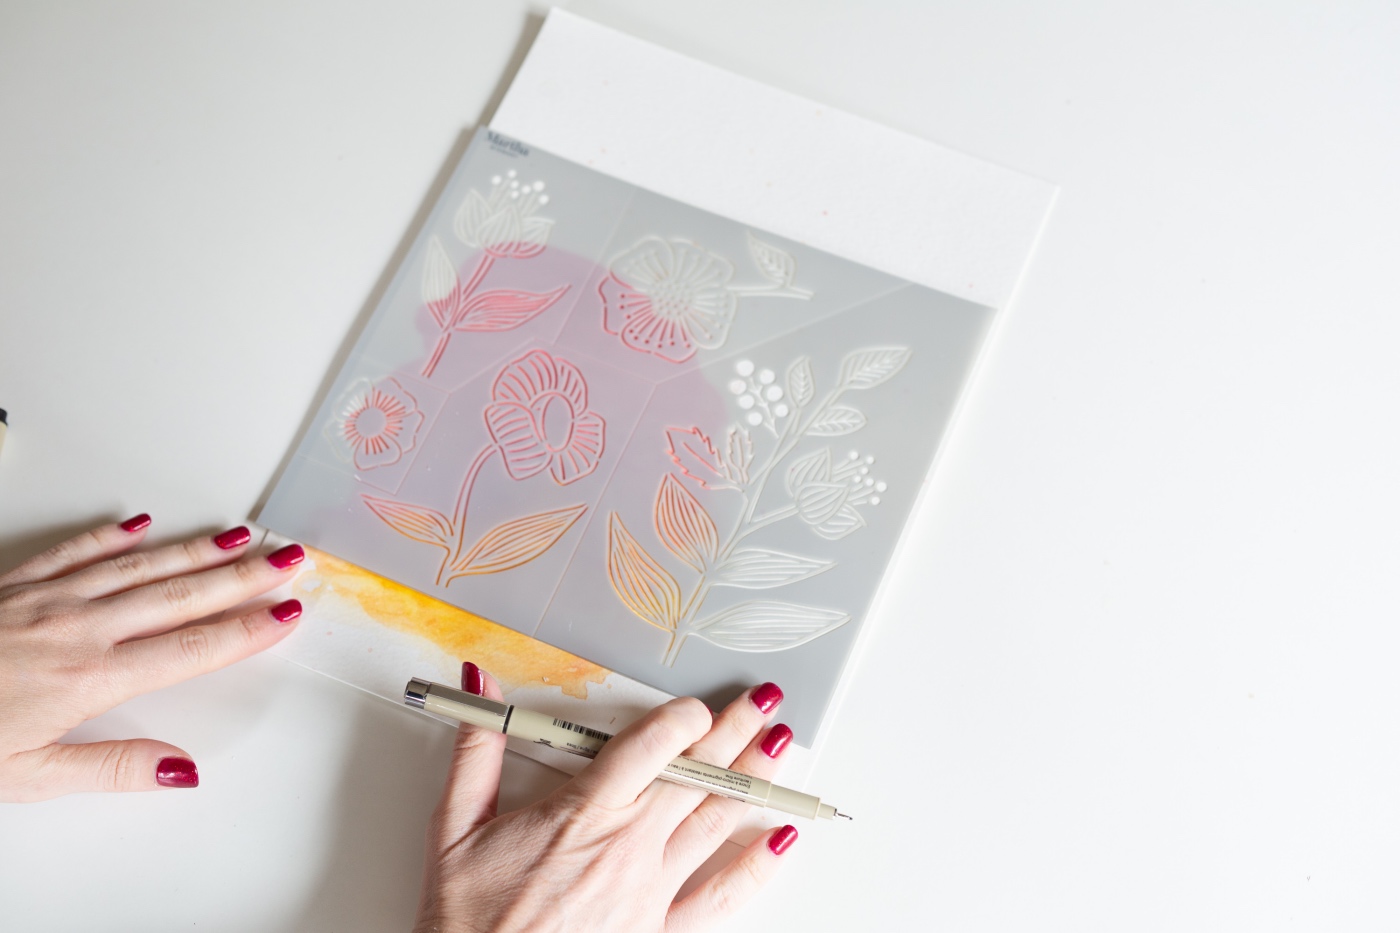
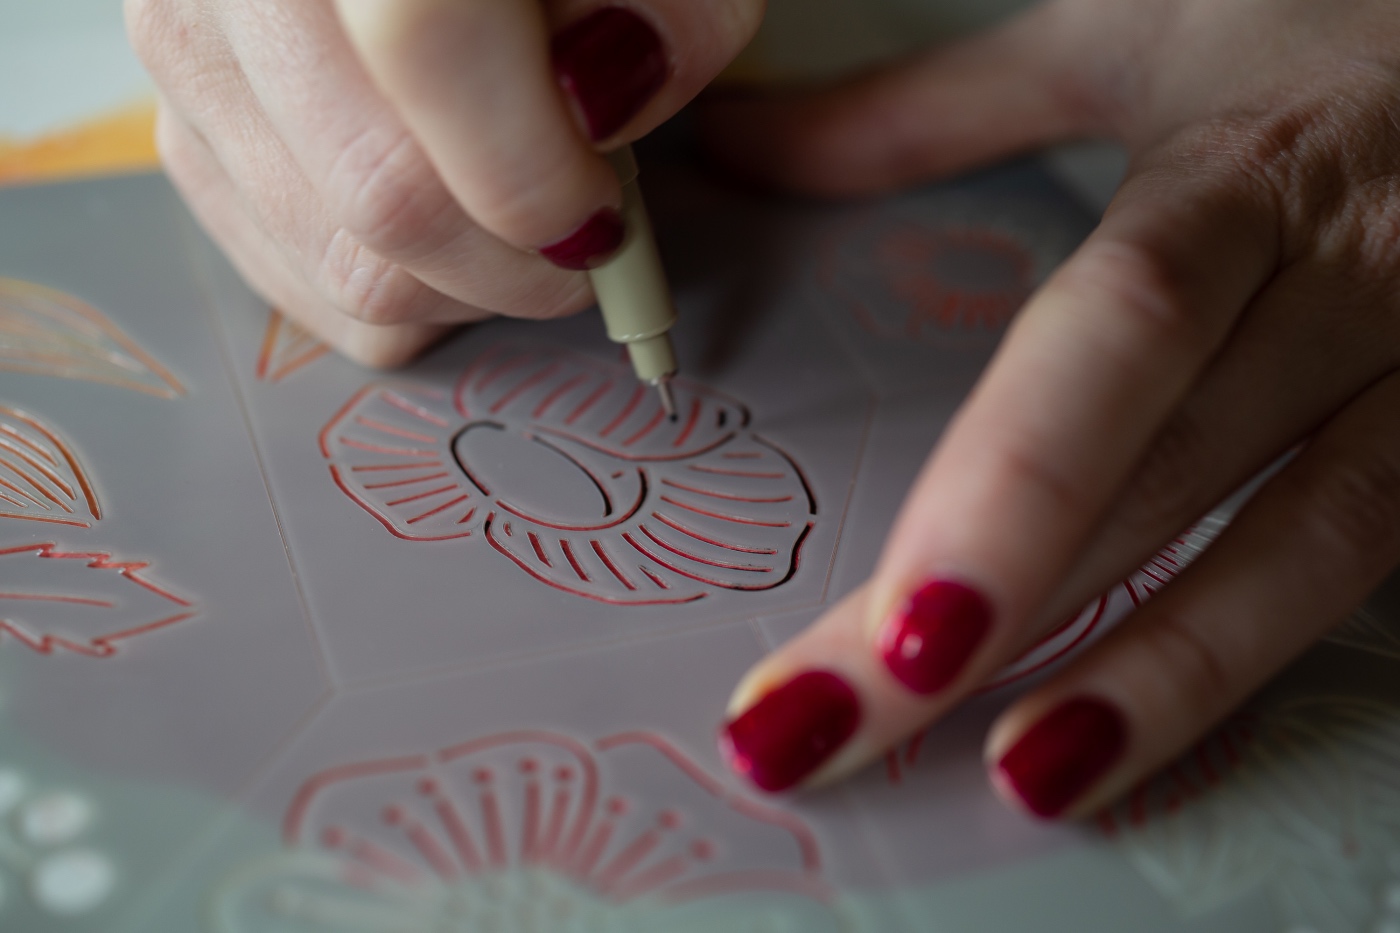
Slowly fill in the stencil. If your technical pen is smaller than the stencil, be sure to thoroughly trace the edges of the stencil.
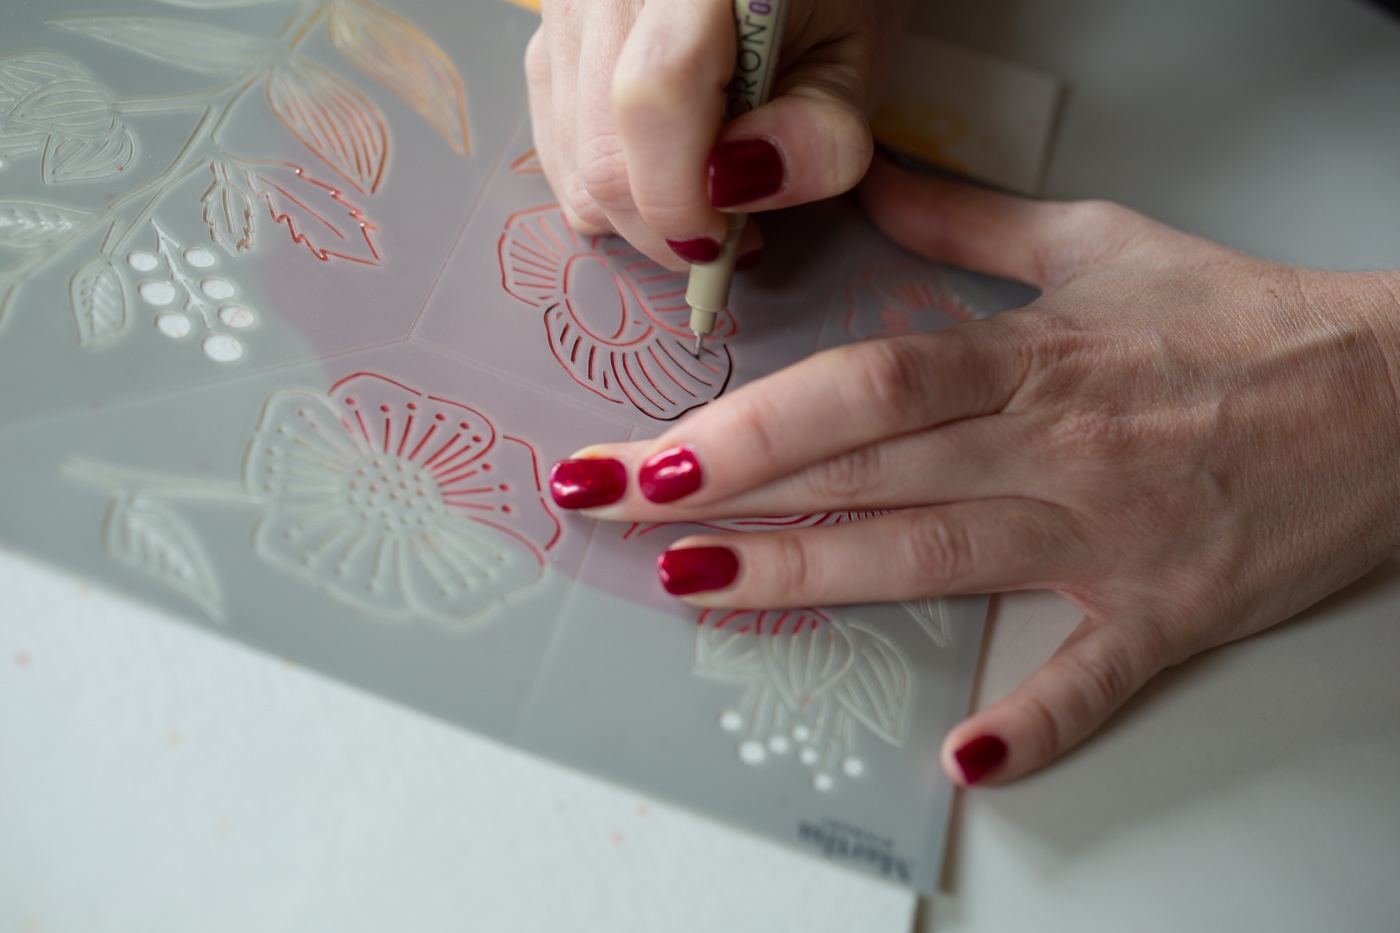
Technical pens are just perfect for this because they have a professional grade dense black line like you would see in an architectural drawing. Microns are an easy to find brand of disposable technical pens but they also make ones that you refill! This is a great supply to keep around because it comes in handy across lots of different DIYs.
Again, the trick here is to not let the stencil slip. I would consider just holding it with your hand. There’s nothing worse than taping it down, only to ruin the watercolor painting, as you remove the tape. Also, even with taping, the stencil could still move, so holding it with your hand is best.
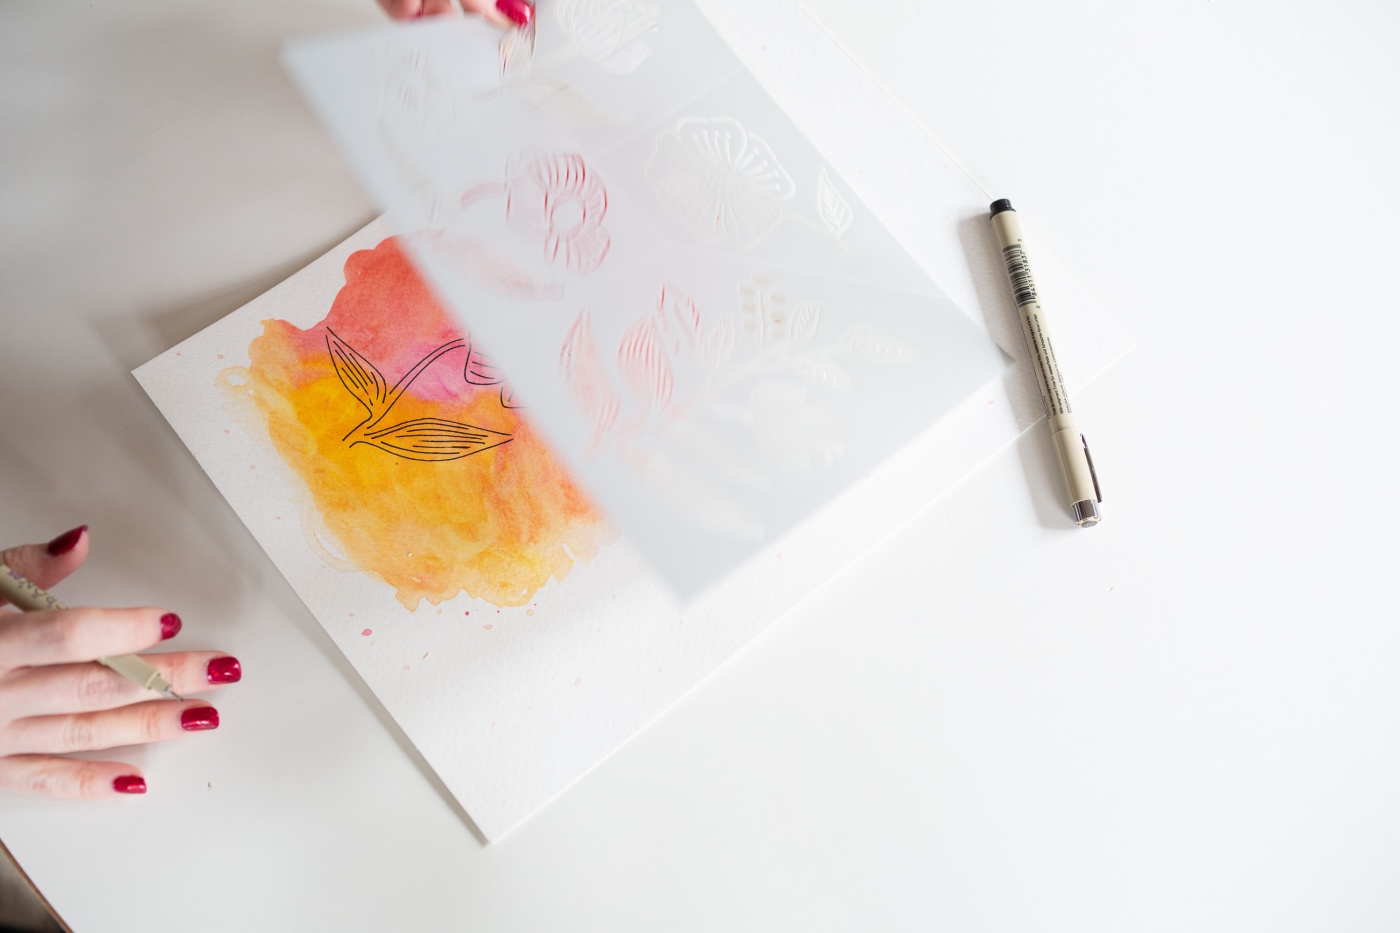
Once you are finished, reveal your graphic black image by removing the stencil! And here’s a little video of all those steps so you can see it in action!
Now that you’ve mastered this, consider what other stencils, colors, compositions would be perfect for this project. Since an Ink on Watercolor Stenciled Painting is all about creativity, you can try anything!
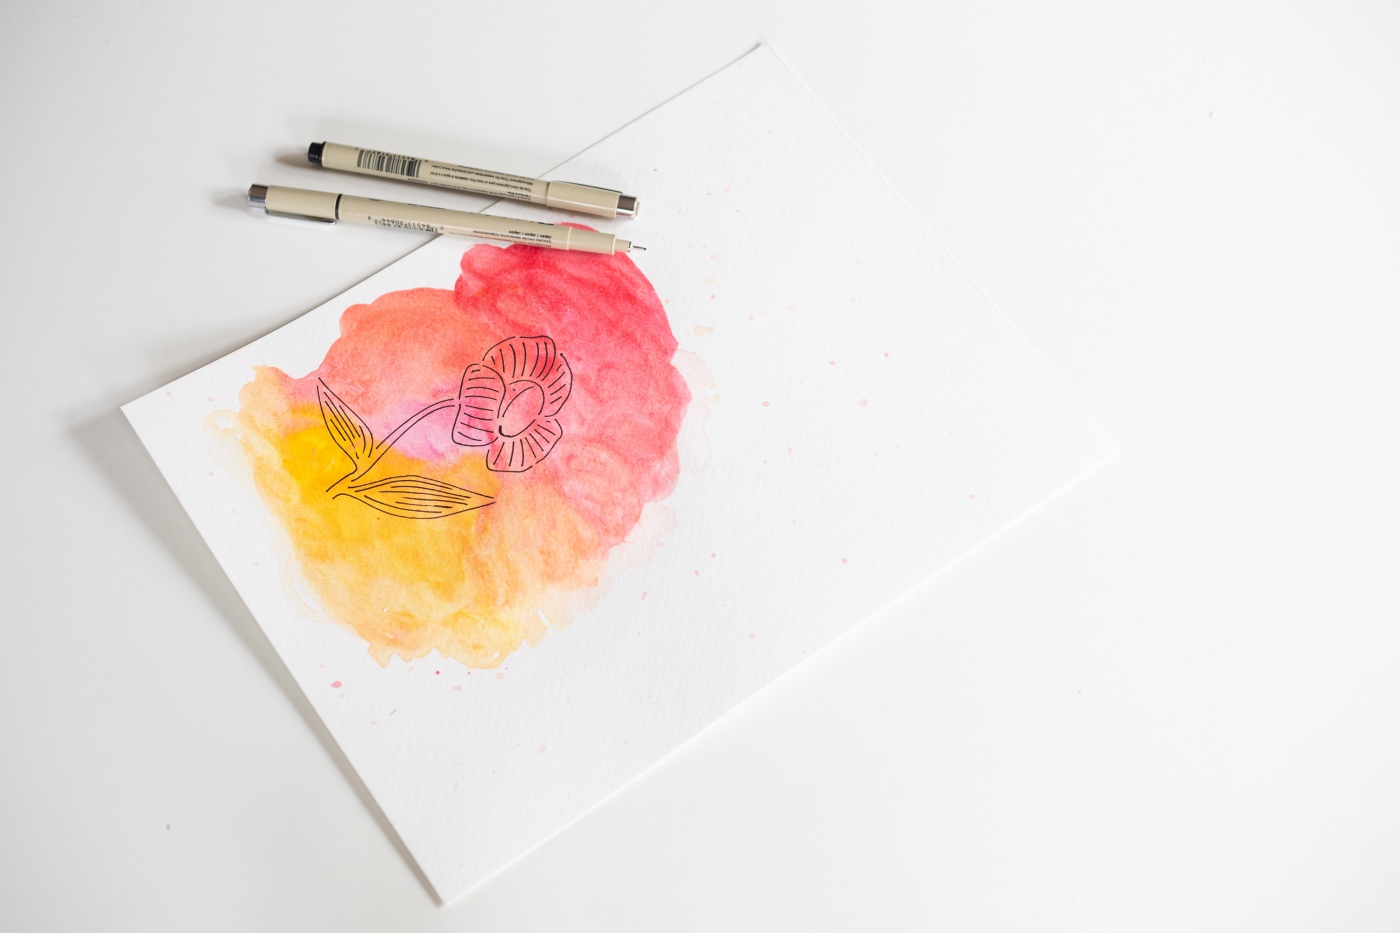
Once you are finished, add the piece to a frame, use thumbtacks to hang it on a cork board, or casually stand it with some cute objects like I did! And if you have to make one of these for yourself don’t miss out on shopping the February 2019 Craft in Style Subscription Box here at Pop Shop America.
Let’s Be Friends!
Insta | Pinterest | Enews | TikTok

Beautiful painting! Love how easy this project is for anyone to tackle. This would even look great on a DIY greeting card. Thank you for sharing you ideas 🙂
Cheers,
Jasmine