Nov
This project was one of those amazing creative moments that just hits you like a load of bricks and you think “OMG, that’s such a good idea – how did I not think of this before?!” I love moments like this because they often yield amazing projects. I think being excited about a project ultimately impacts the end result. The more excited you are about a project – the better it turns out!
This project can really only turn out well as it’s fairly simple to execute, plus there is a lot of sentimental value involved.
After my birthday back in September, I had a fresh stack of birthday cards (with envelopes) from family members ready to be stored away. I’ve always been the kind of person who saves special memories and cards. The only problem with doing so is that they get tucked away in a box and are never seen again.
I decided to remedy this problem by using the envelopes from my birthday cards and framing them to make a set of art. You of course don’t have to use just birthday cards, but I think that’s the occasion when people receive the most cards, thus you’ll have the most supplies!
I think it’s a great ideas to use the card envelopes for a few main reasons:
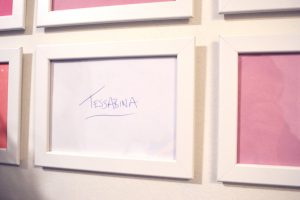
- The envelopes from the cards contain your name on them – which is such a huge part of you and is something that’s great to use to personalize your space.
- It’s very sentimental because you can see all the different ways that your name is written by different family members or friends. It’s especially important if you have envelopes left from a family member who’s passed away. It’s a simple, yet heartfelt way to remember them by. It’s projects like this that I love doing because there is so much meaning behind them. For instance, two of my cards have a nickname written on them that only my aunt calls me. I would take that any day over a random print that you picked up at Homesense!
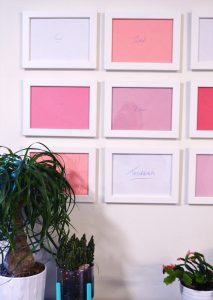
- If you have a ton of cards that you’ve saved up over the years, you can choose to do different colour schemes to suit your space, or pick a card from each member of your family / each friend. I lucked out and got mostly pink and white envelopes this past birthday, so I used those and added in a few from previous years.
- It’s the kind of project that can grow with you as the years go on. If eventually you’d like to include an envelope from every member of your family & friends, you can slowly build this project up until it’s got 20-30 or even 50 frames. Alternately, a great idea would be to start doing this project for your kids when they’re babies. For example, you could save the envelopes that their grandparents give them every year for their birthday and add another frame each year. I’m sure it’s something that your child would be extremely thankful for when they’re 25 and see the piece of their grandparents that you’ve been saving. An alternative, and possibly easier option, is to start saving the birthday/anniversary/valentines card from your partner and using them for this project!
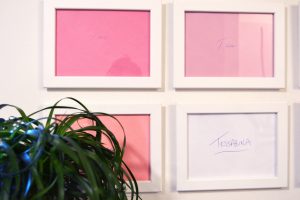
- From a design perspective, it’s very pretty. I find it very interesting to see all the different fonts and text styles that your name can be written it. I’ve also always loved handwriting and like to see all the different ways that people make their “T”. Quite possibly the most gorgeous envelope in my collection is the single “T” on the dark pink envelope from a university friend – I fell in love with the “T” as soon as I saw it!
So, now that I’ve give you all those great reasons, let’s start the project!
Birthday Card Envelope Art
Supplies:
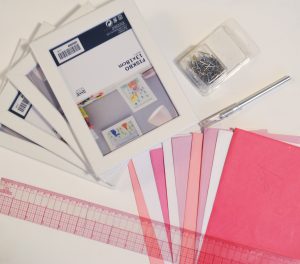
- 3-12 envelopes that are addressed to you (I would start with at least 3 and build from there)
- rubber cutting mat
- ruler
- exacto knife
- frames (probably the 5 x 7 size, unless you wanted to use a mat)
- small finishing nails – you’ll need as many nails as you have frames
- a hammer
Method:
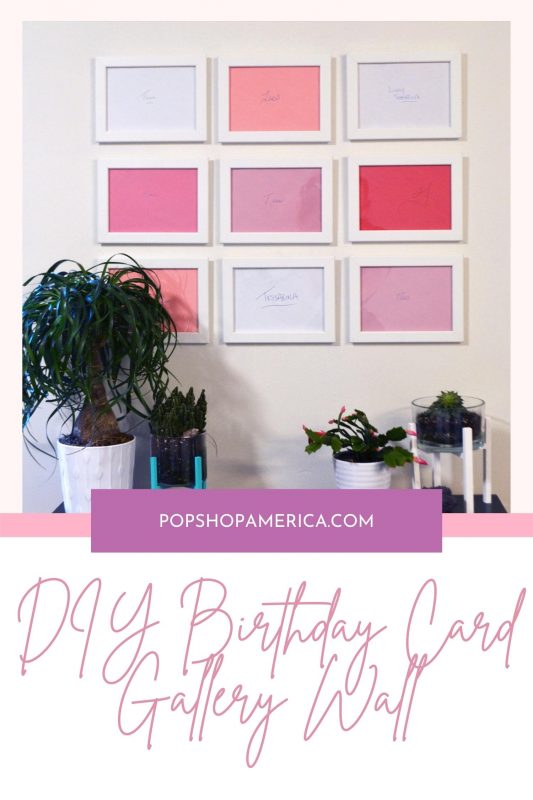
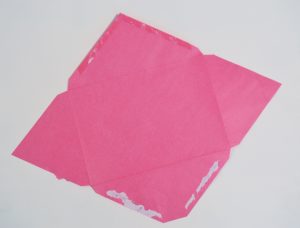
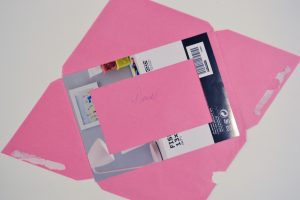
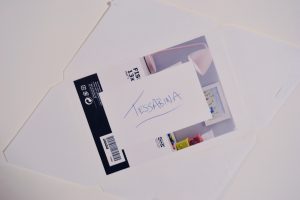
- Start by gathering the envelopes that you want to use. I chose 9 different cards all with a white/pink theme
- Take your envelopes and open up the seams so that it lays flat and looks like this:
- Take one of your frames and remove the stock photo that’s in there.
- Using your ruler, cut a rectangle out of the stock photo so that all you’re left with is a one inch border
- Pick an envelope and then lay your paper border over the envelope. Use this to centre your written name within the border. By using this paper border that you’ve made, you can make sure that you’re cutting your envelope to the exact size of your real frame. Cutting the stock photo to make a border ensures that your name that was written on the envelope will be centred when you put it in your real frame, like so:
- Once you’ve got your written name centred in the border, cut around it using an exacto knife
- Proceed to insert your cut envelope into the real frame
- Repeat this process for the remaining envelopes
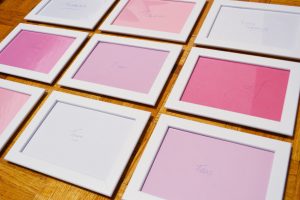
- Once all of your envelopes are framed, lay them out on the floor and decide on a layout. Which colours or letters work well beside one another? I rearranged my frames a couple times before I decided on a layout that I liked.
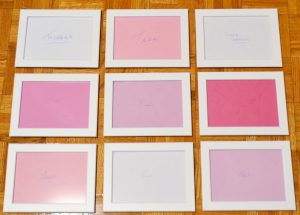
- When you’ve decided on an arrangement, hang your frames with your small finishing nails. Now, I’m not an expert in hanging and spacing frames, so whatever way suits you best, please do that. Mine aren’t exactly perfect, but they came out pretty decent.
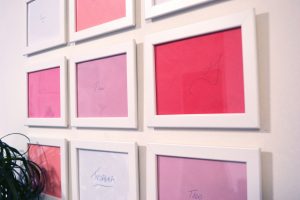
Now, all that’s left to do is step back and admire your beautiful, sentimental & very personal project!
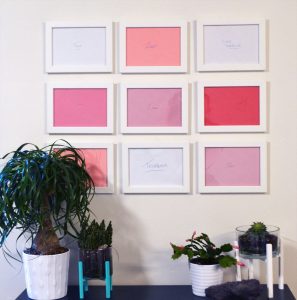
I absolutely love how mine came out! I chose 9 different cards, and they work perfectly in the space above my dresser. I like that it’s a personal statement, but it’s a more subtle one written in gently flowing handwriting (for the most part)!
I’d love to know what you think of this project, and any results from you trying it yourself!
xo, tess.
Follow Tess Ciarloni at
Angean Blog | Facebook | Twitter | Instagram | Pinterest

Let’s Stay Friends!
Insta | Pinterest | Enews | TikTok