Craft in Style Subscription Instructions, DIY
DIY Ice Dyed Blanket with Snow

Feb
When it’s cold outside, you gotta find fun ways to enjoy the outdoors without staying outside too long! And ice dyeing with snow is a perfect way to do just that.
Ice dyeing with snow is easiest when the snow is melting as winter turns to spring. But you can also make it work on any snowy and sunny day or by bringing the project into a warm area where the snow can melt – for example in a bathtub inside.
Beyond those needs, it’s really fun, easy and makes a style of dye that’s really unique! So let’s make it.

Supplies to Make an Ice Dyed Blanket with Snow
This Kit from Pop Shop America
or
A Queen Sized Cotton Blanket
Rit Dye Or Another Dye Brand in Colors of your Choice
Note: 2-3 Colors are Best, We Used Teal, Denim, and Navy
At Least 4-6 Gallons of Snow (or Ice)
Gloves
Optional: Rubber Bands, Wood Boards, Oversized Clothespins

Ice Dyeing Prep:
Before you get started with most dyeing projects you have to rinse your project. Always start with a wet blanket and rinse any dirt, debris, starches or additives from the fabric so you can start with a clean surface. When your blanket is wet, it will help the dye move through more evenly to help create a gorgeous effect.
Next, plan your pattern with oversized rubber bands sections of wood, or oversized clothespins. You can find a lot of different pattern ideas here. You can even use this ombre dip dye pattern for inspiration. To make rounder shapes use rubber bands. To make geometric shapes try wood blocks.
Or you don’t have to use any patterning tools at all! My blanket looks folded, but what’s even better is if you scrunch and bunch your blanket an an abstract and organic way.
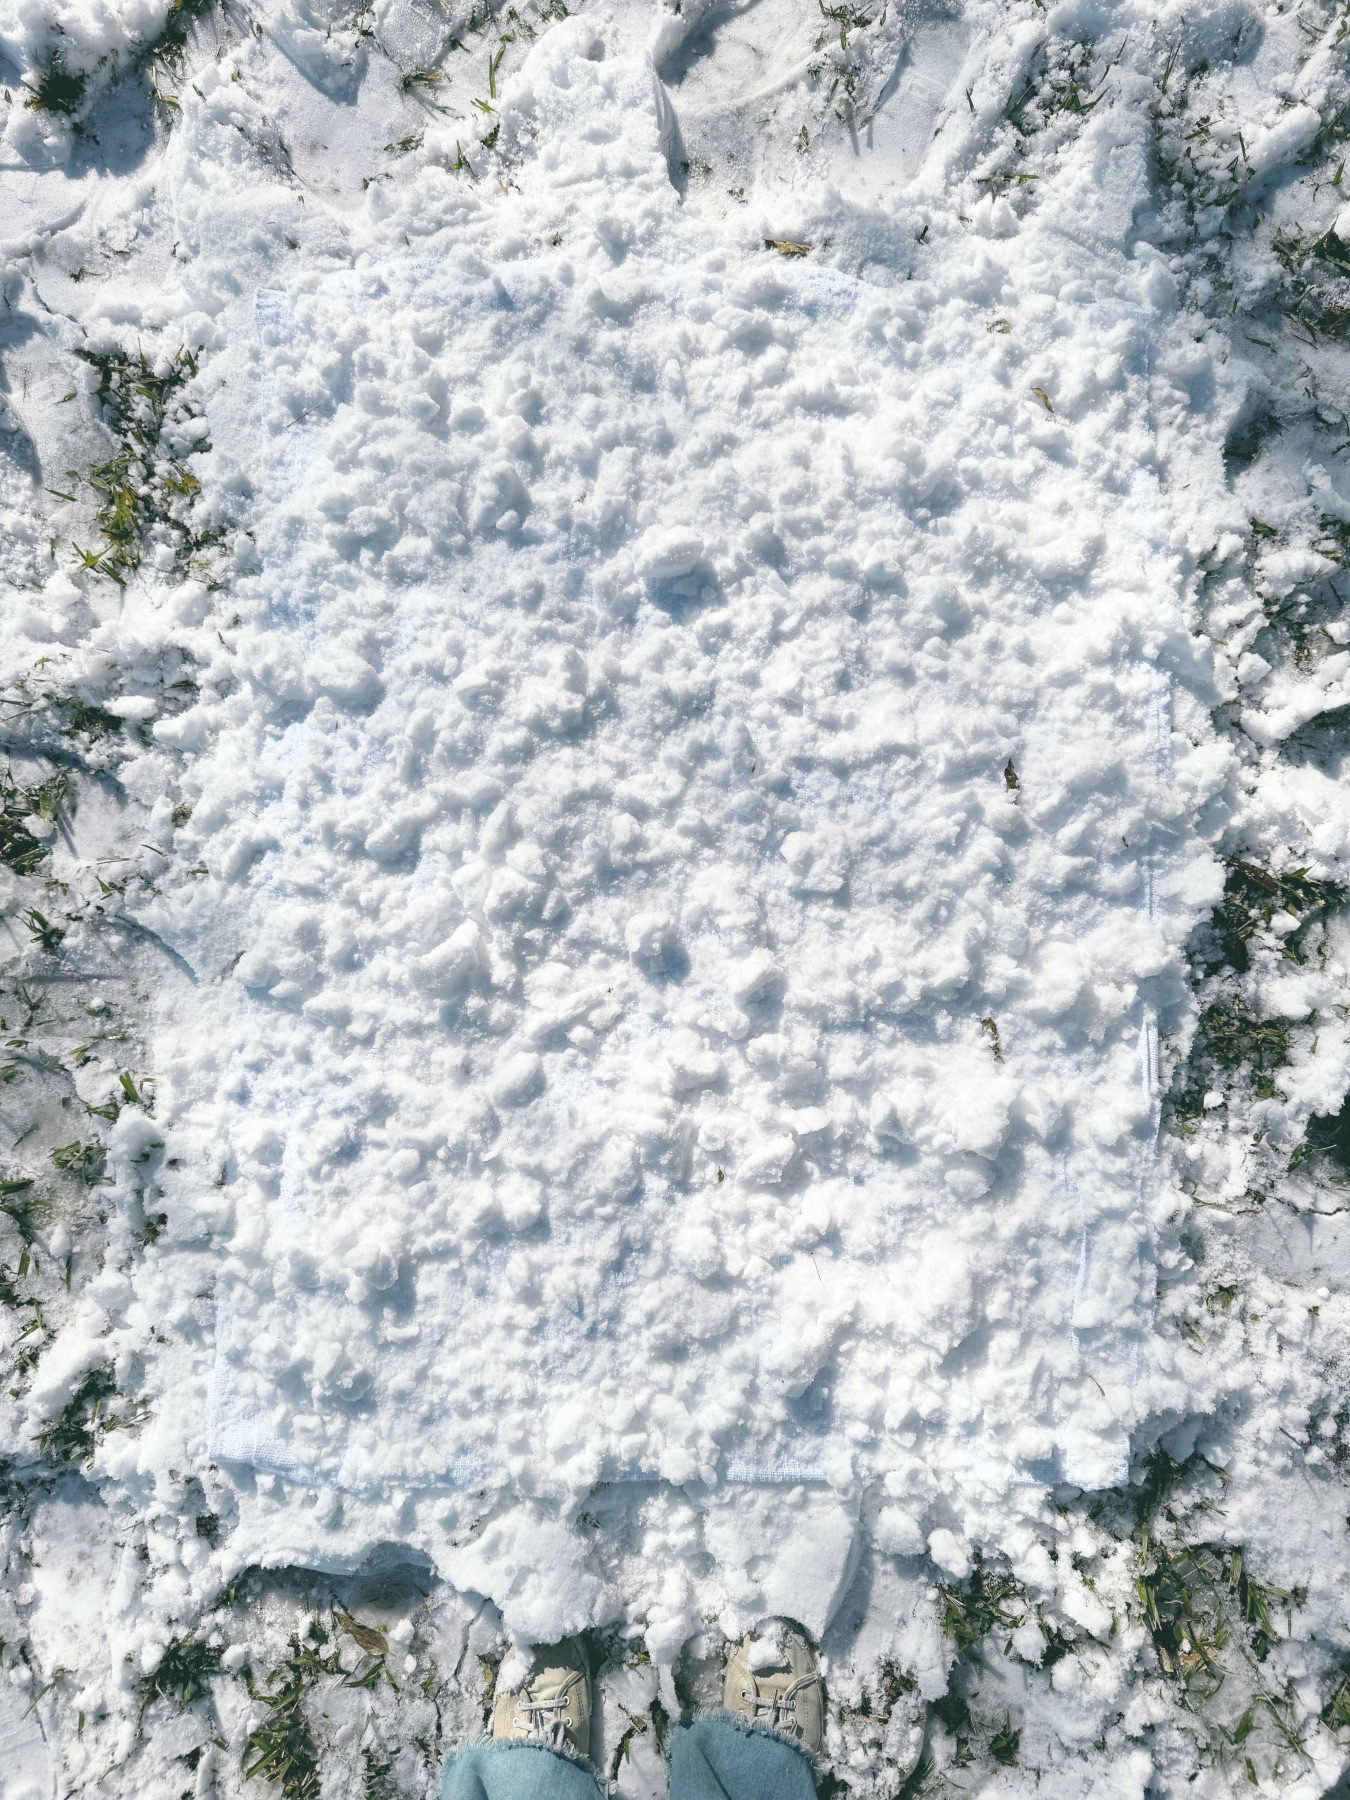
Cover Your Blanket with Snow:
Next, cover your blanket with snow or an even layer of ice if you prefer. Ideally you want the snow to be a few inches thick. Powdery snow is great but ice works well too!
If you can’t leave a project outdoors, like if you are in a major city, be sure that your project is elevated above a bucket or sink. That way the ice can melt and the excess water and dye can run off of the blanket instead of sitting on the surface of the blanket.
The ice or snow will never be perfectly even and that’s okay! Just make sure that your blanket is still wet and everything is decently covered.

Sprinkle Your Dye Across The Blanket:
For a queen sized blanket, you will just need a tablespoon or two of dye. Sprinkle the dye across the blanket. You can sprinkle it abstractly as I did. Or you can concentrate colors in certain areas. Just have fun with it!
Remember this project works well when you use 2-3 different colors.

Let the Dye Set:
Once your dye is sprinkled across the snow or ice, leave the project alone. You will want the dye to set for at least 30 minutes and even longer for darker colors. Pro-Tip: Dyed items will look darker before the excess dye is rinsed out. Keep this in mind to choose your ideal colors.
In a dream scenario, leaving the blanket outside on a sunny day that snow is melting is really ideal. For this method, just allow the snow to melt and once it’s melted and it’s been at least 30 minutes or longer, bring the blanket inside.
If you are using ice, just allow the ice to melt fully and any water to run off and bring the blanket inside.

If it’s not a day that snow is melting, that’s okay! Just bring the project inside when you are ready and allow it to finish melting inside. Remember, dyed items will look darker before they are rinsed!
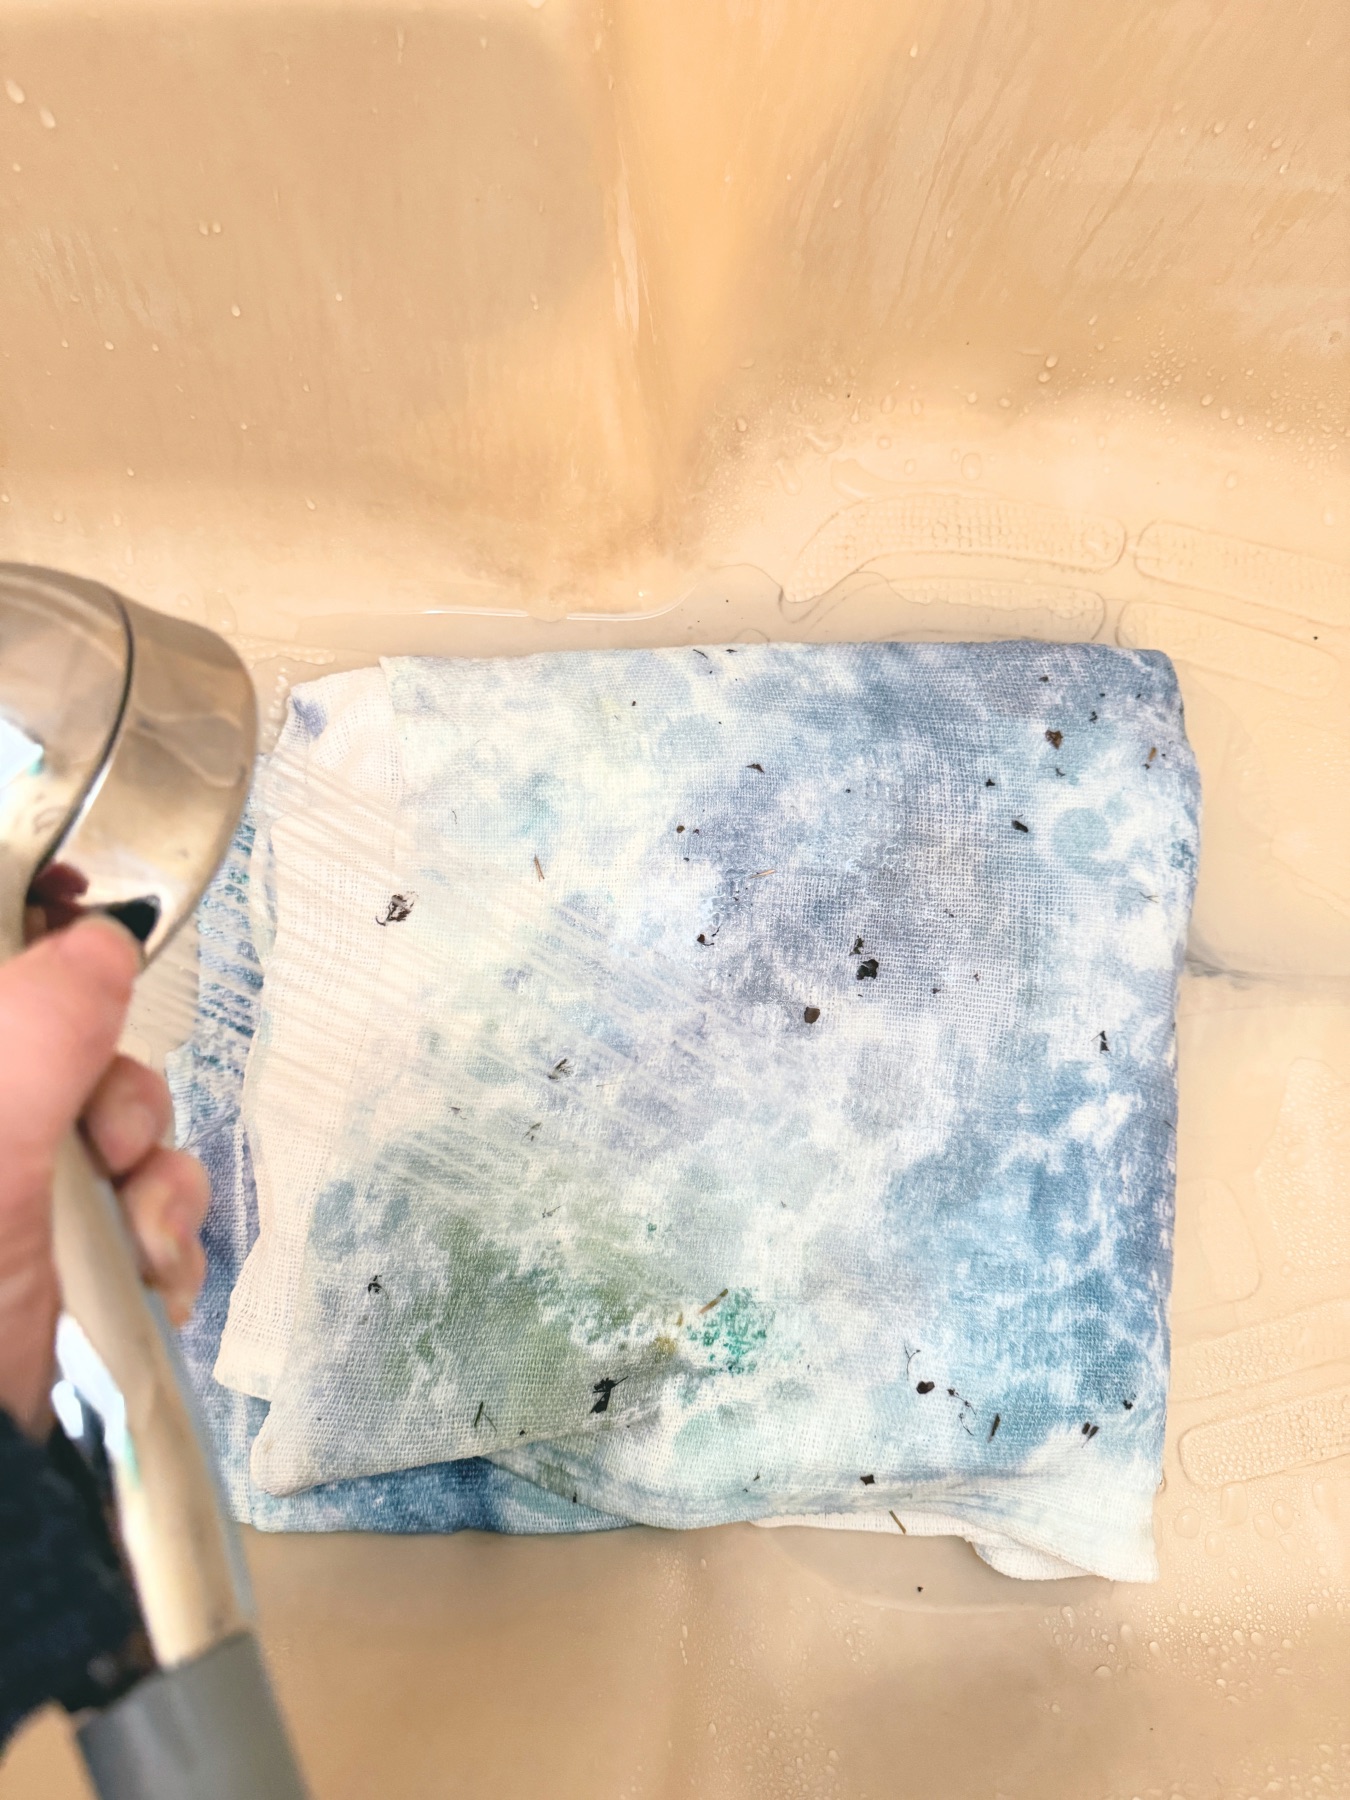
Rinse the Dye Out:
After your 30 minutes or longer, place the blanket in a dark or stainless steel sink, bathtub, or even rinse it outdoors with a hose. Just rinse the blanket until the water starts to run clear. The dye is already permanent but will lighten as you rinse it.

Launder Your Blanket:
Once the excess dye is rinsed, dry your blanket in a normal dryer on it’s usual settings. Then you can wash and dry your blanket normally because the dye is already set!
Need a little extra touch of cute? I added tassels to my blanket! You can see how to add tassels to a project here or here. Dreamy, right? If you love this project, show us below or on social how your project turned out.
Let’s Stay Friends!
Insta | Pinterest | Enews | TikTok