DIY
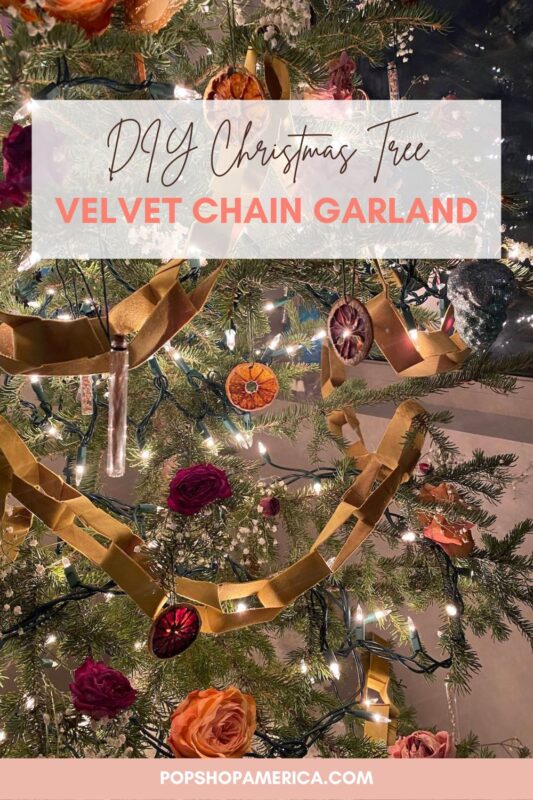
Easy Christmas Tree Velvet Chain Garland
Dec
I’ve been doing dried flower Christmas trees for about 4 years now. This year, I knew that I wanted to step it up a notch.
I grew up with our Christmas tree always having a garland, so it’s funny that I’ve never thought to do a garland on my tree. But sometimes, you just need to see the perfect inspiration photo or the perfect craft supply before an idea will strike.
For this garland, my friend had some velvet fabric that we’d previously tried to use to make chair cushions. It was SO difficult to sew with and kept slipping all over the place and jamming in the machine. So, needless to say, I was a bit hesitant to use it. But, I figured that with a garland like this, I could put it together easily and not have to sew it, so I was willing to try. I was nervous about it slipping around a lot when I tried to cut it, but cutting it in a single layer helped! This means that it takes a little longer to cut out all the pieces, but it will ensure that they’re all even.
I’ve been really into chartreuse lately, so I loved this muted version for our Christmas tree. It picks up on some of the other chartreuse tones around our apartment and feels festive without being too bold. I used this garland on our tree, but you could use it in some different places around your home as well! Try putting it on a mantel or as part of a garland on your staircase.
A Note on Supplies
Let’s talk about the fabric to use for this project! Ideally, for this type of project, you’re going to want a fabric that doesn’t fray at all when cut. I chose a velvet fabric because it has a really luxe texture, but also won’t fray once it’s been cut. I’d choose a fabric that doesn’t have any stretch. Stretch fabrics are more difficult to cut and can start to curl around the edges – especially when cut in small pieces. If you don’t mind a frayed look, you could go with a thicker cotton fabric. However, I do think that velvet is the best choice here!
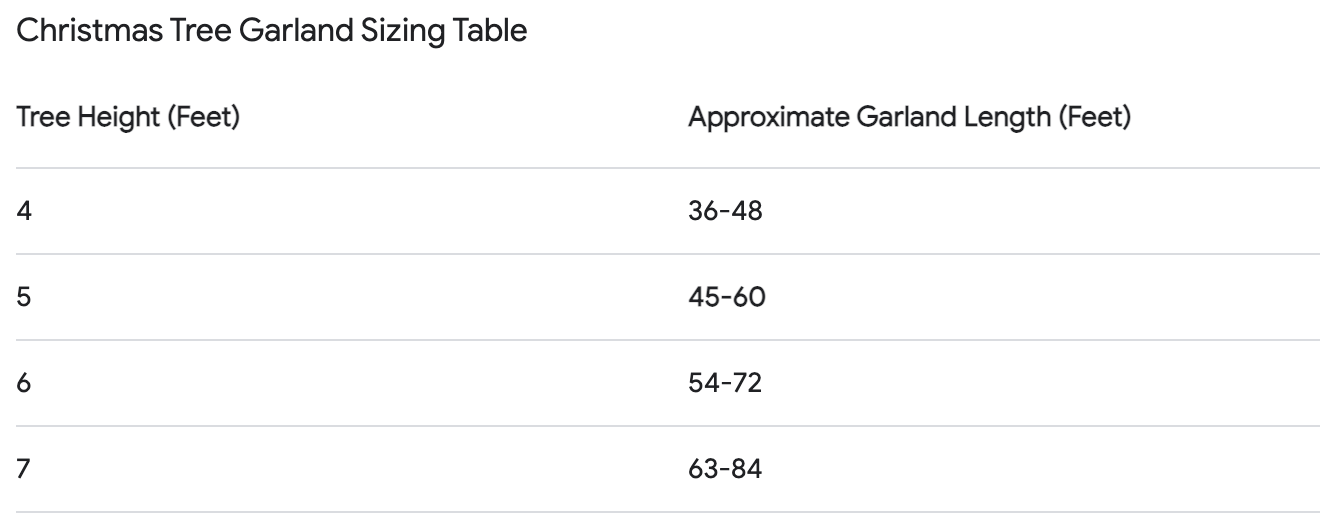
The amount of fabric that you’ll need will depend on how long you want to make your garland. Here’s a handy guide to how long you’ll want your garland to be:
There are several ways that you can assemble this garland. I think the easiest way is with hot glue, but if you don’t have a hot glue gun or don’t like the look of it, there are alternatives! First off, if you want this garland to be really strong and last a long time, you could sew the rings together. This will take a lot longer and will probably waste a decent amount of thread (especially if you have an older machine), but it will be sturdier. You could also use fabric glue if you have it. I did find that the velvet didn’t adhere very well to the fabric glue. If you’re using a different fabric and have the glue on hand, that would be a good option. For me personally, I found that the hot glue adhered very well and was the fastest method of assembly, so I’d recommend that you start there!
Colour Options
I decided to do this garland with a single colour, but if you have a lot of different velvets it would be fun to do a multicoloured garland with a few different colours. A monochromatic colour scheme would be really fun too. You could also even do larger coloured sections of about 12 links at a time to create blocks of colour for your garland. I also love the idea of doing two garlands, each in a different colour to add some fun coloured layers to your tree. It could even be cool to mix in some patterned velvet with your solid colours. The options are endless and totally up to you!
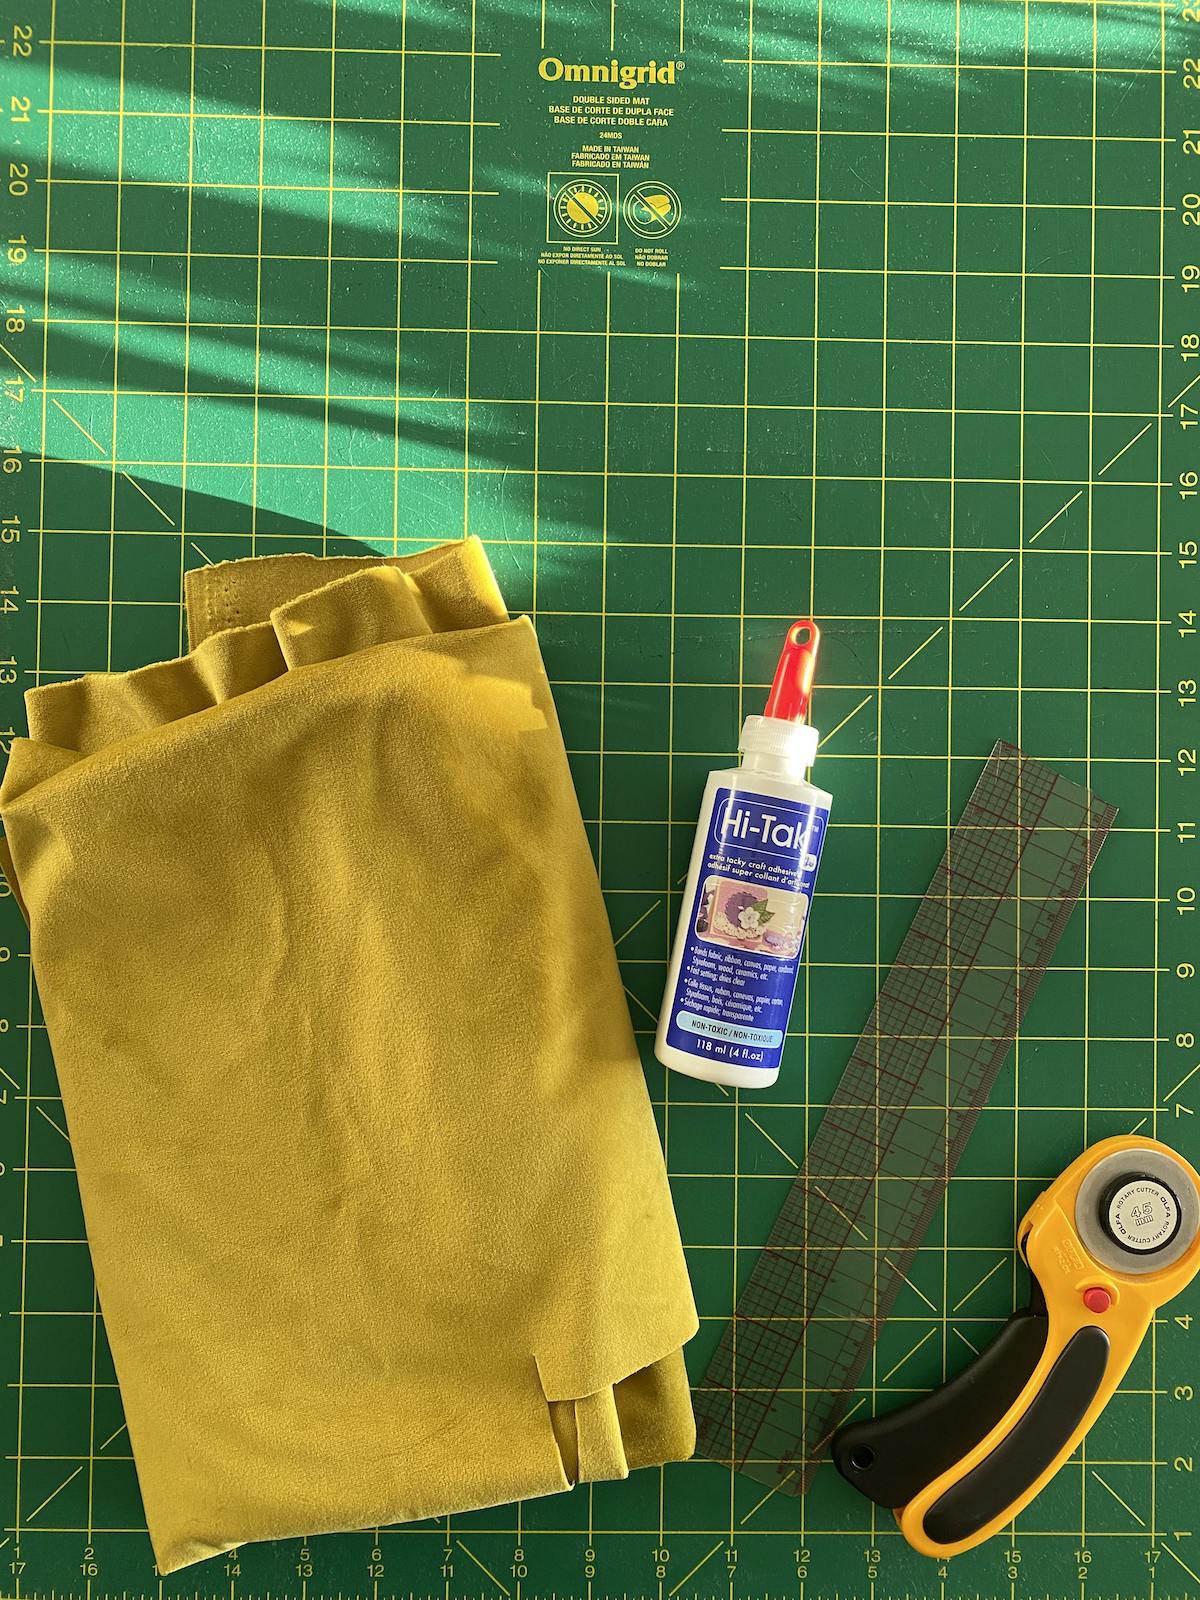
Supplies to Make a Velvet Chain Garland:
About 1 yard of medium-weight velvet fabric (this is enough for a 5-foot tree)
Hot Glue + Glue Gun
A Rotary Cutter
A Quilting Ruler (I like to use a quilting ruler for this because the 1″ marks and transparency of the ruler make it really easy to cut your 1″ thick strips)
A Cutting Mat
Cutting Instructions:
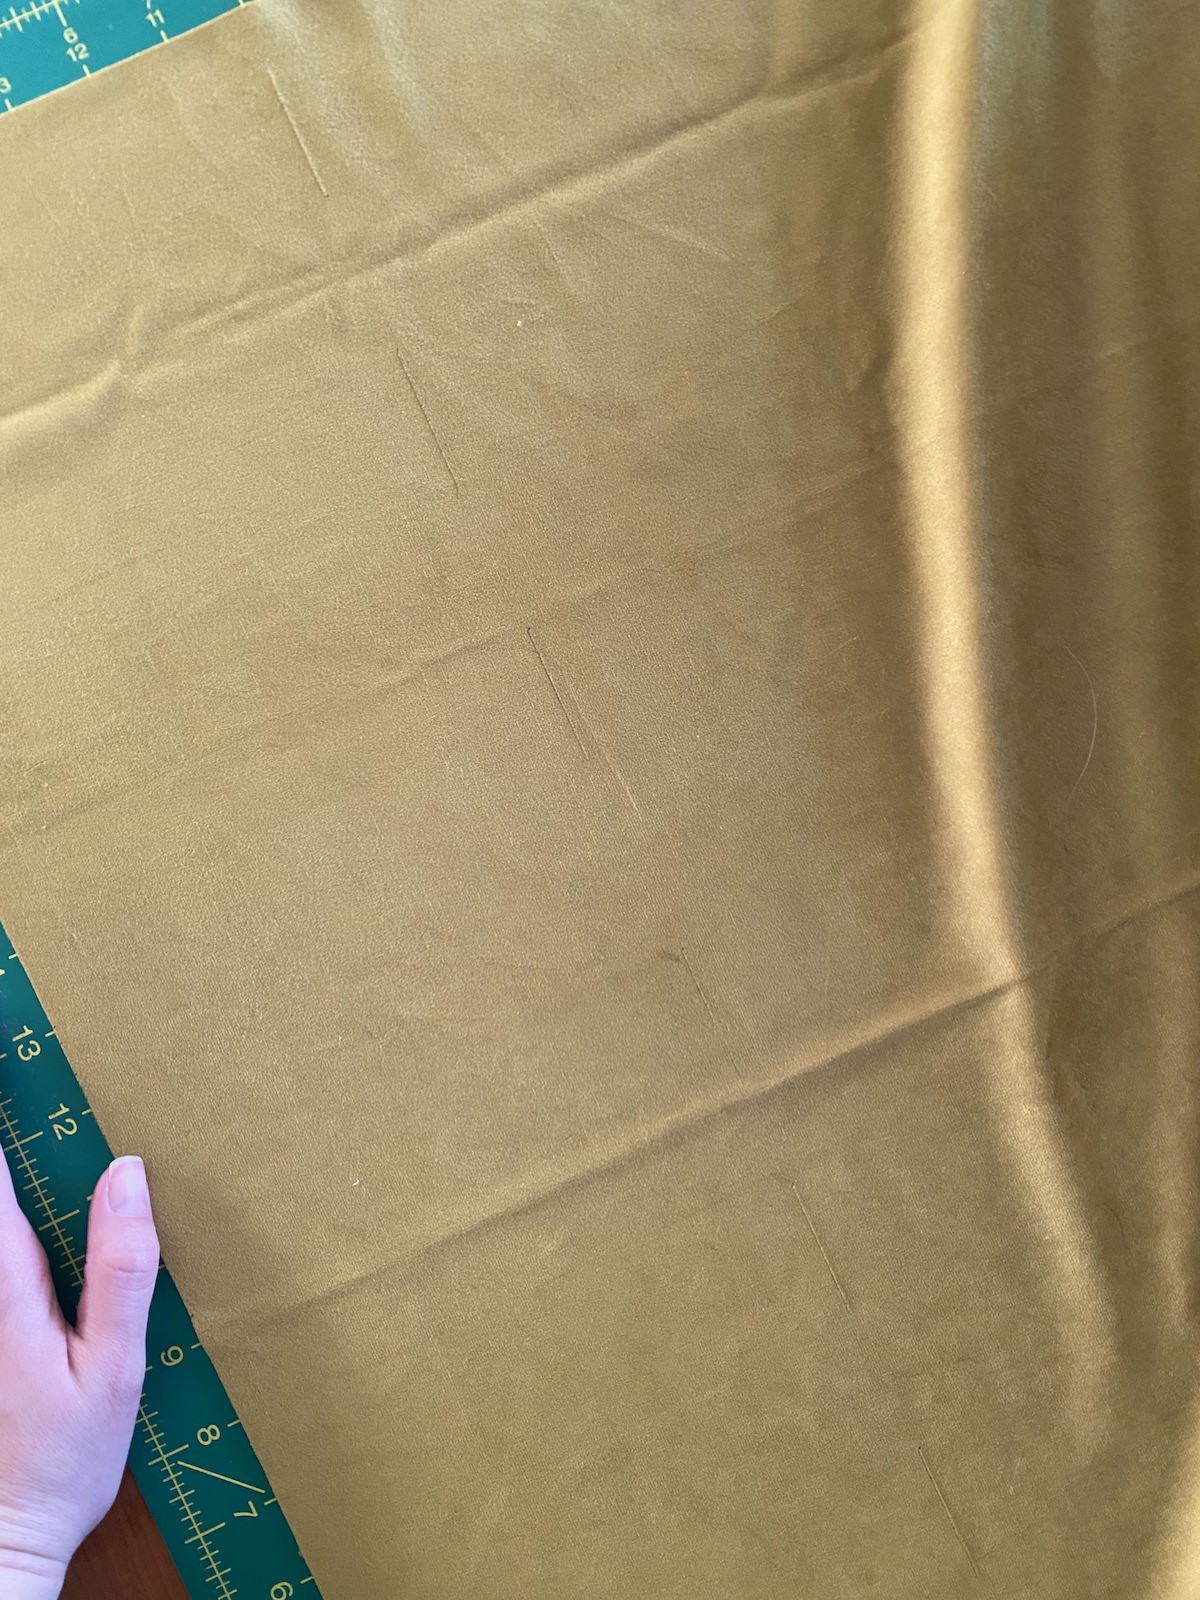
We’re going to start by cutting out our strips of fabric. With your fabric in a single layer, align one edge of your fabric with the line on your cutting mat, bringing the corner to where two lines intersect. We’re trying to make sure that our fabric is cut straight so that all of our pieces will be even. If your fabric isn’t perfectly straight, trim a little bit of the edges.

Next, go along the length of your fabric and make a mark 7″ from the base of the fabric. Make marks all along the length.
Then connect the dots so that you have a long strip of fabric that’s 7″ wide. Cut along the line that you made so that you’re left with a long strip.

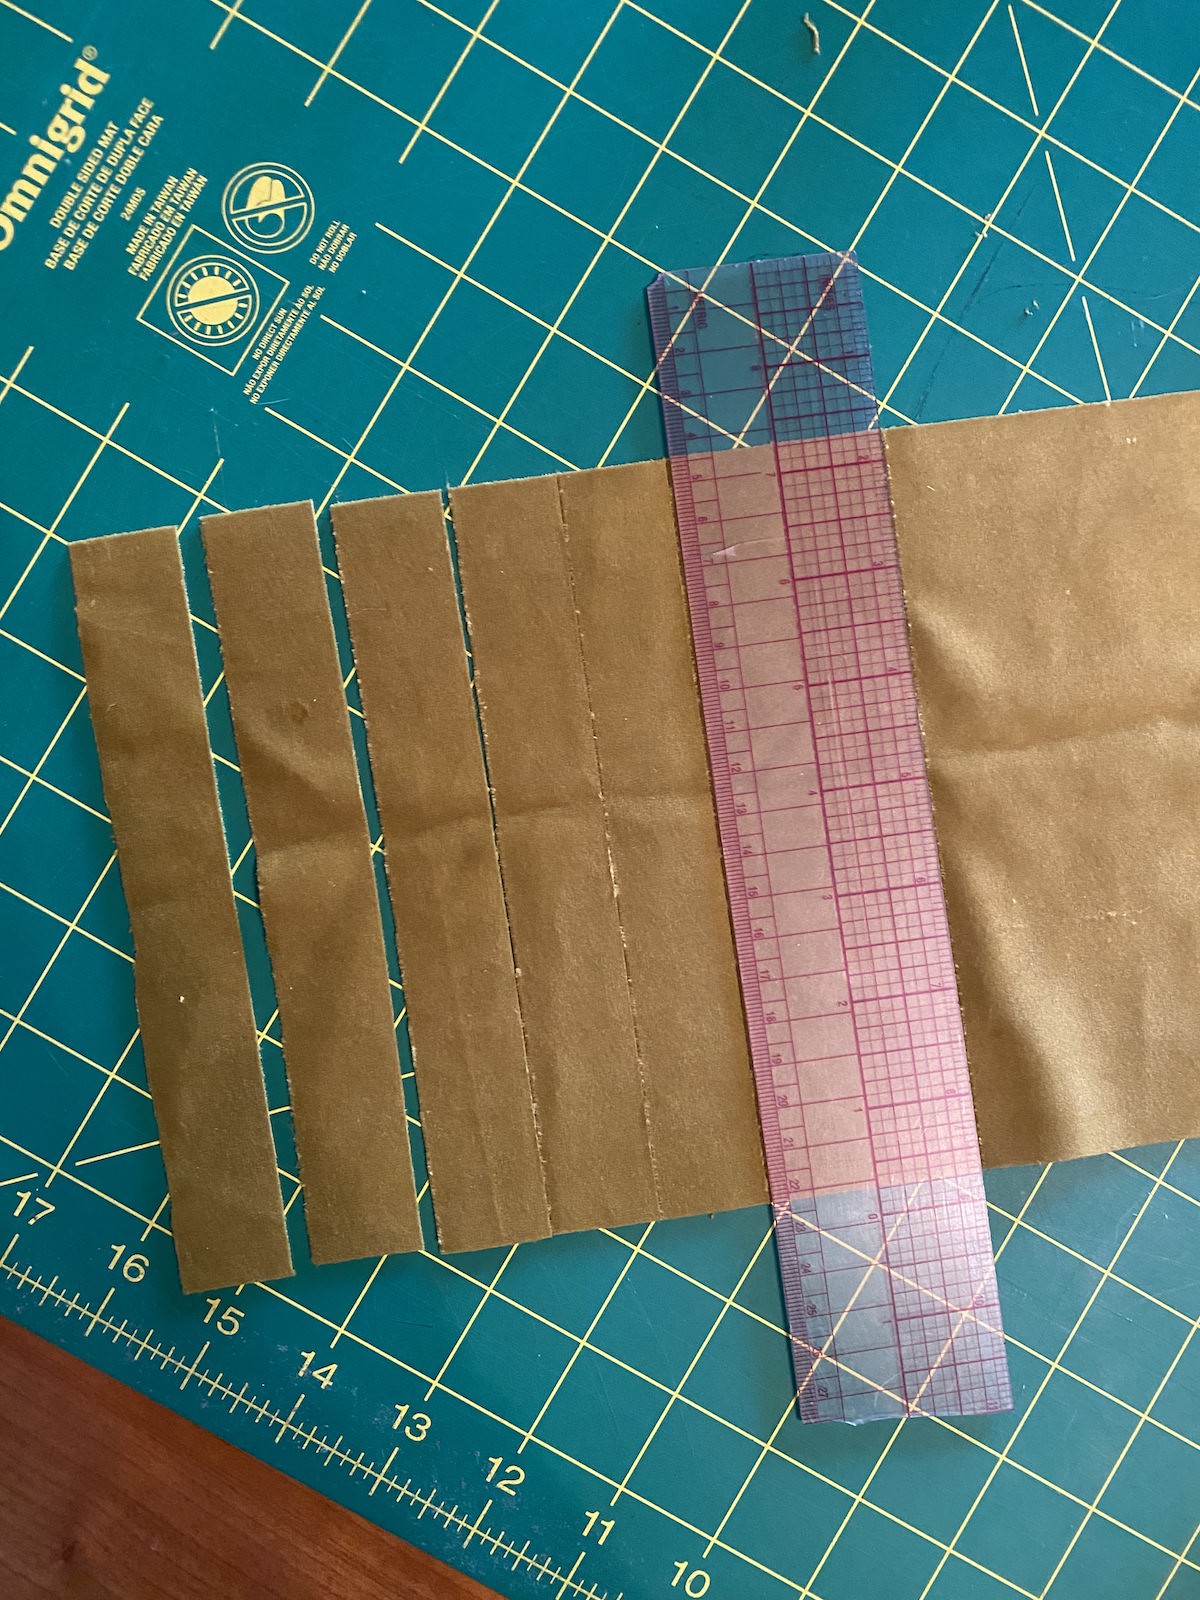
Now, take one piece along with your quilting ruler and line up the 1″ mark with the short edge of your fabric. There should be a 1″ x7″ strip of fabric that’s covered.

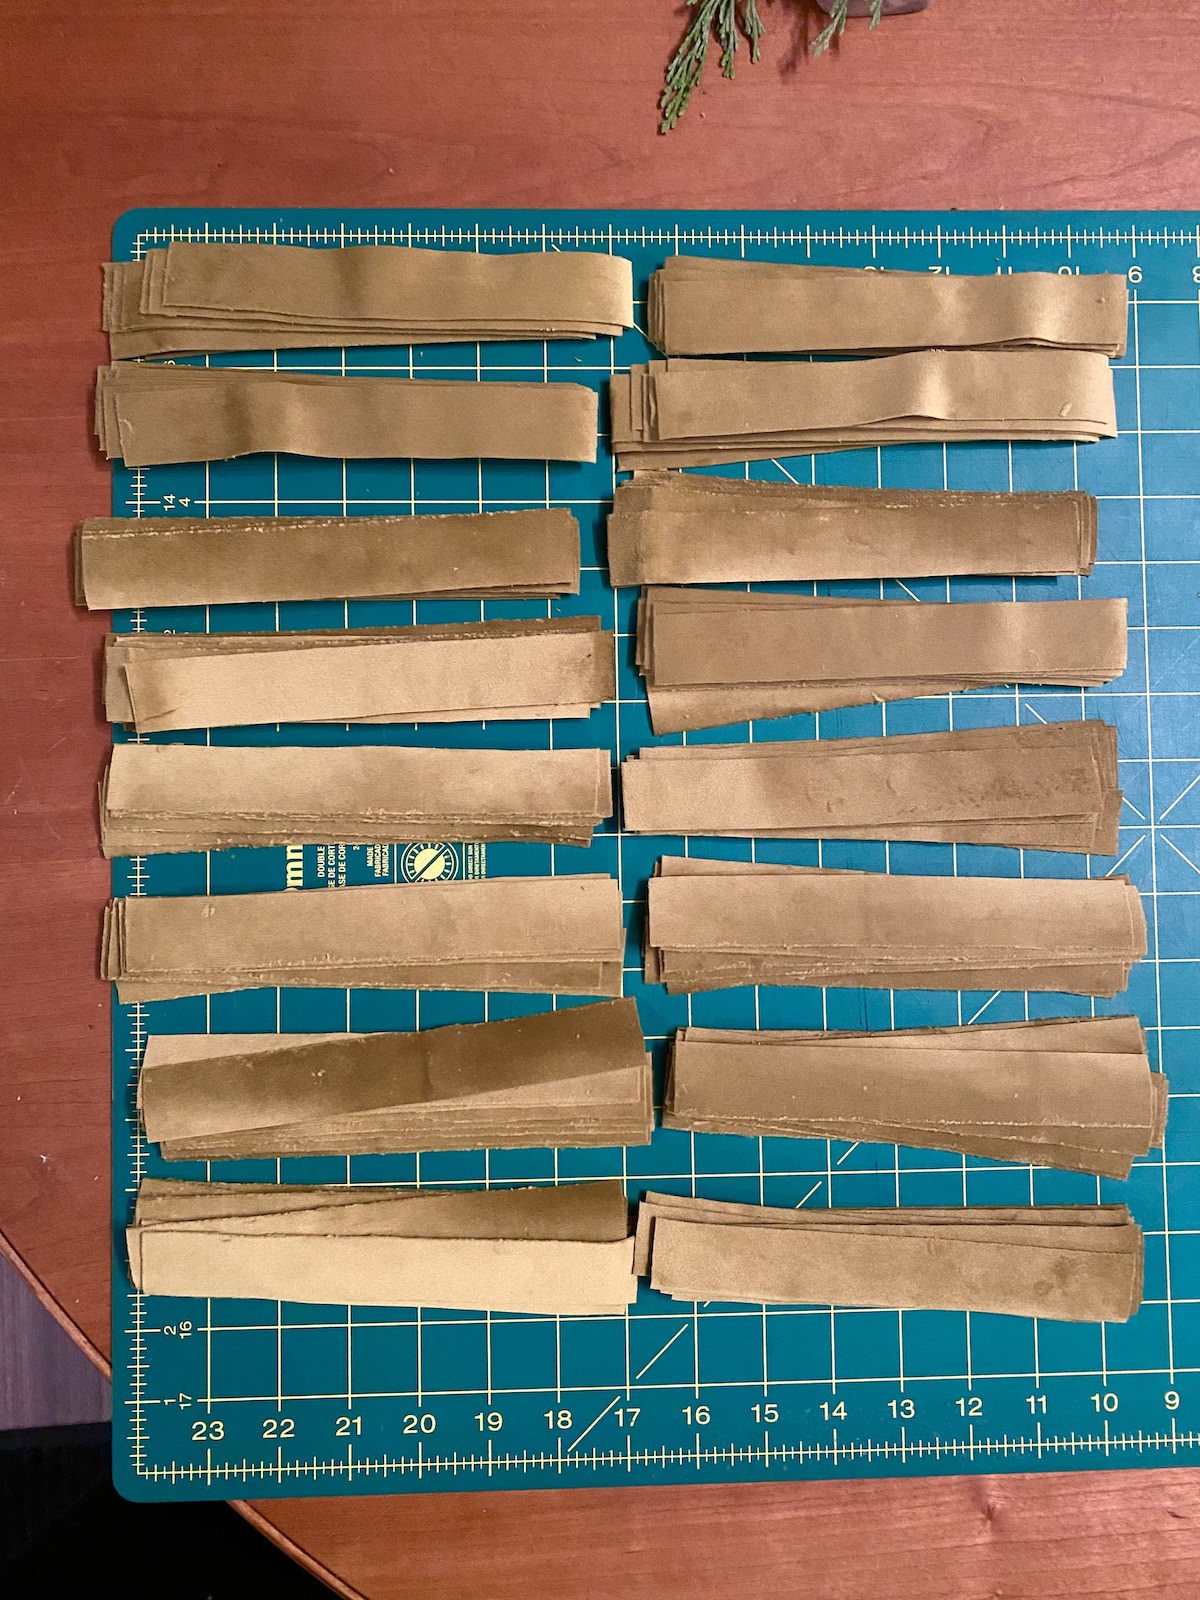
Take your rotary cutter and run it along the edge of the ruler to cut out your strip. Repeat for the remainder of the strips in the row. There may be a little bit of fabric at the end that’s not super straight that you can just discard.
Once you’ve finished that strip of fabric, continue with steps 2-6 until all of your fabric is cut.
When you’re done, you should have about 160-200 strips of fabric. This is enough for a 4′ mini tree.
Glueing Instructions:
Once all your strips are cut out, it’s time to start glueing!
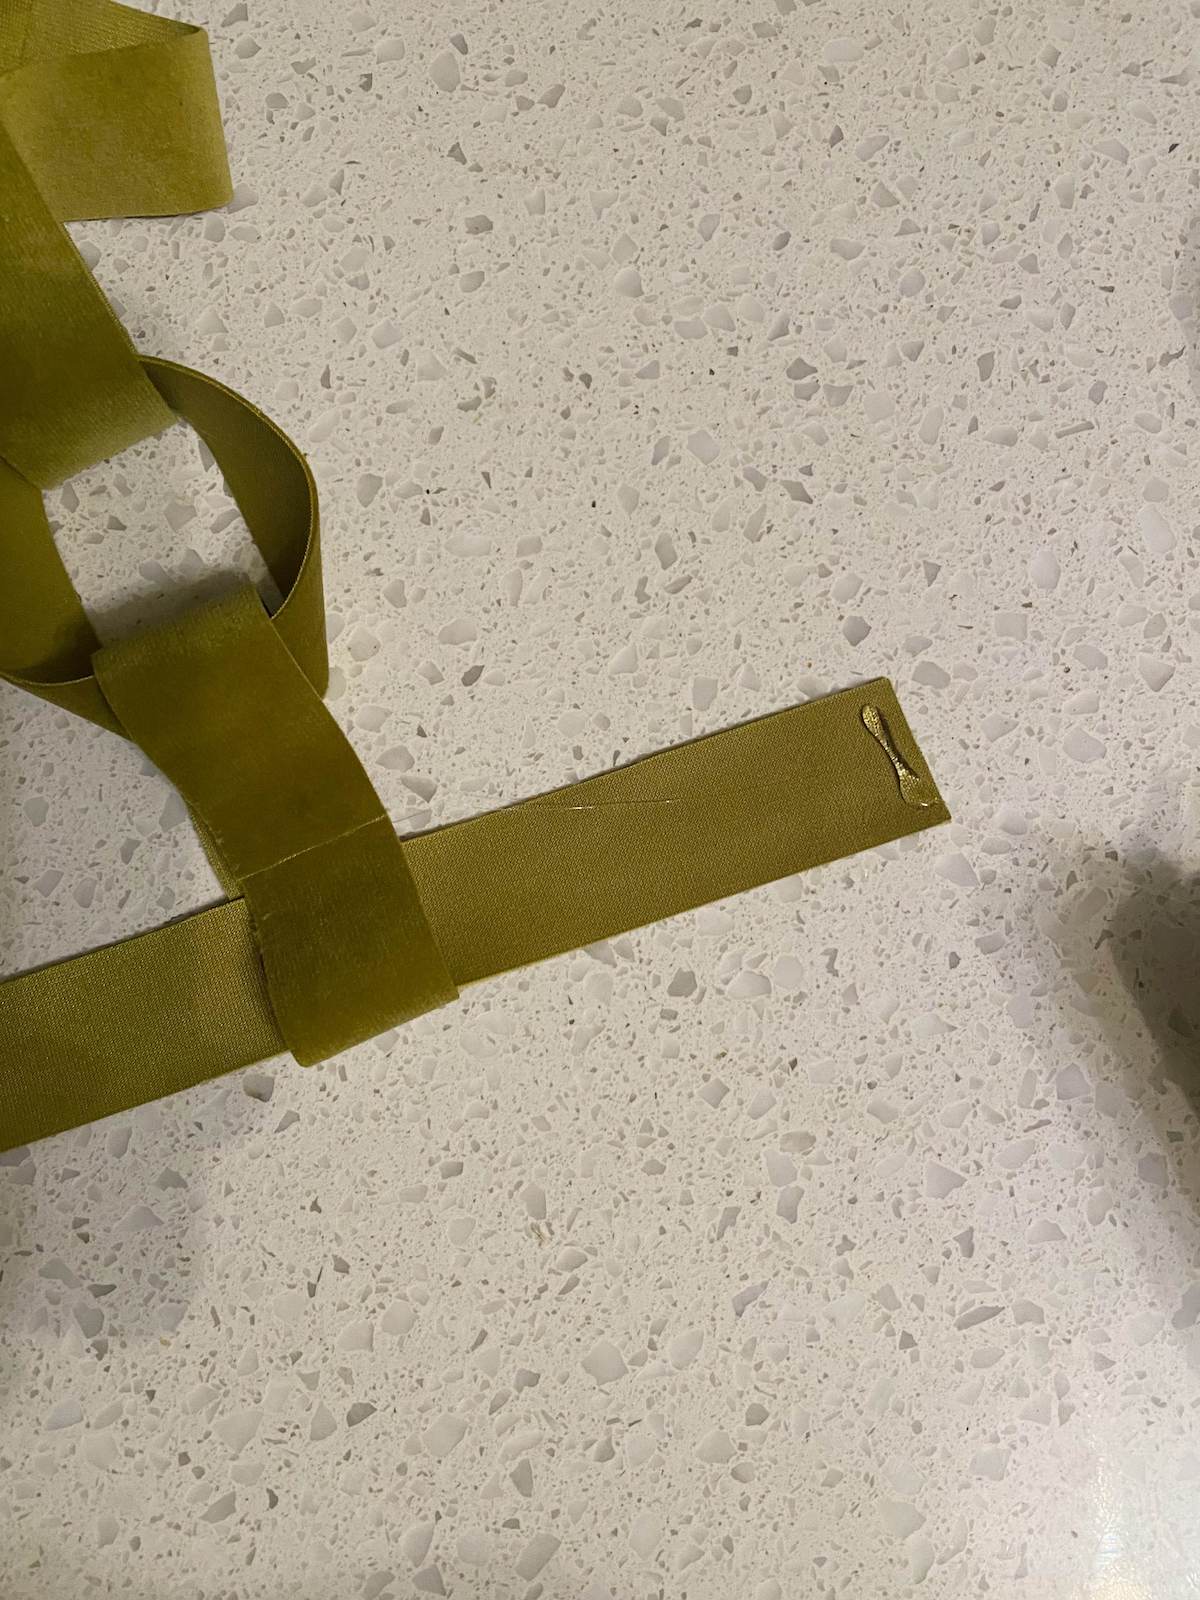
Take one strip of fabric and on the top side of one end, make a small line of glue.
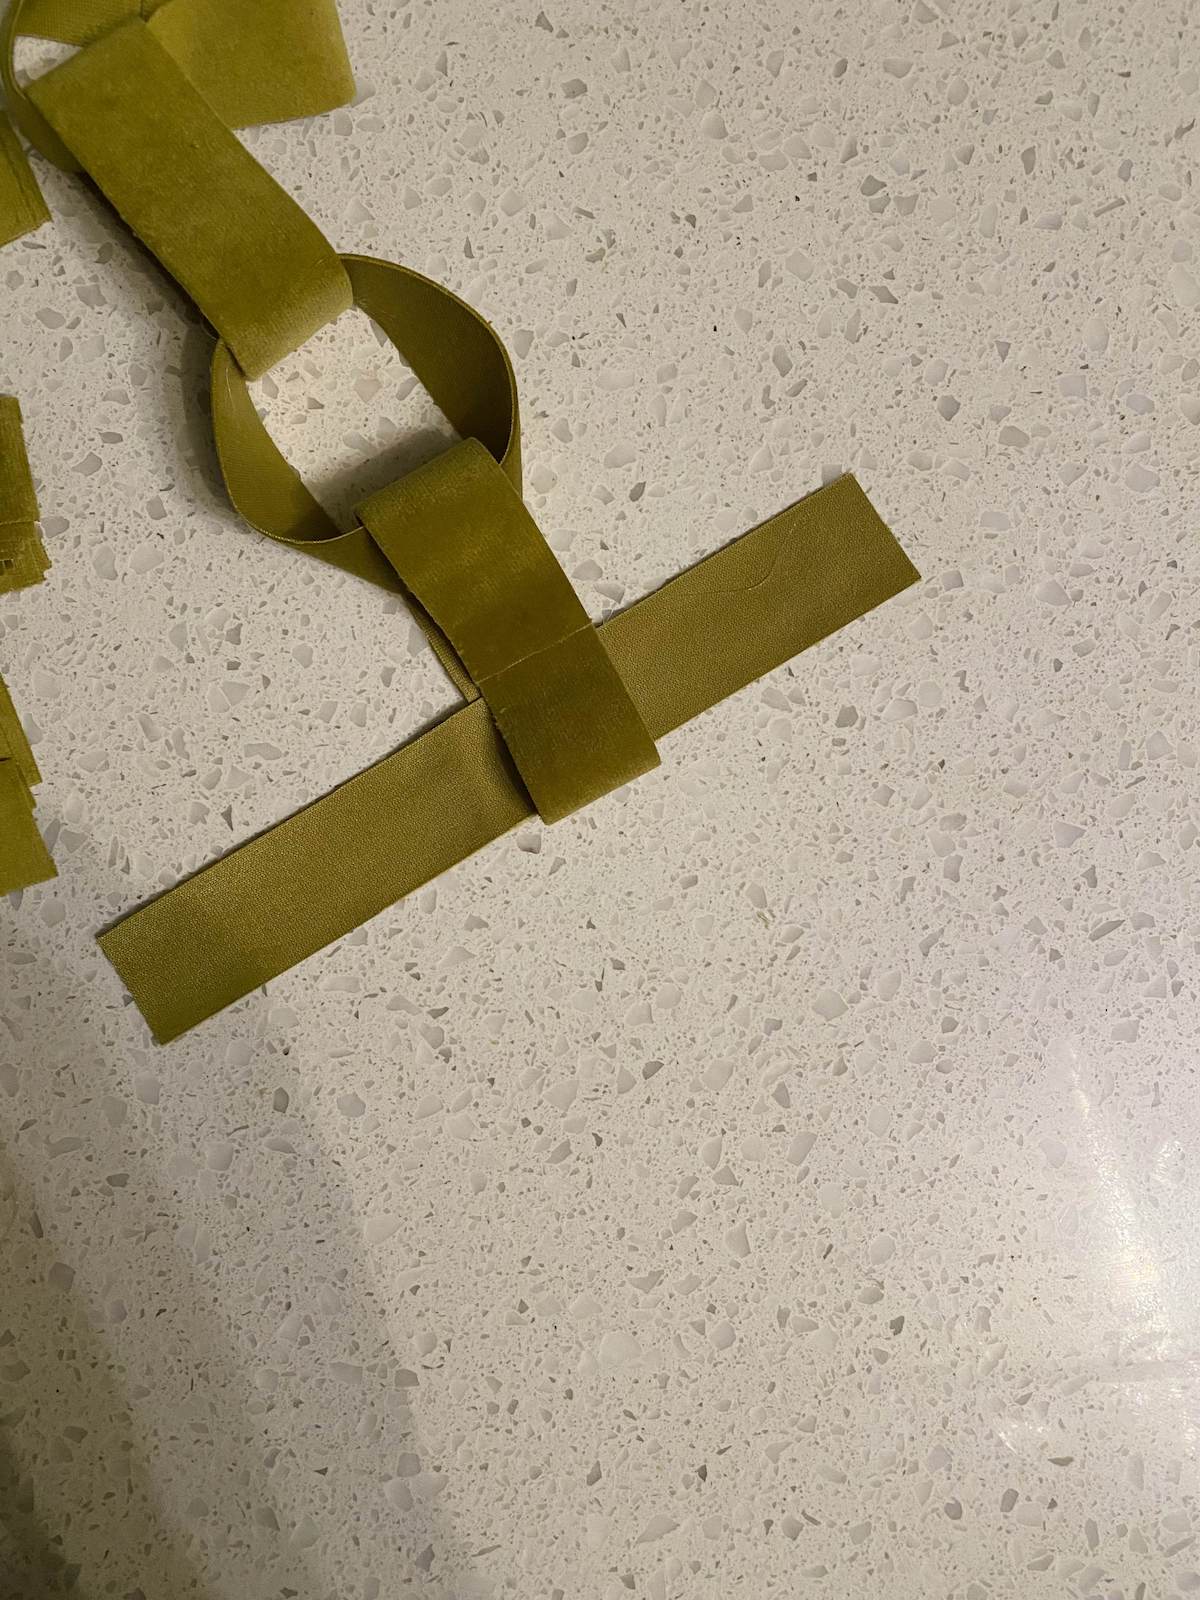
Wrap the other end around to create a loop.
Take your next strip of fabric and insert it through the hole in the first loop.
Follow the same glueing instructions as the first loop.
Continue glueing all of your strips like this until you have a long garland, ready to be hung! 
Tip: When hanging your garland, I tried to make sure that the overlap of the fabric is nesting in the top of the chain above it and isn’t running along the side. I found that this helps to keep the square shape of the chain and gives the garland a little bit more structure.
Now your garland is ready to be hung on your tree! I decided to hang mine in a looping kind of pattern because I think it allows the fabric in the chains to look a lot better. If you have a really full tree, you may be able to have it drape around the tree in more of a straight line if that’s what you prefer! 

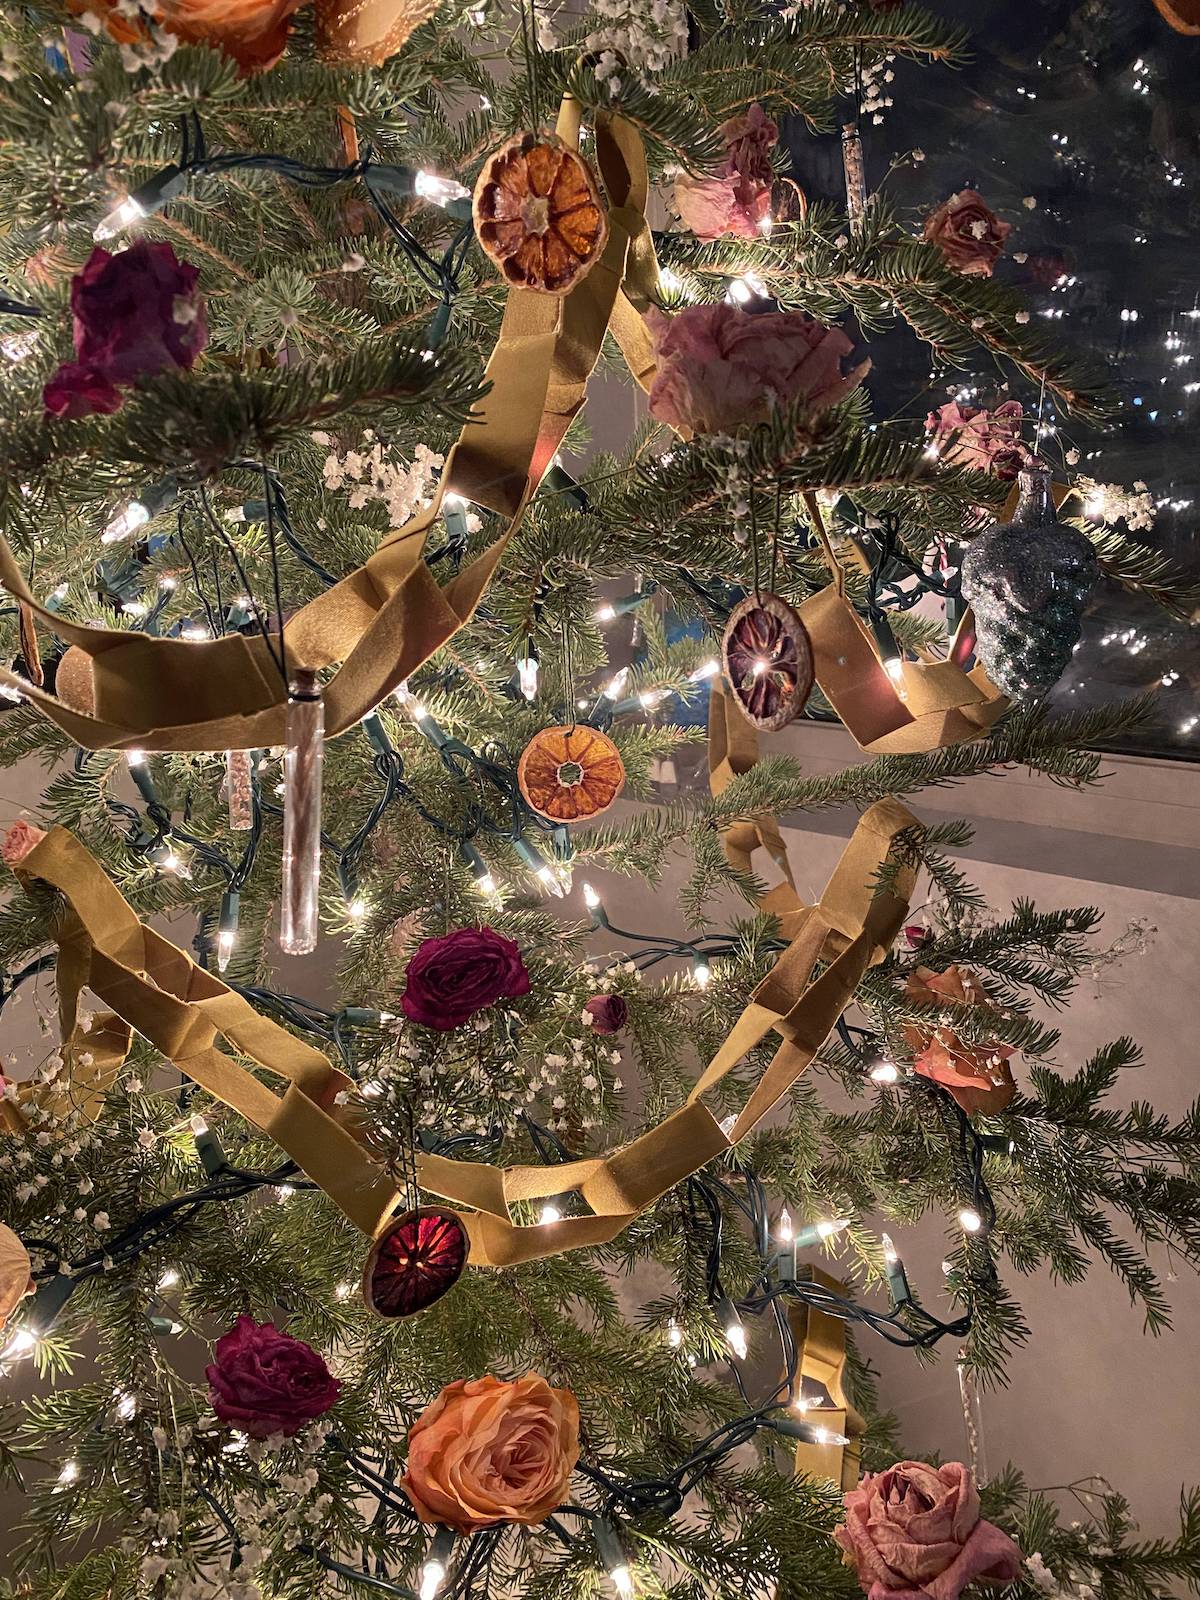


I think this garland is an amazing addition to our dried flower tree! The texture is very luxe and rich and the muted tones work really well with the subtle colours in the dried flowers. Plus, it was really easy to do and I was able to make it with materials that I had on hand!
I’d love to know if you’d make one of these easy DIY velvet chain garlands for your Christmas Tree!
Tess
Let’s Stay Friends!
Insta | Pinterest | Enews | TikTok