Craft in Style Subscription Instructions, DIY
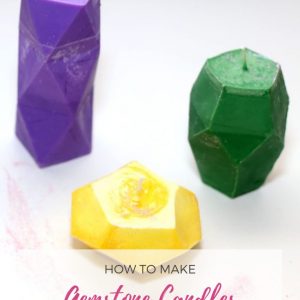
How to Make Concrete Geode Candles

Mar
This is the tutorial for the Craft in Style Subscription Box. Find more about Craft in Style Subscription Box here.
Sometimes it’s fun to make simple candles like these. But sometimes it’s fun to make gorgeous candles that are unusual and extraordinary like these Concrete Geode Candles.
The base is a concrete block that can be made stylized in lots of different ways. The top is a soy wax candle that you can also scent in lots of different ways. So let’s make it!

Supplies to make a Concrete Geode Candle
This Craft in Style Subscription Box
or
1 lb Rockite Concrete
Mailing Tube (around 4 inches wide)
Box Cutter
Vaseline
Foam Brush
Mixing Cups
Popsicle Sticks
Seashells & Gemstones
Soy Candle Wax
A Mason Jar or Microwave Safe Bowl
Cotton Wicks
Essential Oils or Fragrance Oils
Water & A Stovetop or Microwave
It’s a lot of supplies, so double check that you have everything you need before you begin. There are a few things that are optional. For example, you don’t need the seashells or gemstones. Those are to make the concrete layer look like a geode. And you don’t need essential oils unless you want a scented candle.

There are other supplies that you could include. For example, you could add concrete colorant to make layers of white and darker gray, to enhance the look of a geode. You could also include gold paint to make stripes of gold in the concrete also heightening the geode look.
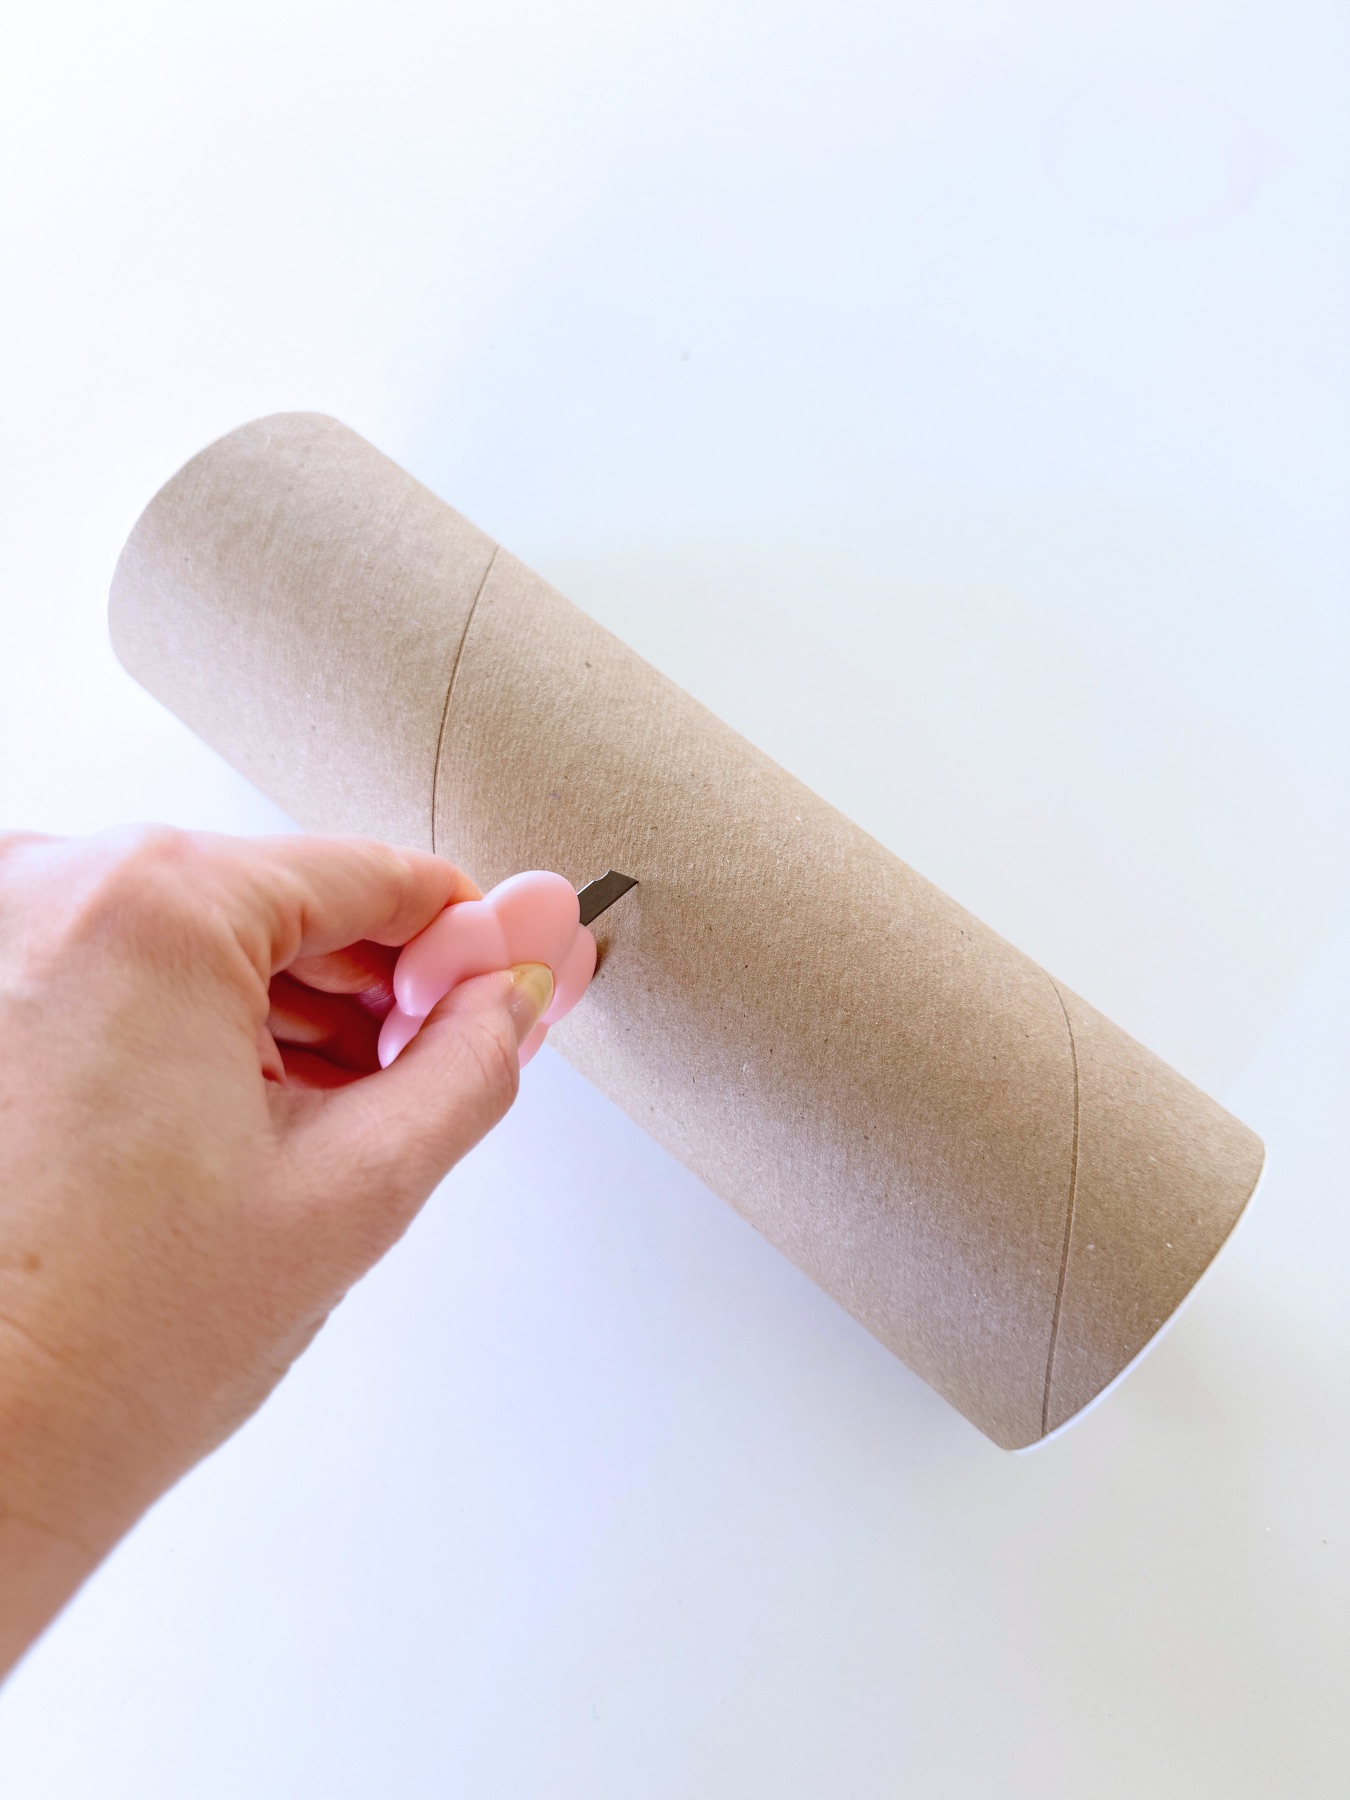

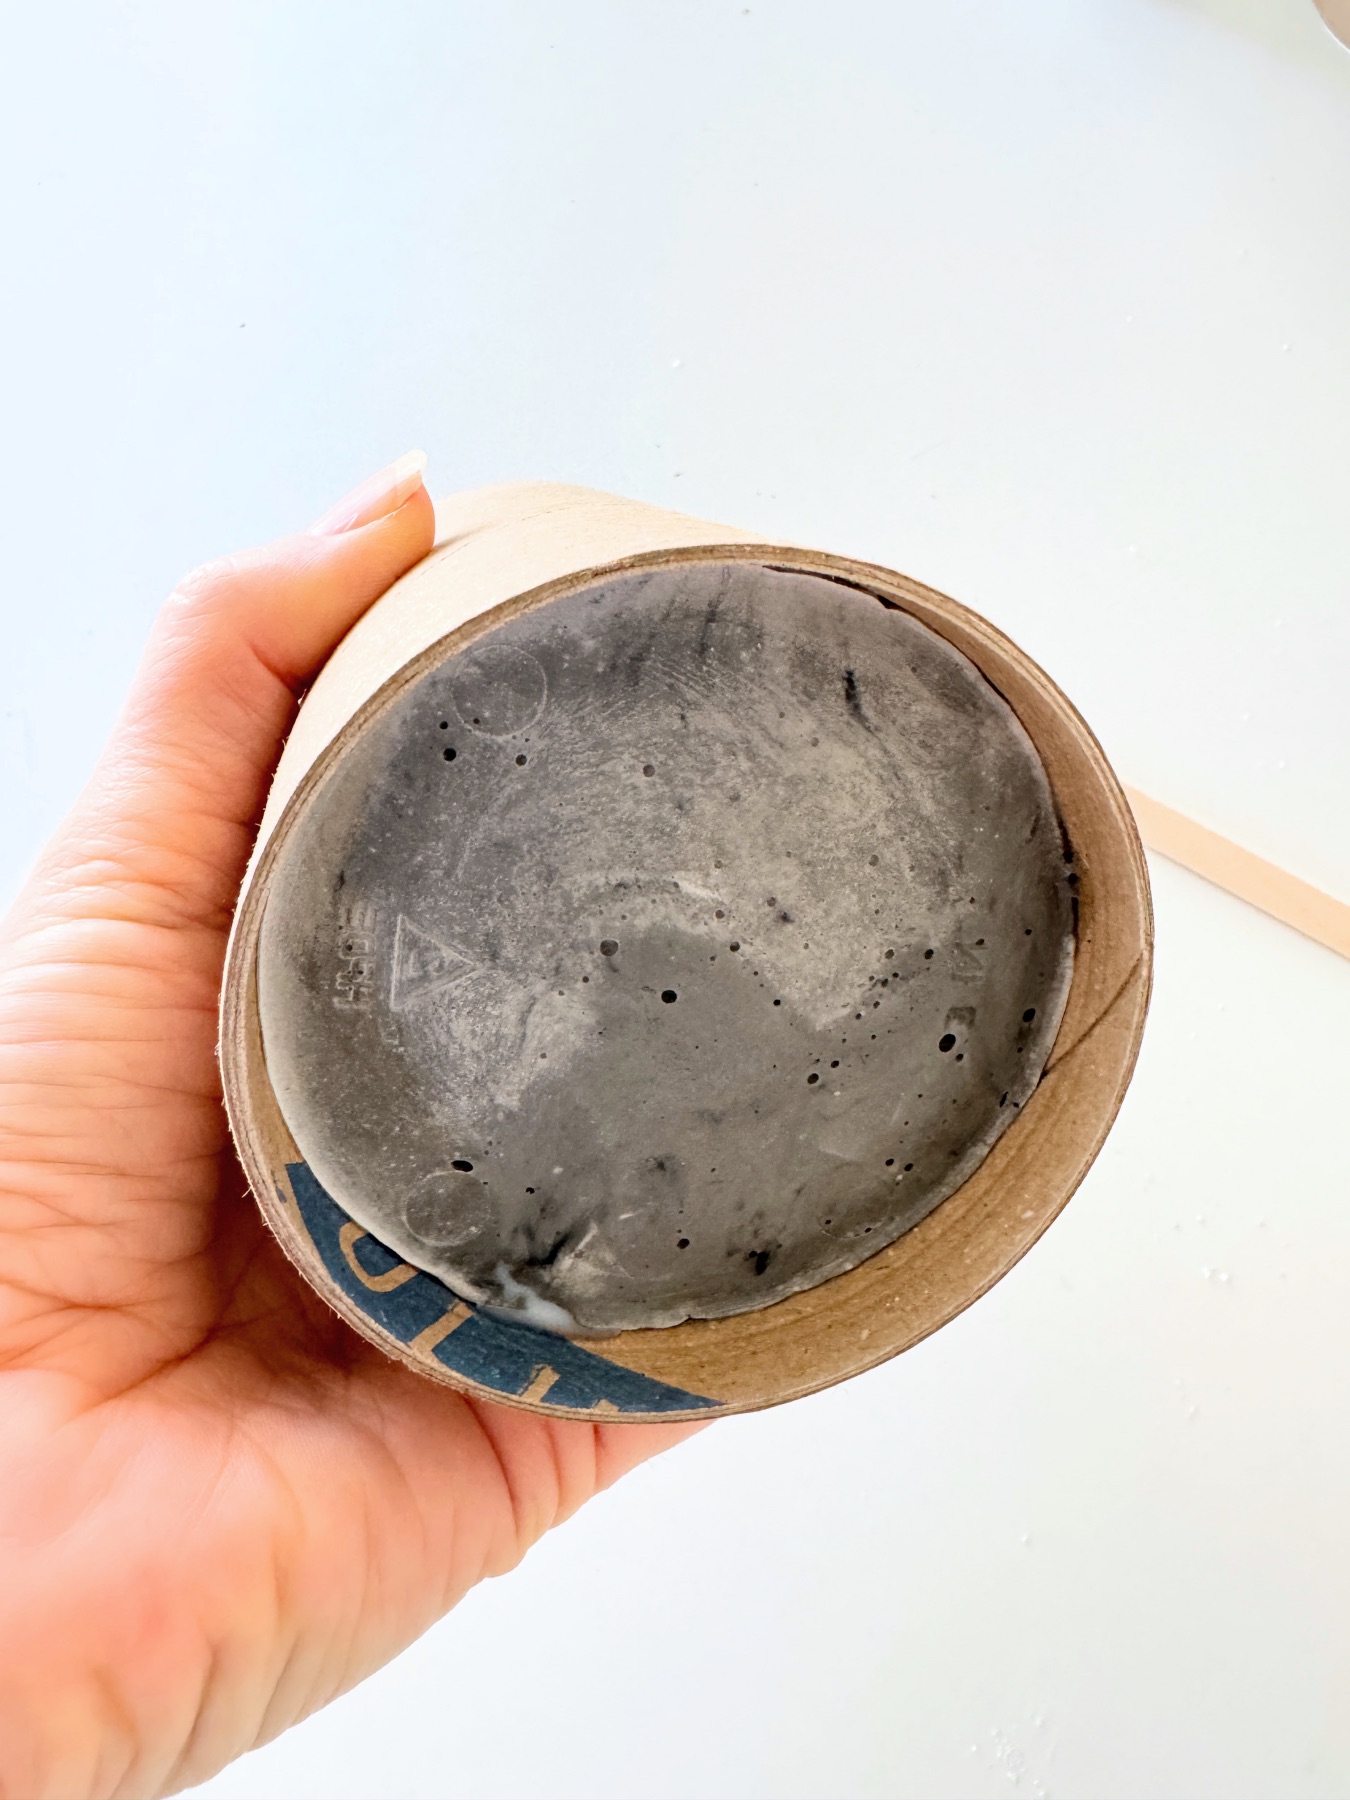
Step 1: Prep Your Mailing Tube
To get started, cut your mailing tube straight through the middle with a box cutter or a kitchen knife. Be sure to keep the plastic lids for the tubes, you will need those. Ideally, you will want a tube that’s smooth on the inside. Any lines in the tube will get picked up in your concrete candle. There are ways to remove them, but it adds a bit of work. So if you can bypass that with a smooth mailing tube – do it!
Remove any paper debris from your work surface and from inside the tube. I recommend making 1 candle at a time, so you can learn as you go and improve your future candles.


Step 2: Coat the Inside of the Mailing Tube
Concrete and wax both stick to everything. To prevent that, coat the inside of the mailing tube with vaseline using your foam brush. You could use coconut oil or even non stick spray as an alternative. But note, that vaseline has no smell and does not stain as much as an oil that has color.
Make sure you coat the entire interior surface including the bottom.

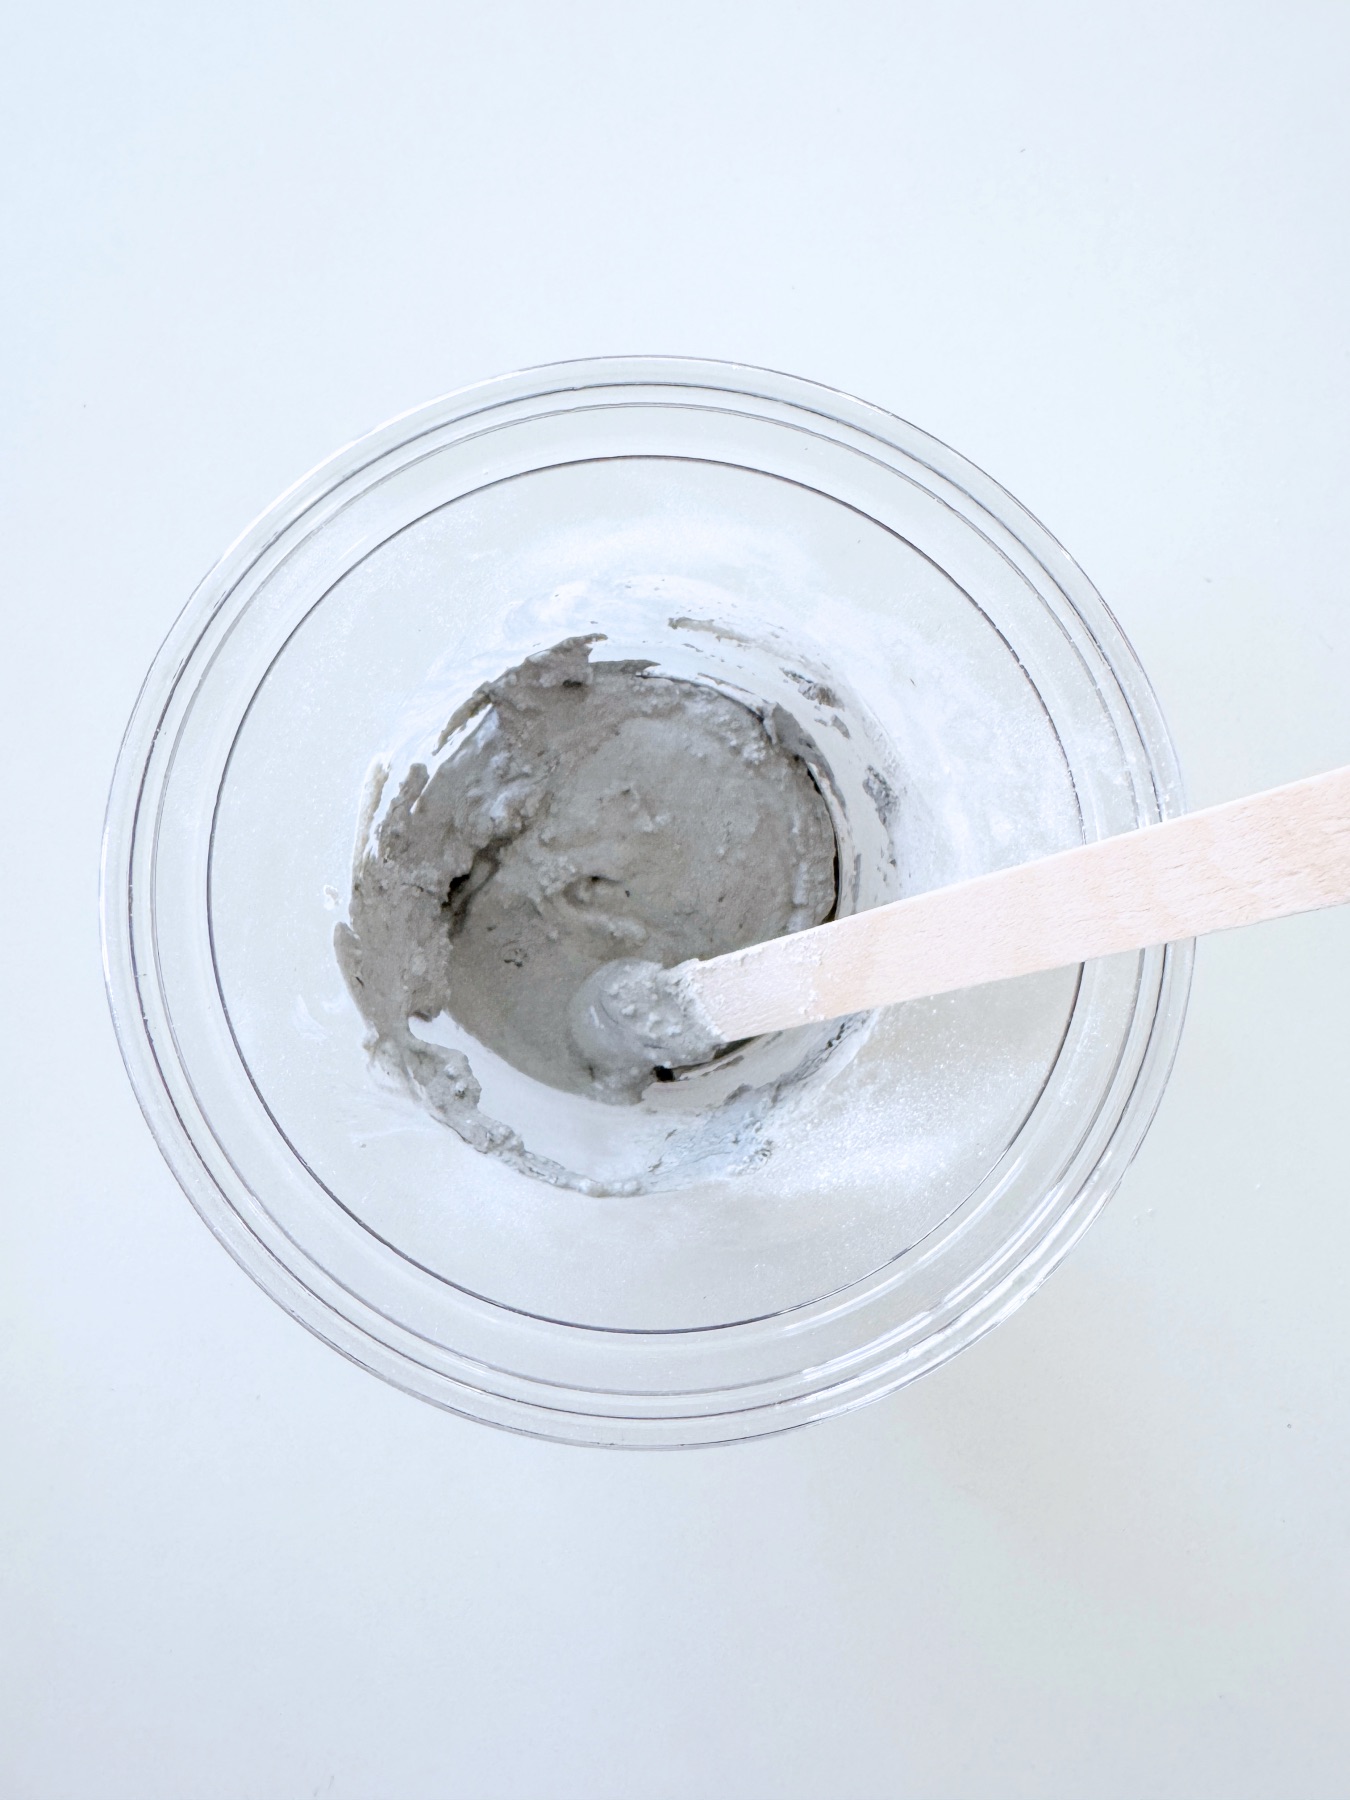
Step 3: Mix Small Amounts of Concrete
Begin to make your geode layers by mixing very small amounts of concrete – perhaps around 2-3 tablespoons with just a few drops of water into a plastic or disposable cup. You want your concrete mix to be thick and gloopy. You want it to be a moist solid, not a liquid and certainly not pourable.
Step 4: Layer the Concrete
Next, scoop the concrete into the mailing tube and while you work, try to create gaps in the concrete for air, and use different angles. Work as if you are sculpting the concrete, not just flattening the concrete in the mold. The entire layer of concrete should be around 2.5-3 inches or so. This height will use around .333 pounds of concrete or so.

Step 5: Add Gemstones & Seashells
Between your layers and around the perimeter of the mold add gemstones or seashells. You need these to be along the edge to be visible. So there’s no need to waste any by placing them in the center of the mold.
If you prefer you can also add seashells and gemstones afterwards – once your candle is completely set with using tiny amounts of concrete as glue.

So what you can do, is save a few seashells and gemstones until the end, just in case you need to touch up your exterior.

Step 6: Clean Up the Sides of the Mold
If you have any concrete splashes, like I do, along the sides of your mailing tube mold, remove them before you add the wax. You want your wax to sit unevenly at the bottom of the tube, but you don’t want any concrete above that, where you wax will sit. It will give your candle a cleaner look.

Step 7: Prep Your Candle Wick & Melt Your Wax
These next steps, you can do at the same time. Candle wax takes some time to melt, so get that started first and then prep your candle wick afterward.
To melt your wax, you can either use this detailed instruction on the Microwave Method or that detailed instruction on the Stovetop Method. The short version is written below.

How to Melt Candle Wax
Stovetop Method: Create a double boiler by placing an open mason jar full of wax in the center of a stockpot with around 1-2 inches of water on the bottom. Be sure that the water can’t touch any of the wax and that the water is quite low compared to the top of the mason jar. Heat on low, stirring occasionally. Once the wax is clear and liquid, use an oven mitt to remove the mason jar.
Microwave Method: Pour wax into a microwave safe bowl and place in the microwave for 30 second increments. Stir between each session of 30 seconds, and continue to microwave until the wax is completely liquid and clear.
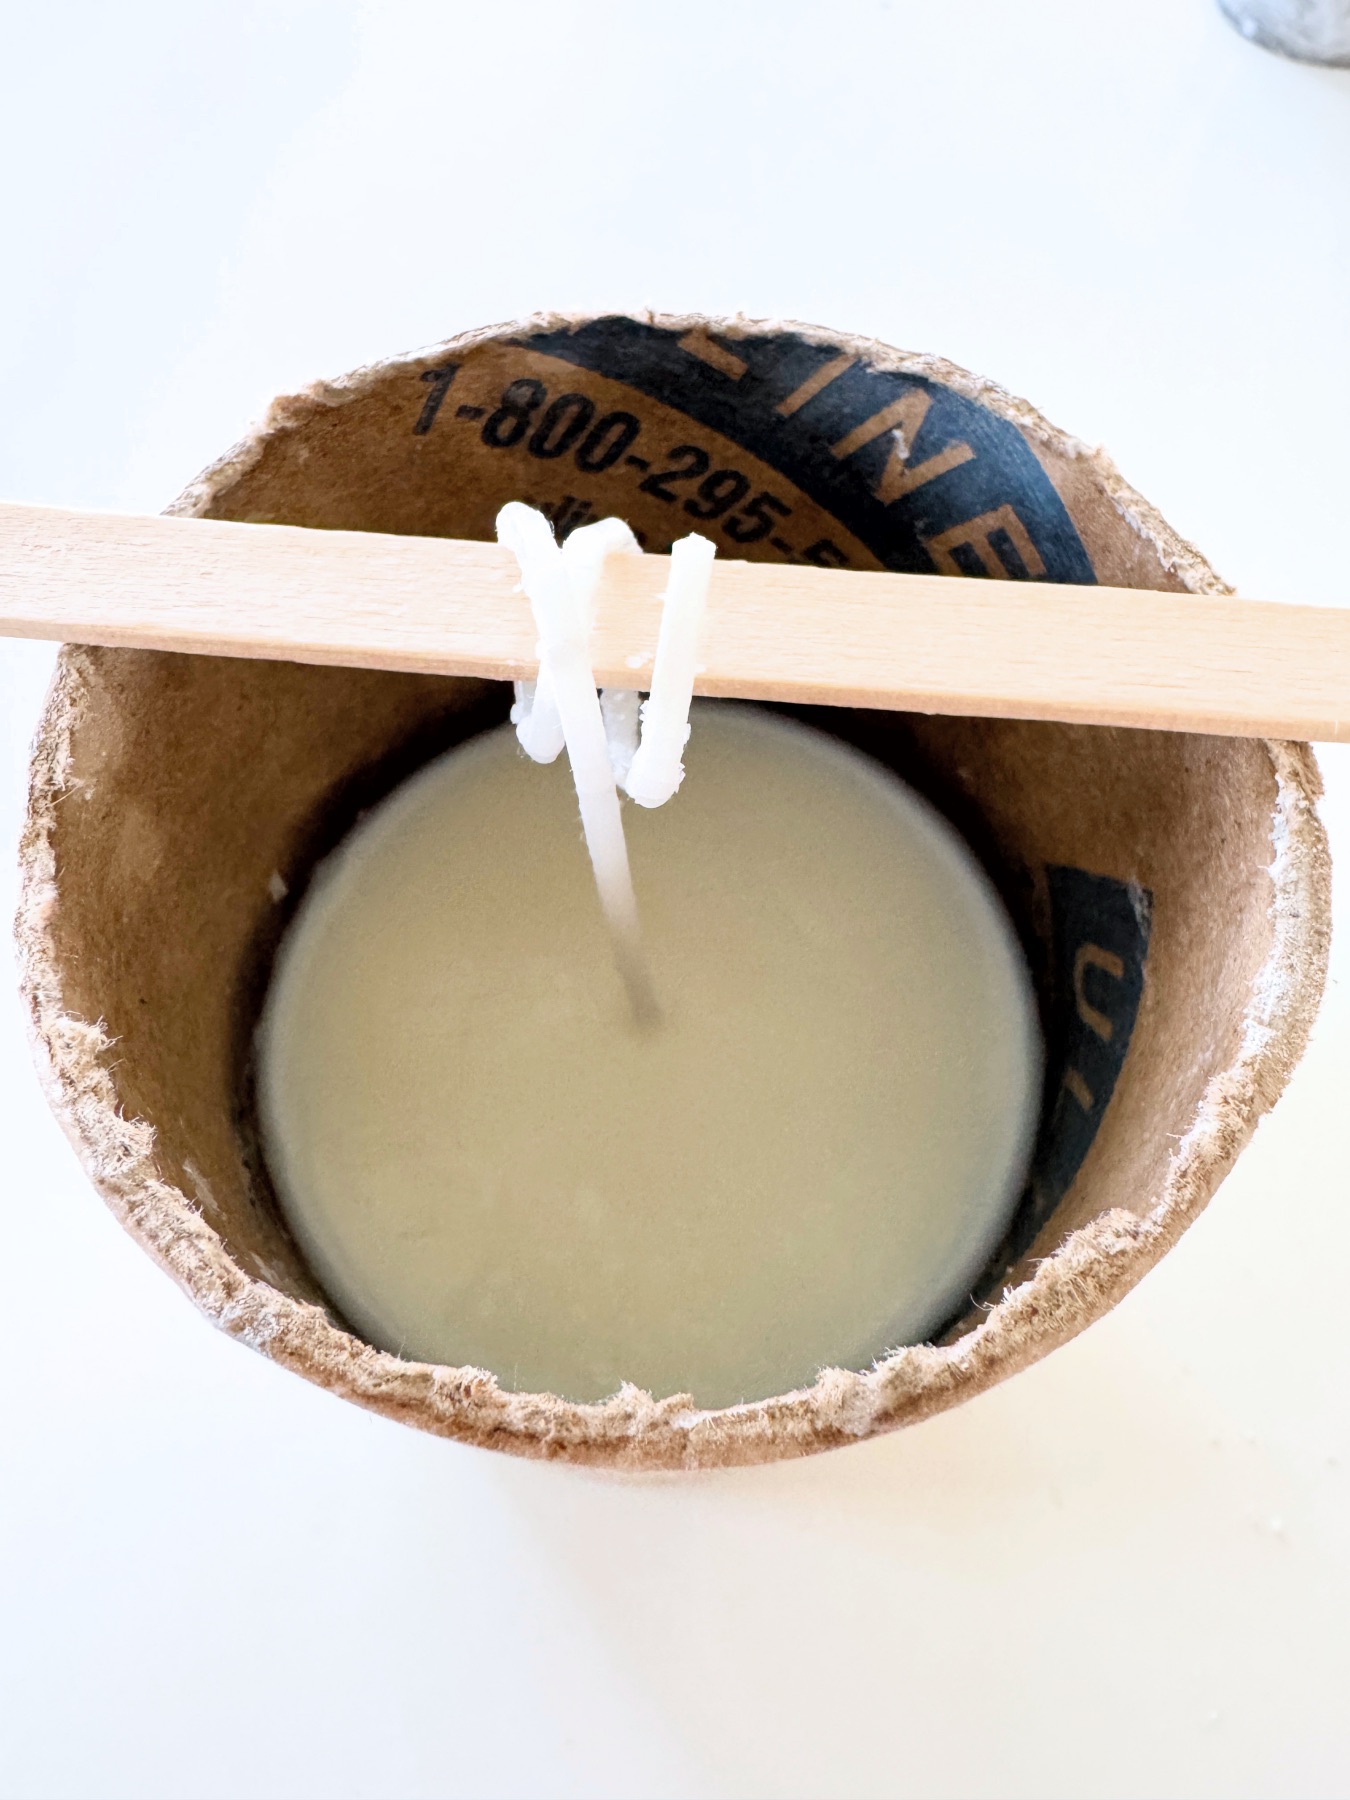
While you are melting your wax, wind your cotton wick around a popsicle stick (or pencil, wooden skewer, etc.) until the metal base of the wick will sit on the base of the concrete and the popsicle stick will rest across the top of the mold.

Step 8: Pour the Wax Into the Mold
If you created a concrete base that’s around 2.5 inches or so, as I did mine, you will want to use around 6 ounces of so of candle wax. If you are working from the Craft in Style Subscription Box, that’s half of the wax included in your kit.
Slowly and gently pour the wax into the mold. Then place your wick in the center so that the wick can be held in place by the popsicle stick resting across the top of the mold.

Step 9: When to Add Your Essential Oils
Candle wax always solidifies from the bottom to the top. You never want to add fragrances or essential oils until the wax begins to cool. This will help the scent release when you burn the candle, instead of releasing all the scent while you are making the candle.
Watch for the wax starting to become opaque at the bottom of the candle above the concrete. Once it’s starting to solidify, add around 50 drops of your favorite scent and stir fully, completely, and thoroughly into the wax.
Step 10: Let Your Candle Rest for 24 Hours
Give your concrete and wax time to set. Concrete sets faster than wax, in around 2-4 hours depending on the brand. But even if your wax appears solid, it will still be soft and easily damaged for a full 24 hours.

Step 11: Remove the Mold
After 24 hours, first take off the seal of the mailing tube. Then moisten and peel the mailing tube away from the concrete and candle. Continue to moisten and peel away until strictly the Concrete Geode Candle remains!

Touch Up How To Guide
If you need to touch up your concrete, use fine grain sandpaper, to stand off any paper or sand down any ugly edges. Use tiny amounts of liquid concrete like glue to add additional gemstones or seashells.
If you need to touch up your candle, use your box cutter to slowly and gently shape the candle by shaving off any uneven areas. You can also melt wax, and drizzle a small amount along the sides or top, but it’s not easy. With candle wax, it’s a lot easier to remove wax, than to melt more.
Your best bet is to take what you’ve learned from your fist candle and work to incorporate that into your second candle. Happy Making!

And don’t forget, if you love this diy you have to try to the Craft in Style Subscription Box where you get all the supplies to make this Concrete Geode Candle for yourself!
Let’s Stay Friends!
Insta | Pinterest | Enews | TikTok