Craft in Style Subscription Instructions, DIY
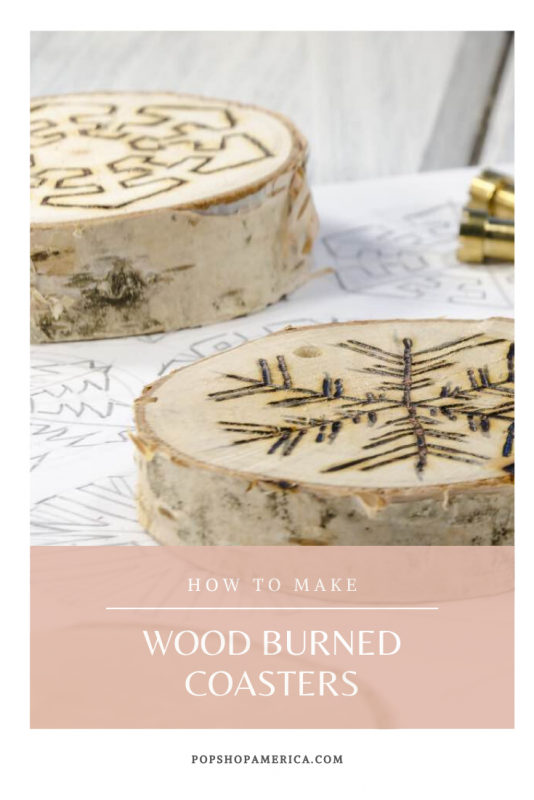
How to Make Wood Burned Coasters
Nov
This tutorial is Part 2 of 4 for the November 2019 Craft in Style Subscription Box. You can find Part 1 How to Make Wood Burned Ornaments here. Happy crafting!
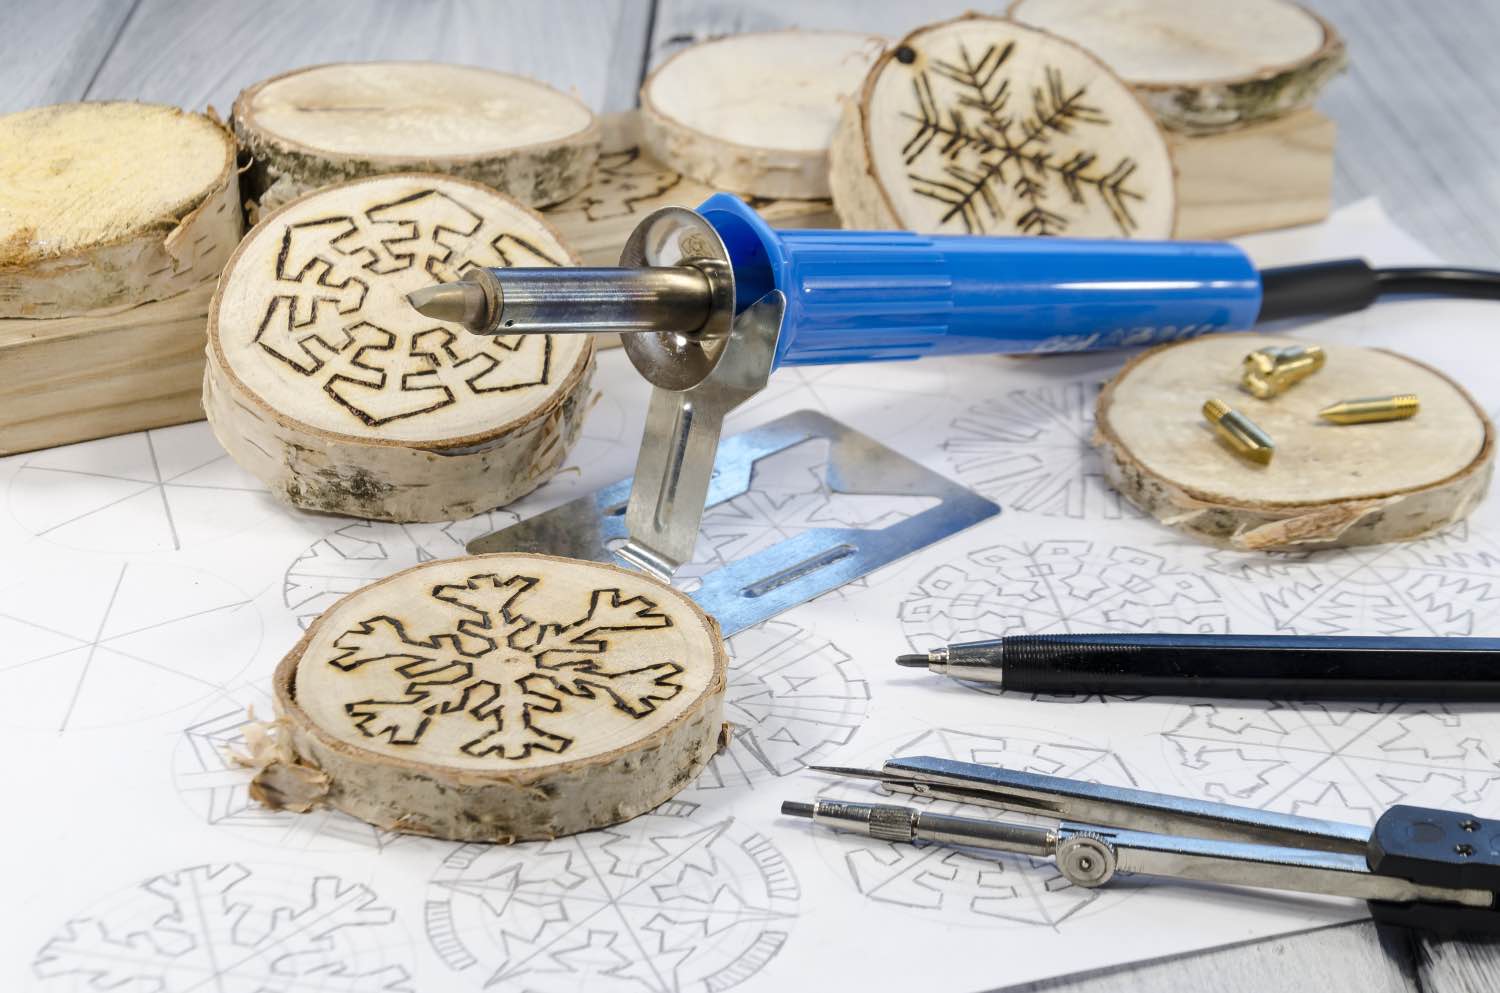
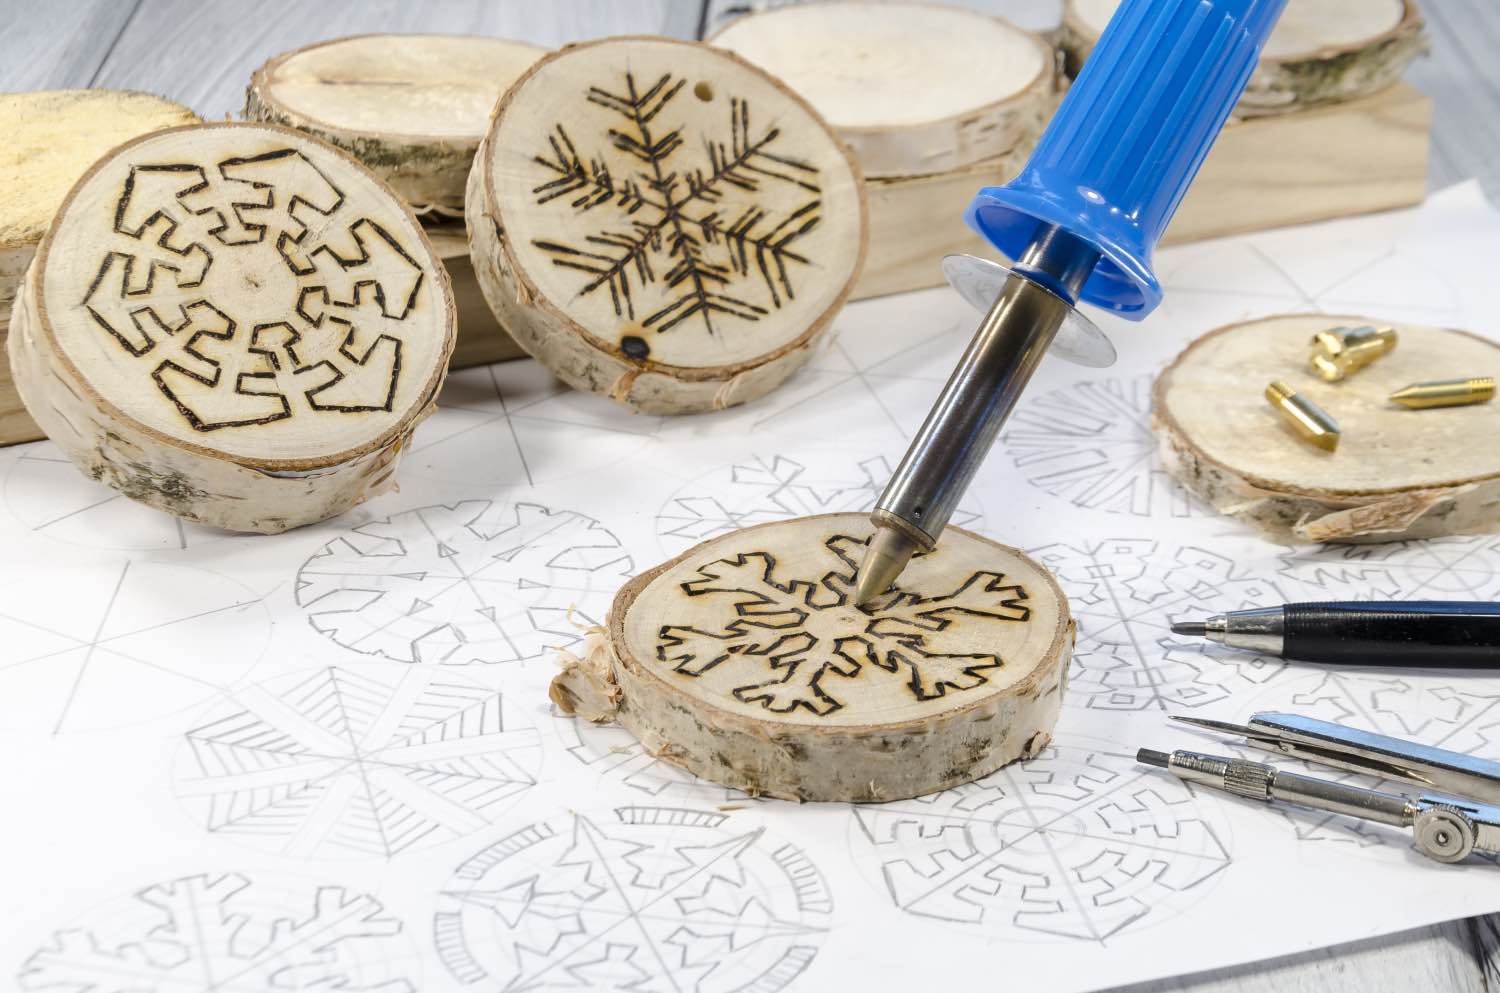
Wood burning is such a versatile craft because you can use most types of raw wood – big pieces, small pieces and everything in between. You can make keepsake boxes, art, frames, ornaments and all kinds of gorgeous creations – like these Wood Burned Coasters!
These coasters make a fabulous gift and can be made with a ton of different styles. I chose snowflakes to give them a wintery spirit.
Supplies to Make Wood Burned Coasters:
Craft in Style Subscription Box November 2019
-or-
Wood Burning Tool Kit
2-4 Wood Rounds (we used raw edge but you could choose laser cut too)
Pencil
Optional: This Snowflake Template (or Stencils)
Wood Sealant
Now wood burning itself only requires a few steps: first sketching/tracing/creating a mirror rubbing of your desired image on the wood. And then burning the wood. That’s it! But there are some tips and tricks to do it well. Let’s discuss.

Before You Wood Burn
Before you use your wood burning tools, you will want to pencil your image on your wood coaster. You could use a stencil, free hand draw, or even make a mirror rubbed image like this.
Any of these techniques will work. Just be sure that your penciled image is exactly as you want it because wood burning is not forgiving.
The Basics of Wood Burning
First, you will want to be sure you have the correct tip attached to your wood burner. I recommend starting with one of the smallest tips although the shaped stamps are really fun too. Be sure to change the tip while the wood burner is completely cool.
Then, plug it in and allow it to warm up. You will want to work on a safe surface. So it’s best to not have any animals or loose papers around. Kitchens are nice or you could use a craft studio with the door closed.
When you are ready to burn, gently touch the tip of the wood burner to the wood. Notice how they almost pull together? Just be careful to dot the heat and pull the burner away. That will give you the most control over your lines. The longer you let your burner touch the wood the thicker your lines will be. Once it starts to feel comfortable, you could try using your burner like a writing instrument, and draw as you would write a letter.

Your coasters are best in sets of 2 or sets of 4. And all together these wood burned coasters will just take around 10-20 minutes to complete! Amazing and aren’t they gorgeous too? So what patterns are you going to burn into your wood burned coasters? Tell us in the comments!
Let’s Stay Friends!
Insta | Pinterest | Enews | TikTok