Food
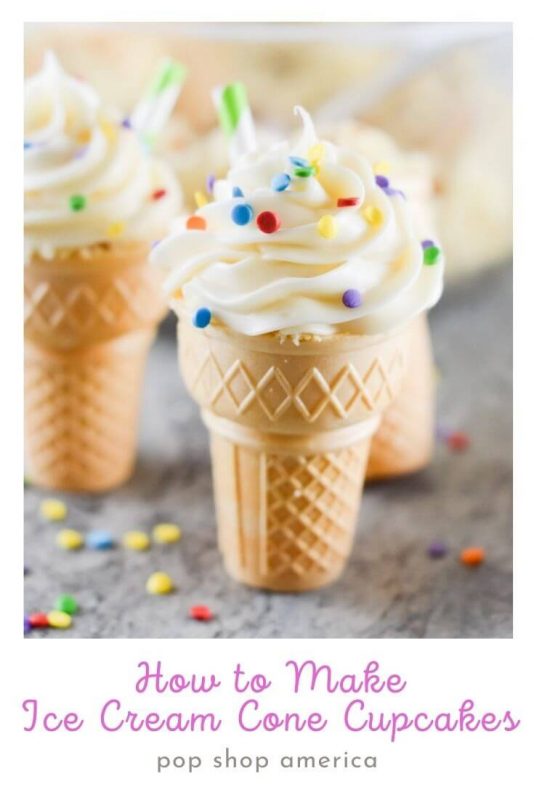
Rainbow Sprinkled Ice Cream Cone Cupcakes Recipe
Jun
These Rainbow Sprinkled Ice Cream Cone Cupcakes are proof that desserts can be both delicious and adorable!
These cupcakes are kid party approved and so fun in the summertime. If you love a tasty ice cream cone and you love cupcakes too, then you must make these Ice Cream Cone Cupcakes! It’s simple.
Recipe Ingredient List
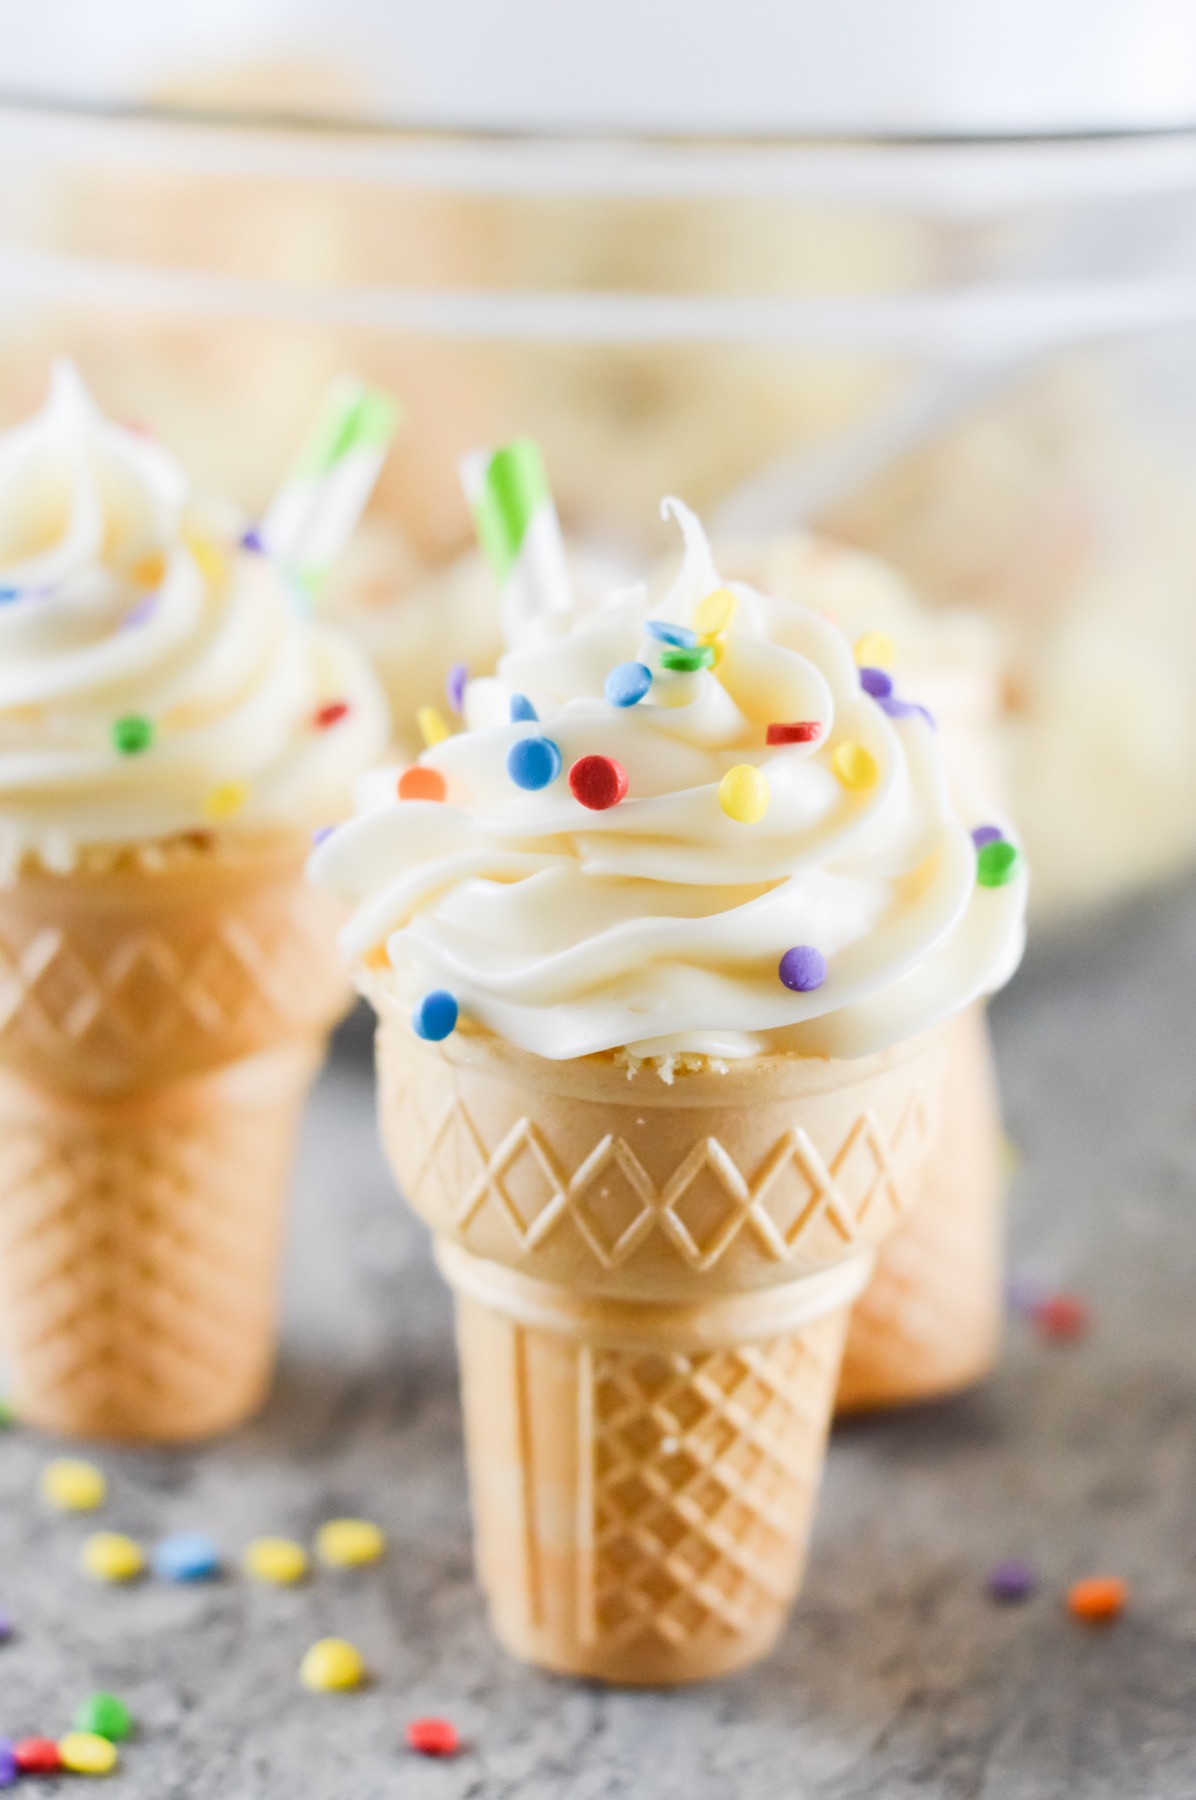
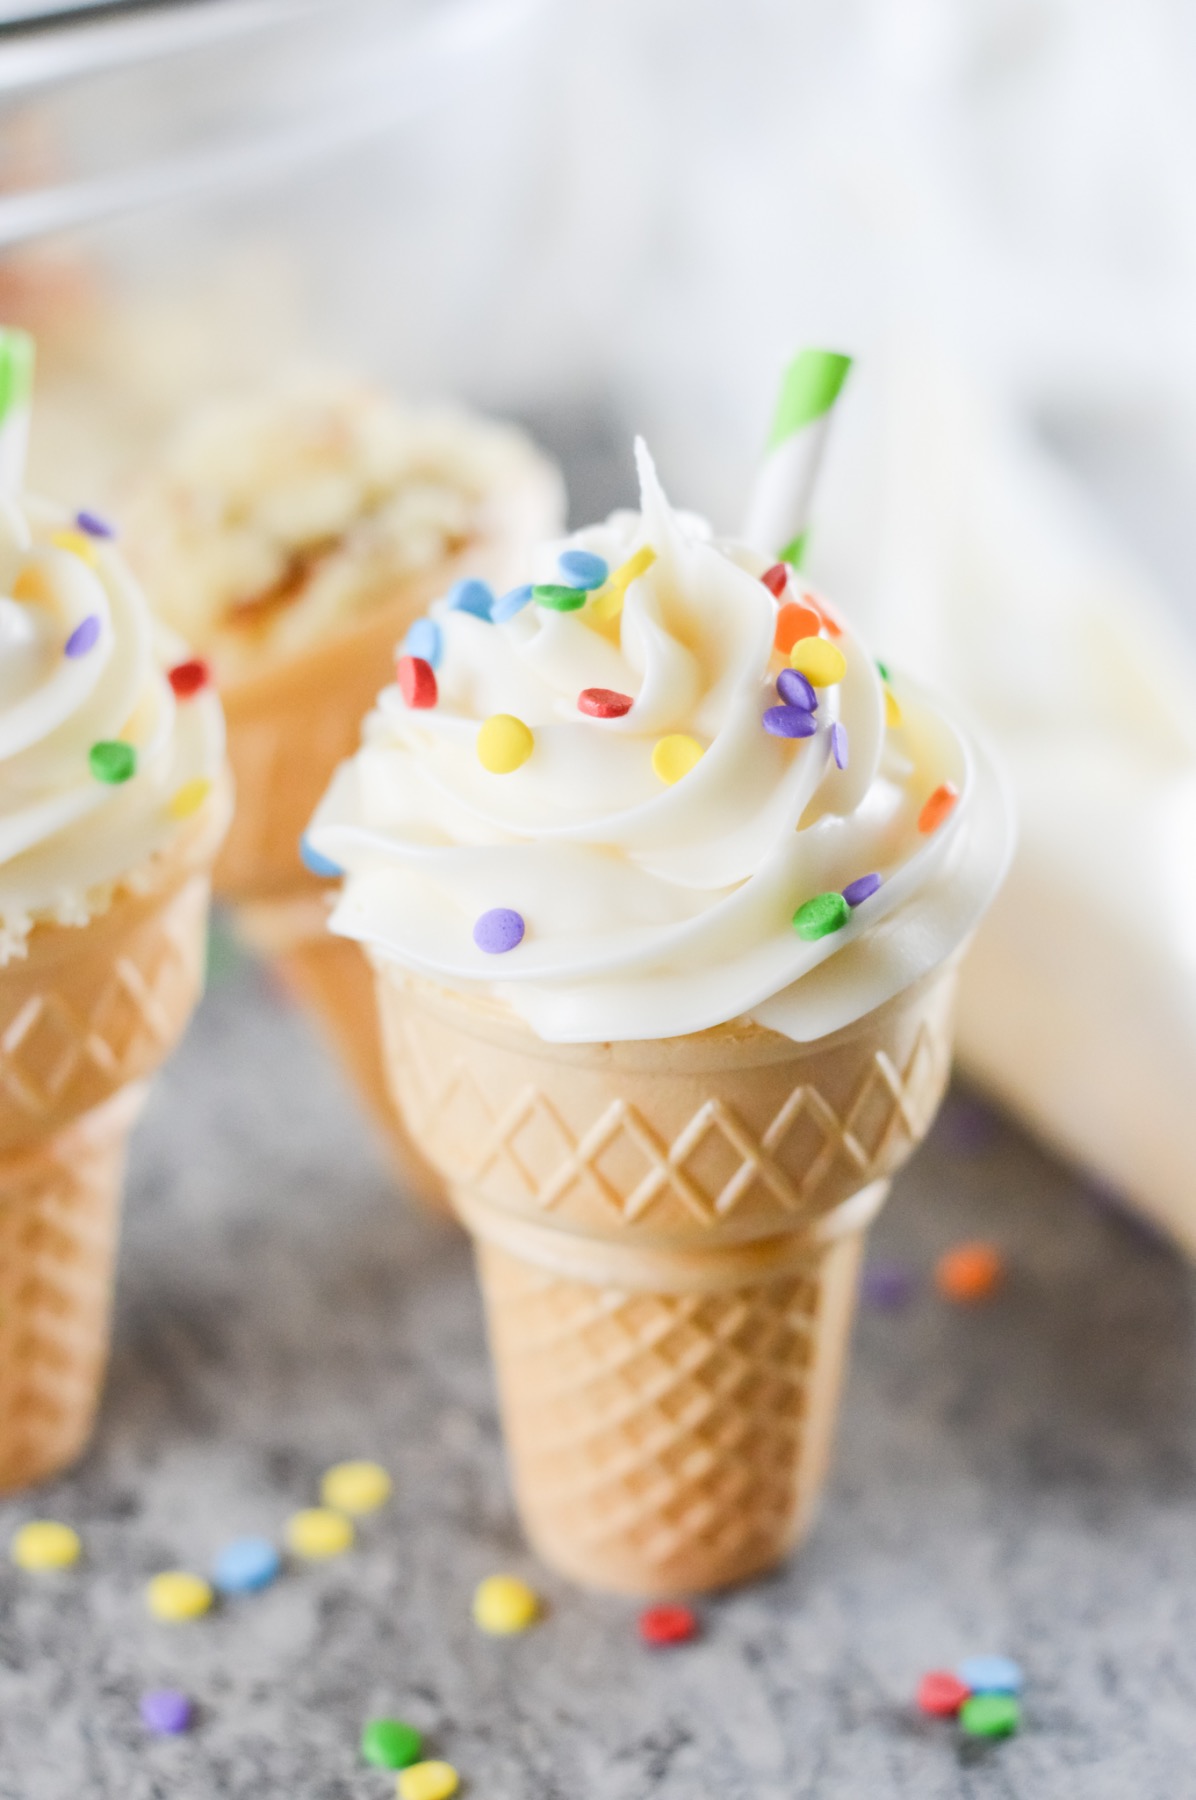
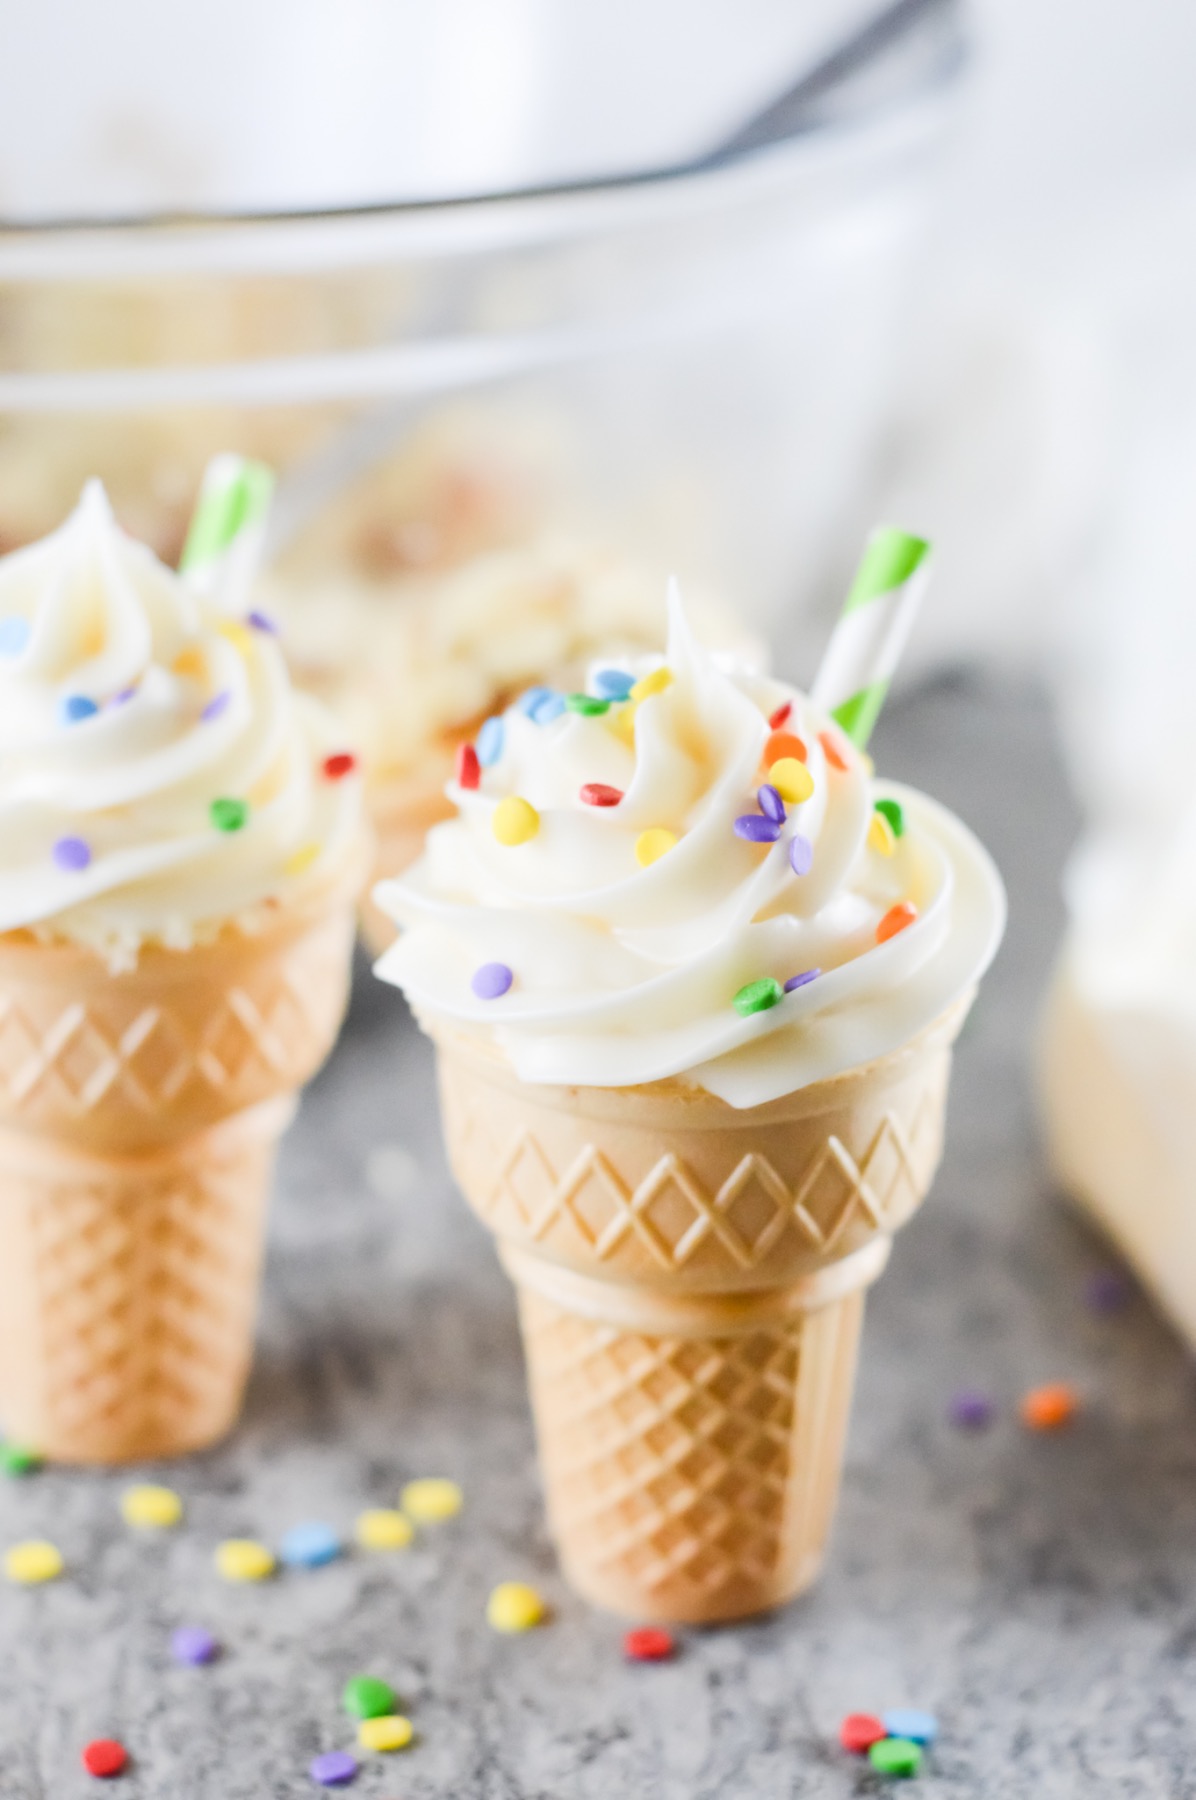
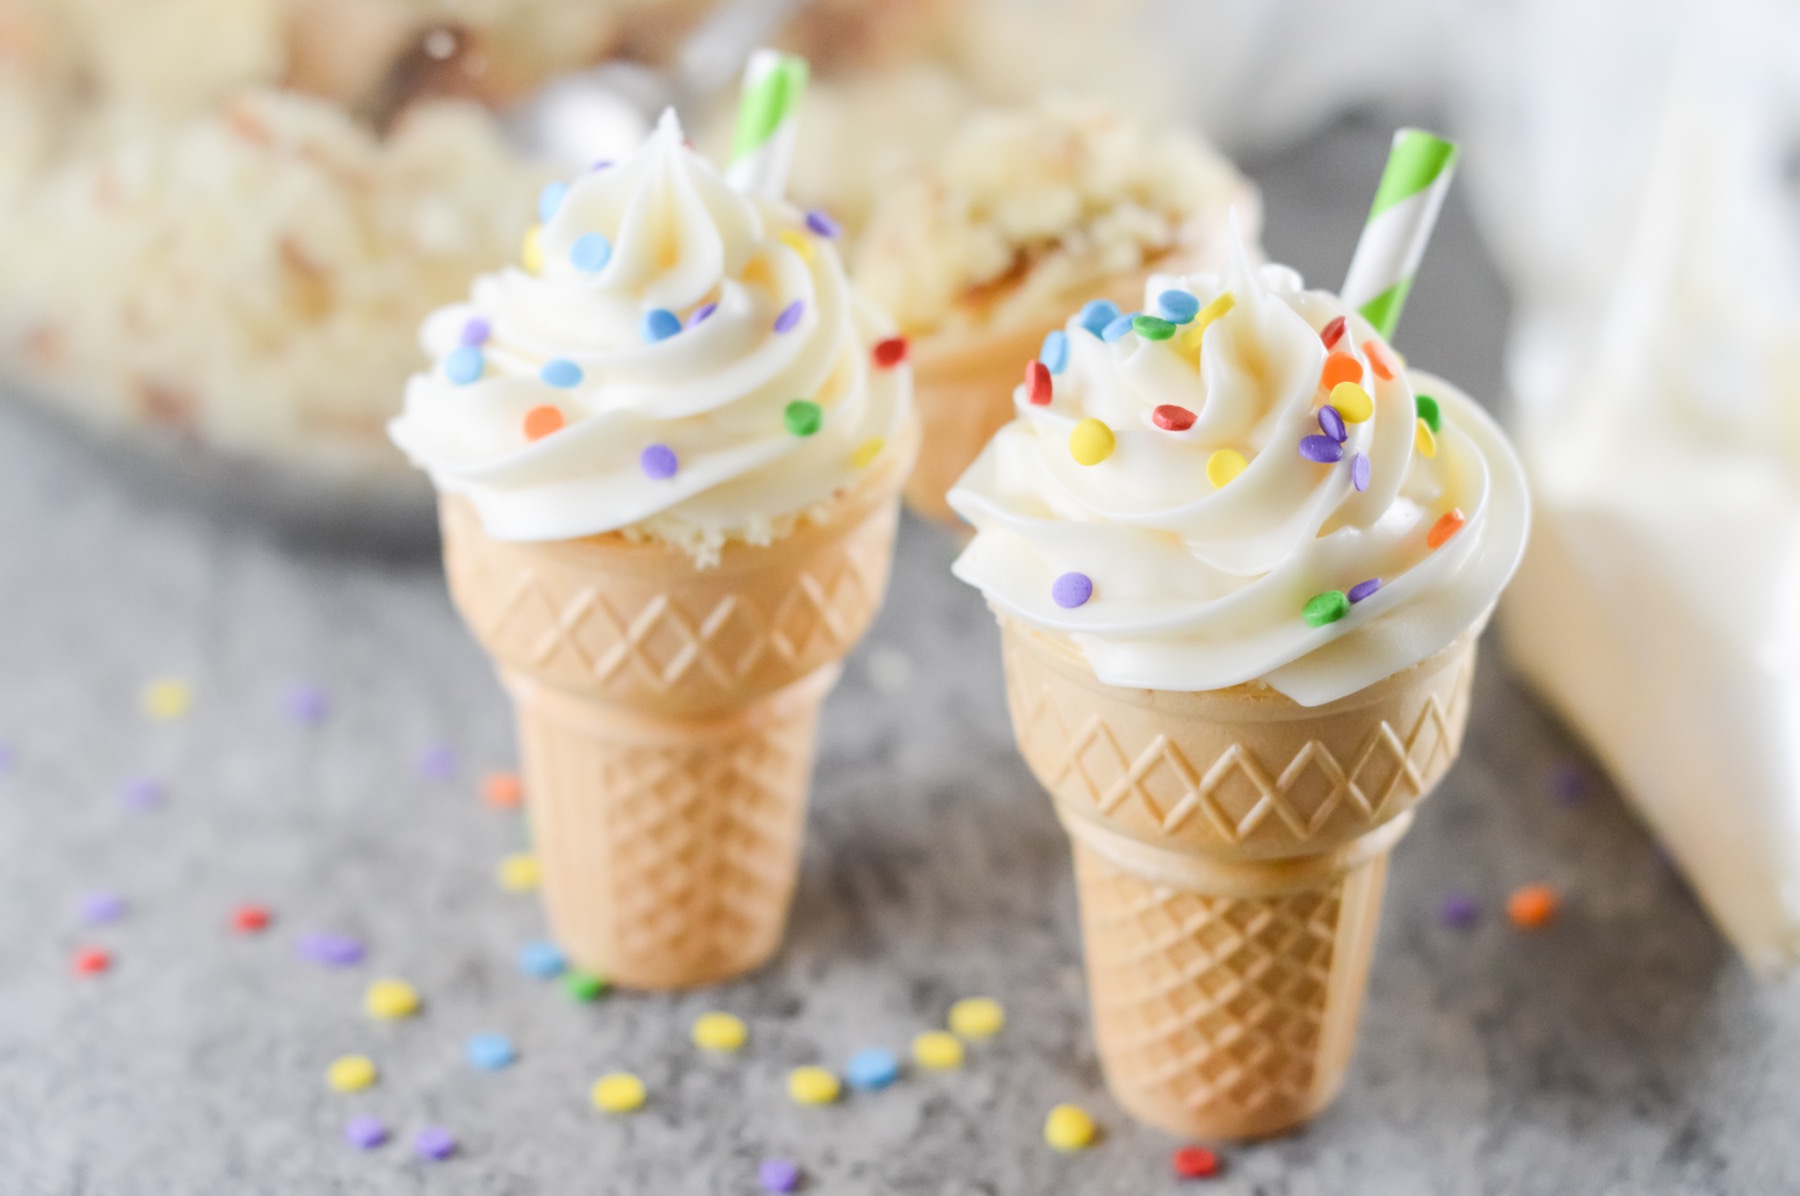
First and foremost, you need ice cream cones. Traditional ice cream cones with flat bottoms are easiest to serve, but you could also use sugar cones as long as you have an ice cream cone holder like this to serve your cupcakes with. You could use an original recipe for vanilla cake and vanilla buttercream. But I used a box cake mix and package frosting so that I could focus on making this recipe cute.
Additionally, you will want rainbow sprinkles, the cuter the better. You will want a piping bag and an open star frosting tip. A #32 tip could work, a 9FT could too, or you could choose a 1M. There’s a lot of possibilities, I would just choose something with a larger opening to make your frosting rosette.
How to Bake Your Cake
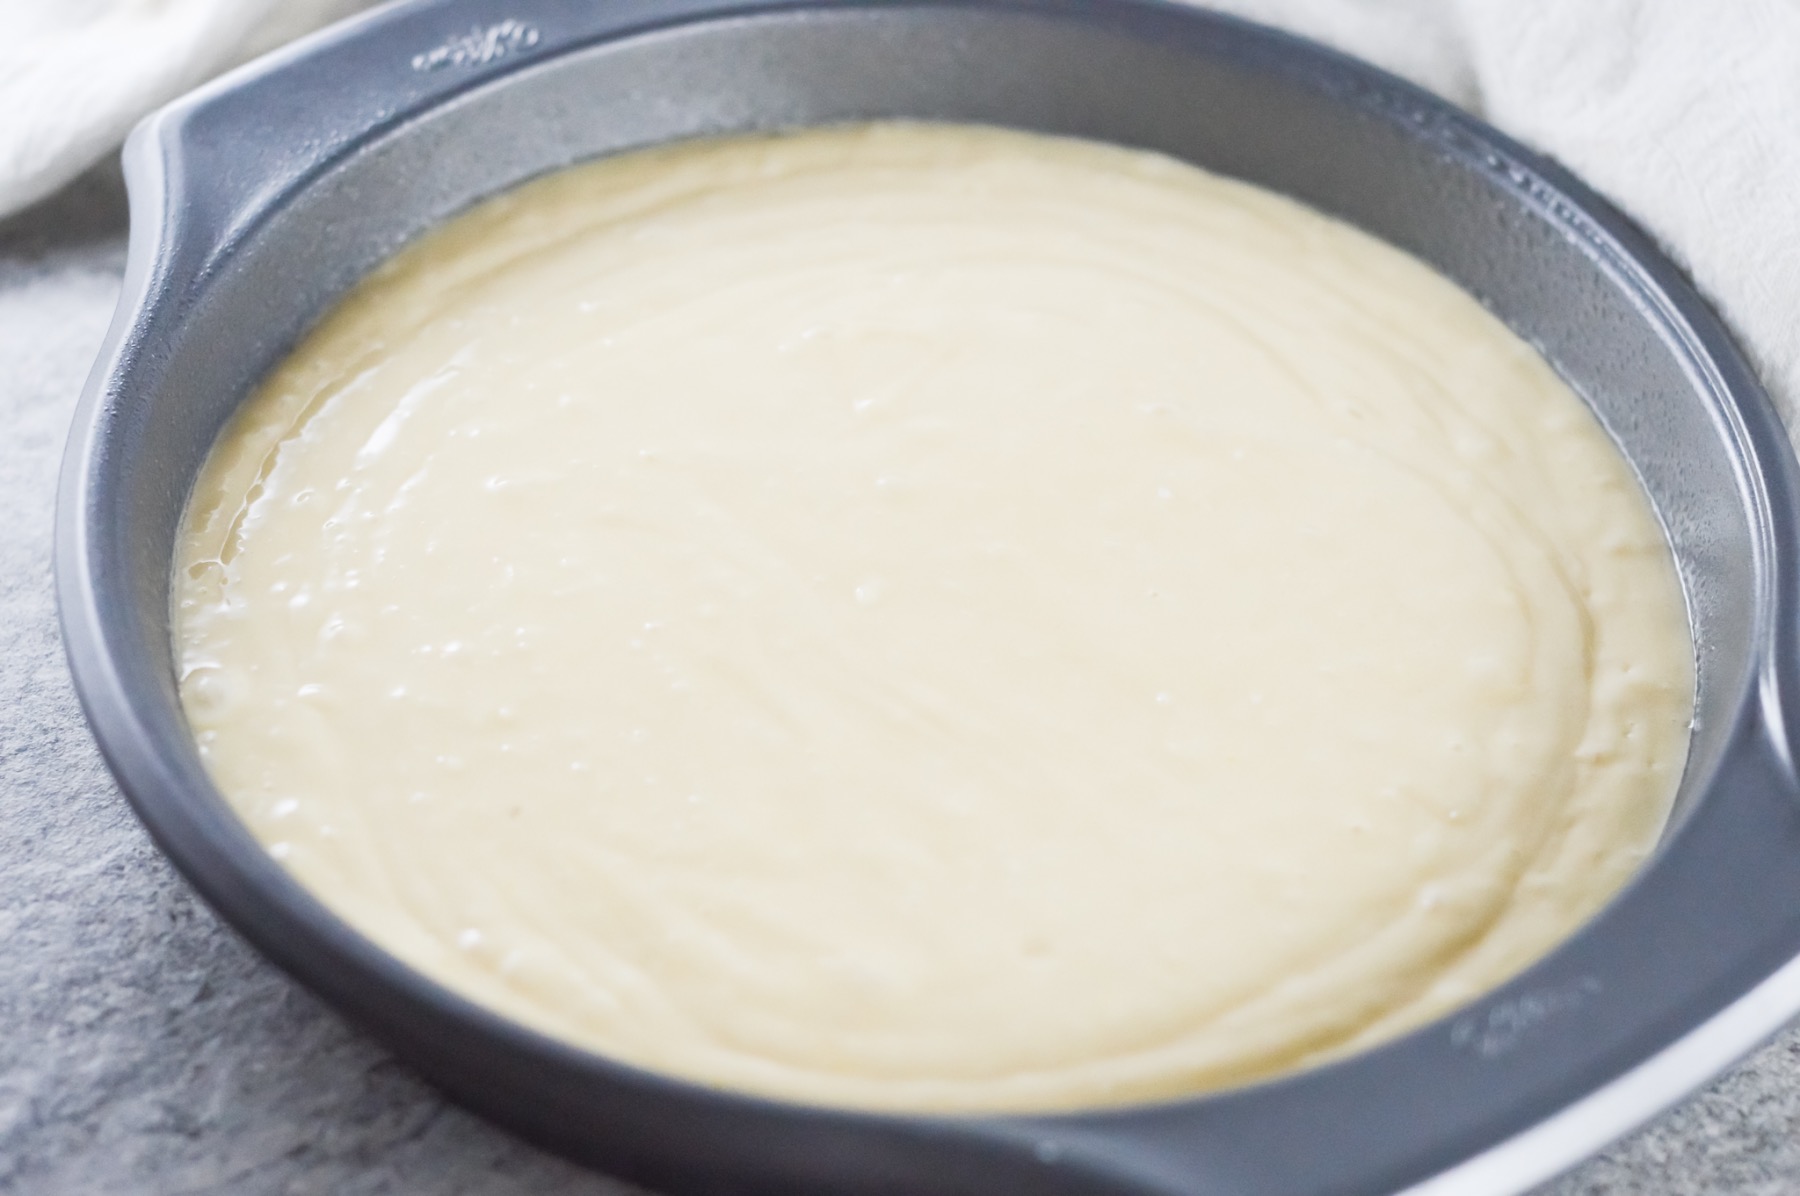
Brownie mix and muffin mix can always be lumpy, but for cakes, it’s important that your batter is perfectly smooth. That’s why it’s best to use a Kitchen-Aid mixer or electric mixer to whip the batter. Then baking the cake is just like you would if you didn’t have ice cream cones in mind! Bake your cake in 2 9 inch round pans according to the package instructions.
Once your cake is golden brown, gorgeous and out of the oven, let it cool completely before moving on to the next steps.
Why I Recommend Chopping the Cake
Before we move on, let’s just talk about why I do not recommend baking a cupcake inside an ice cream cone which I’ve seen done in other recipes. There are so many reasons, but here are my top 2.
1. Baking a cupcake inside a cone burns the cone.
Since the cone is already baked and dry, it can’t handle being baked again with a cupcake inside. Although it’s cute, it doesn’t taste good. It tastes burnt. And sometimes they don’t end up so cute. On a bad day you could end up with an ice cream cone that is too dark or even has black burnt edges.

2. Baking a cupcake inside a cone is harder to eat.
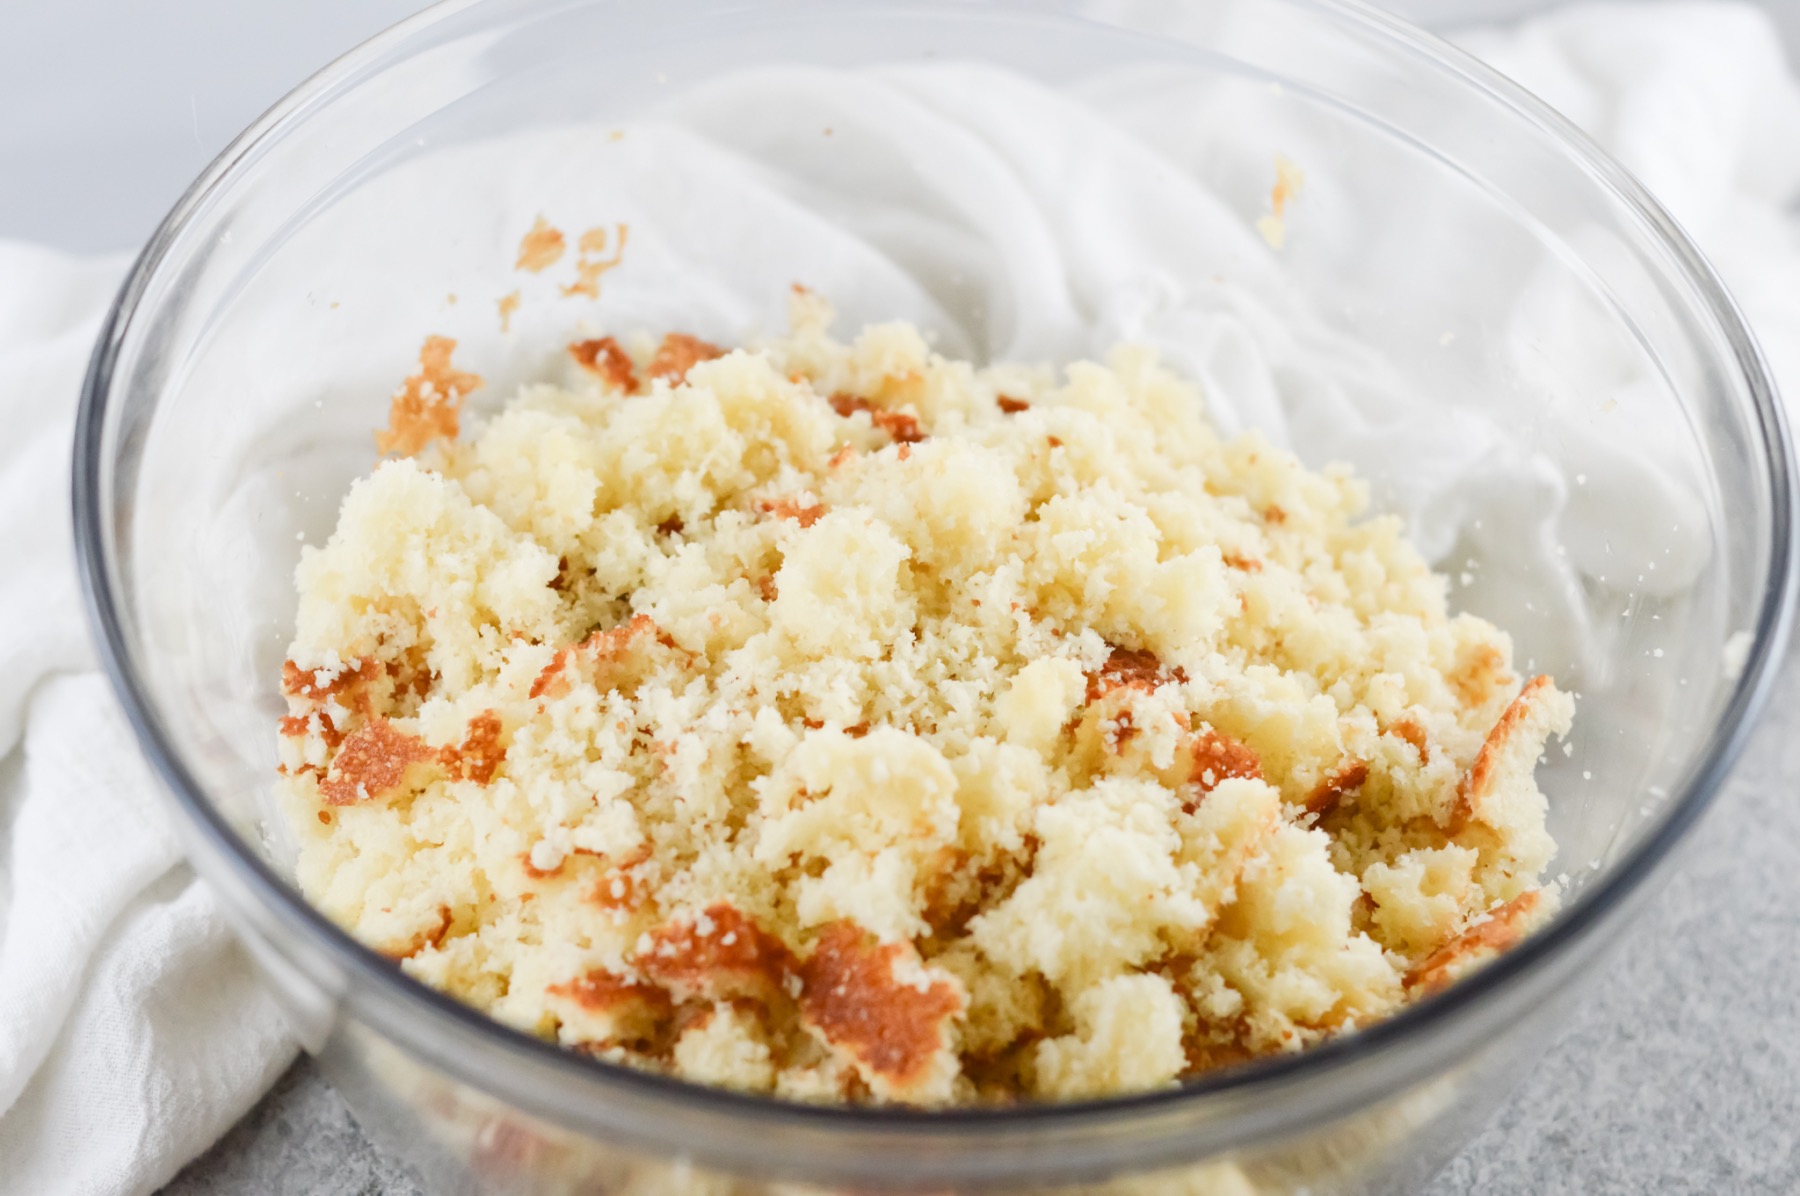
There’s a reason that soft, smooth ice cream is placed inside a crunchy cone – they fit together! A cupcake on the other hand is soft, but not as soft. It’s hard to take a bite of both the cupcake and the cone together. Crumbling or chopping the cake before adding it to the cone makes each bite so much easier.
Next, chop the cupcake into bite sized pieces and if you want to get crazy, mix in a few tablespoons of frosting. That will make your Ice Cream Cone Cupcakes more like cake pops. I left the frosting out but my cake still stuck together inside the cone really well because of how soft the cake was!
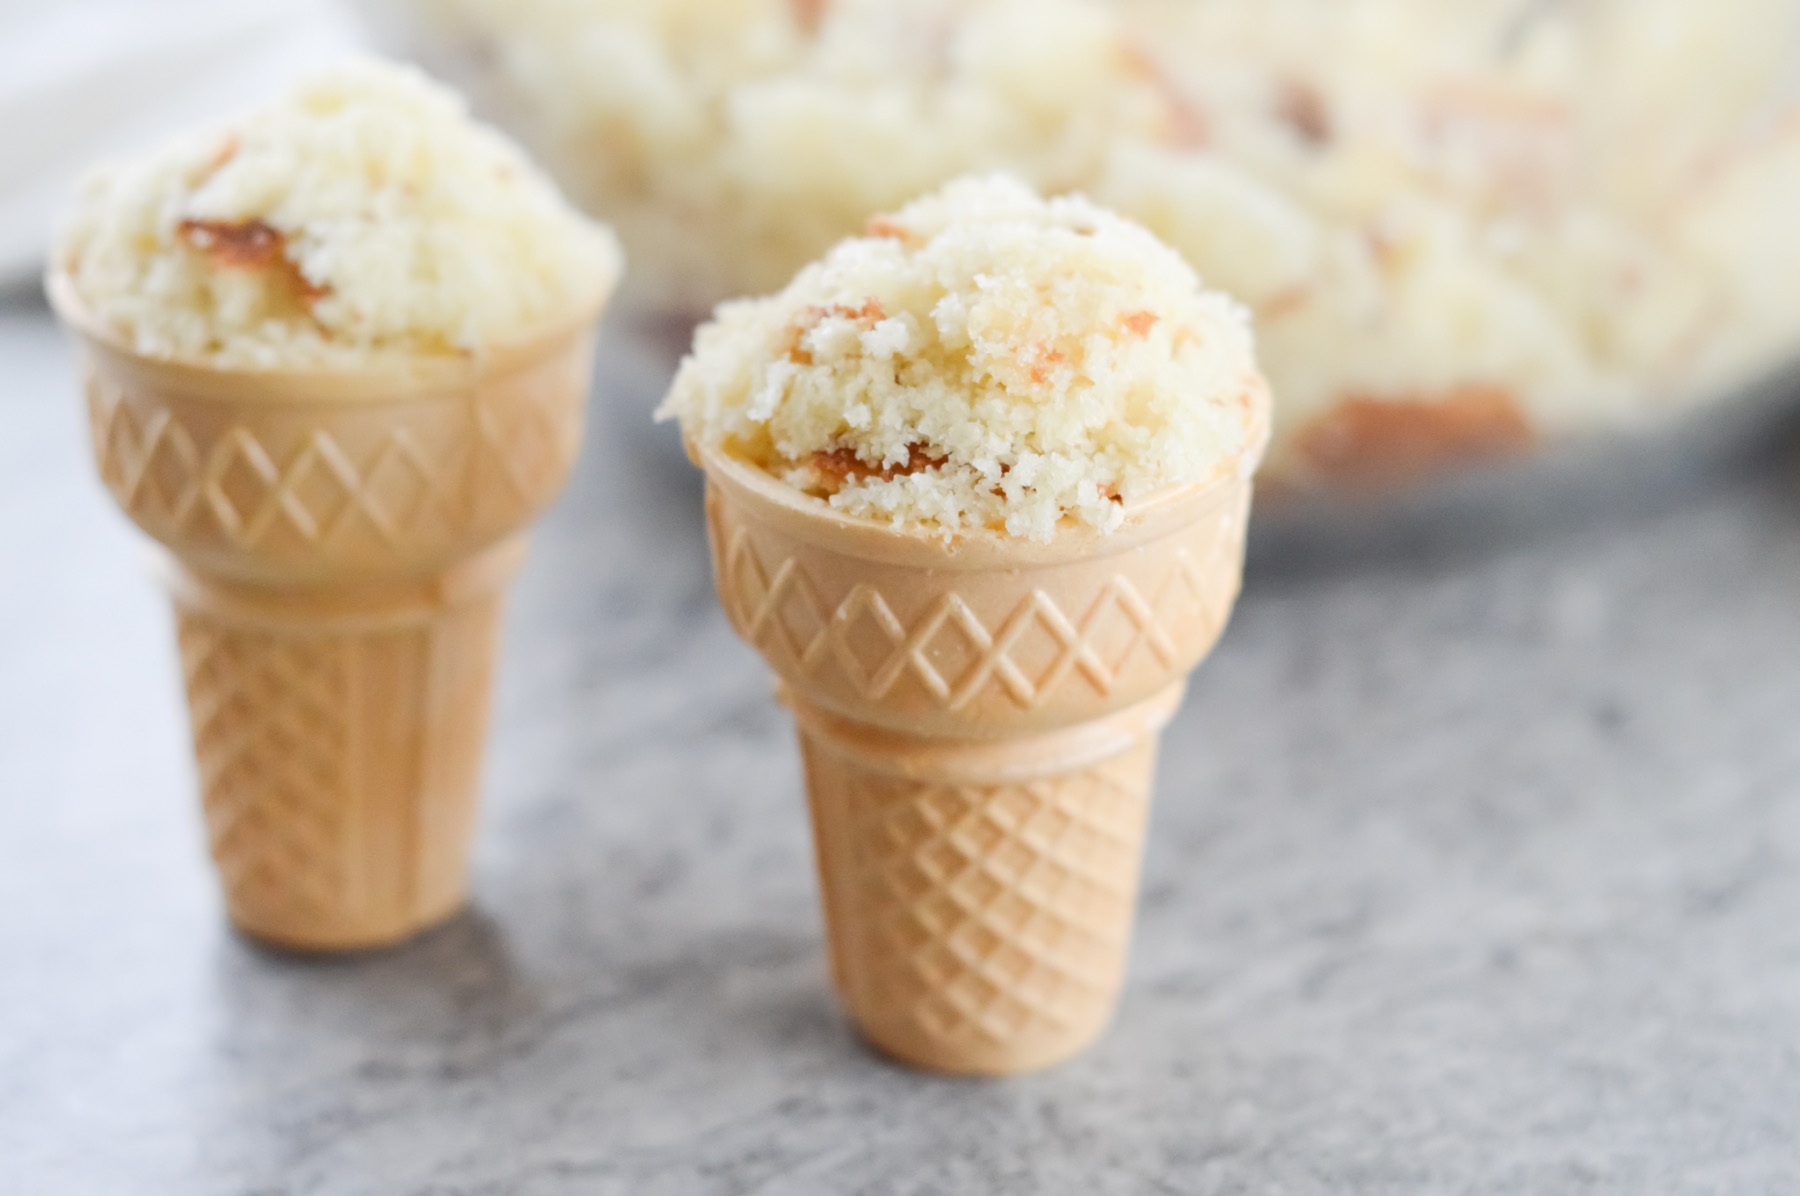
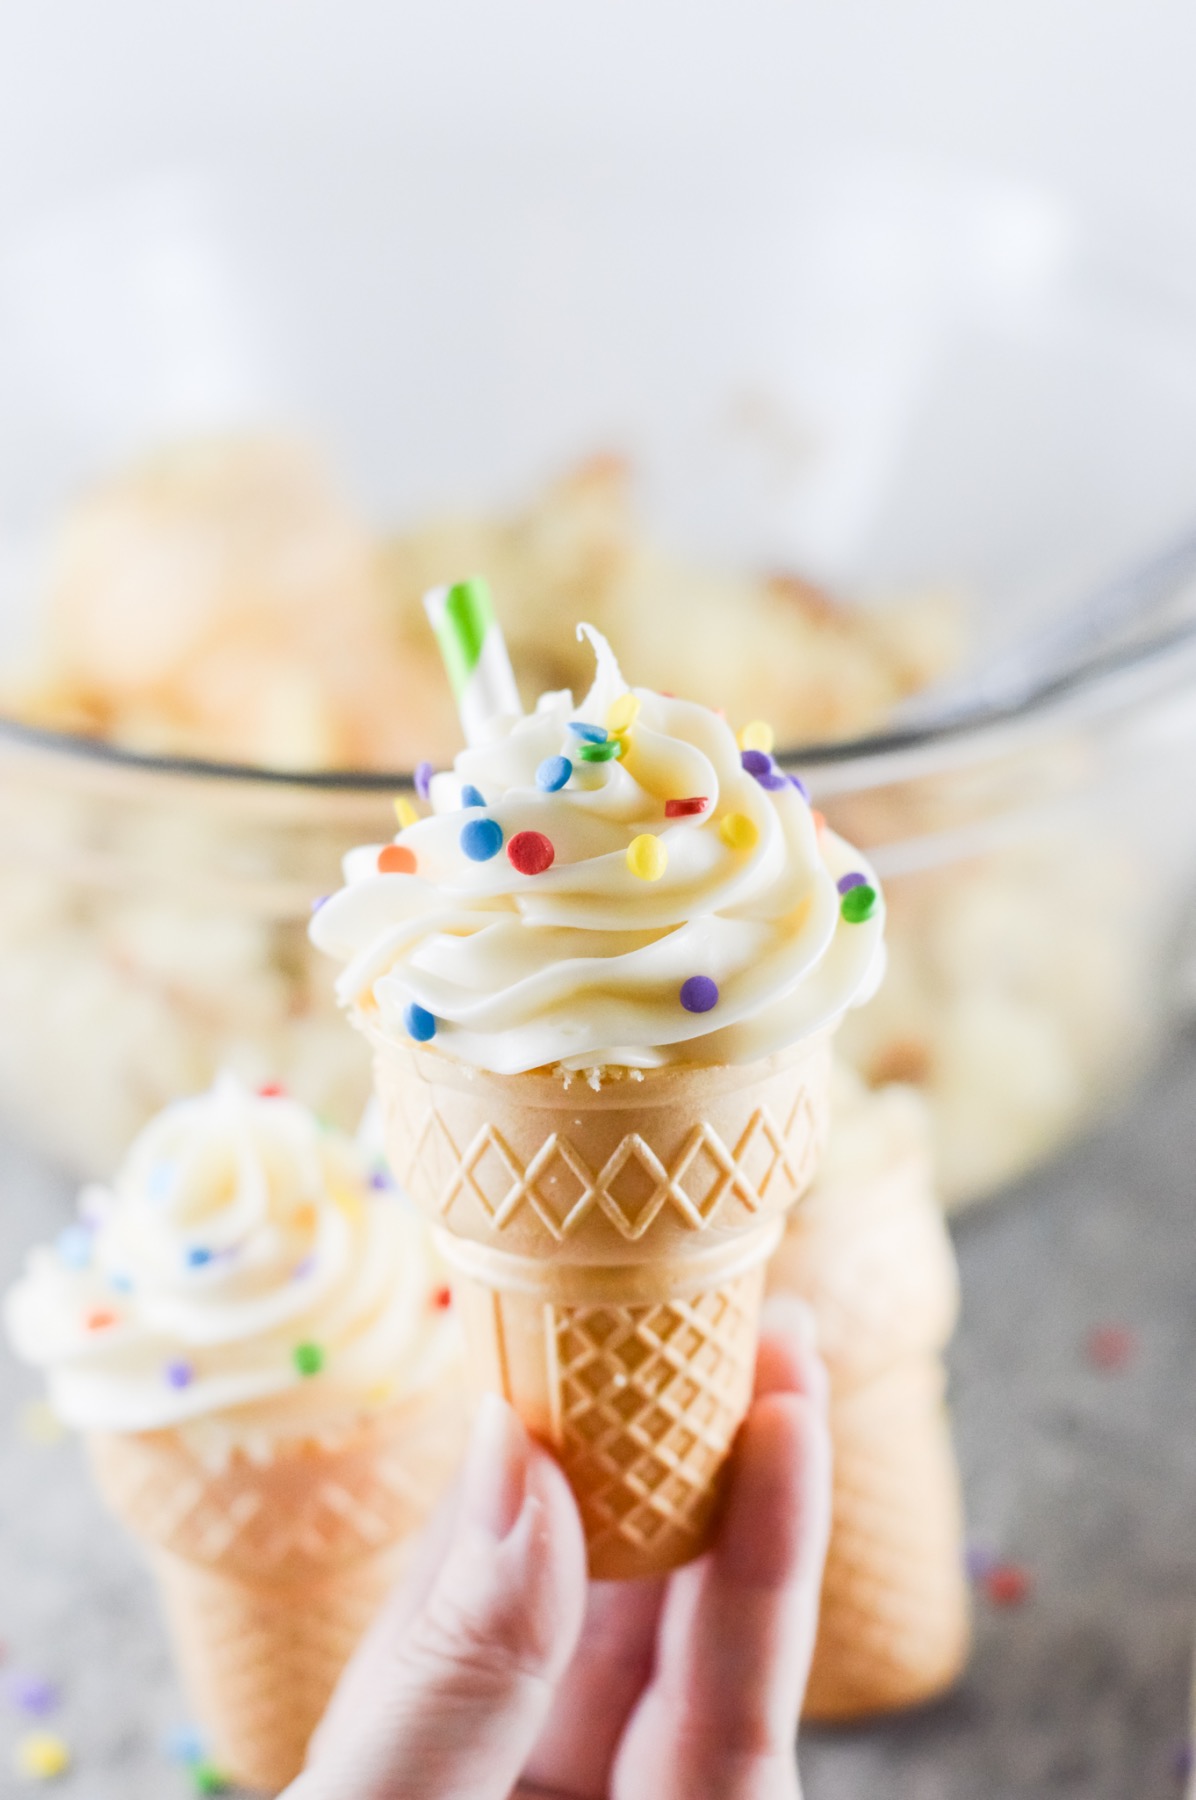
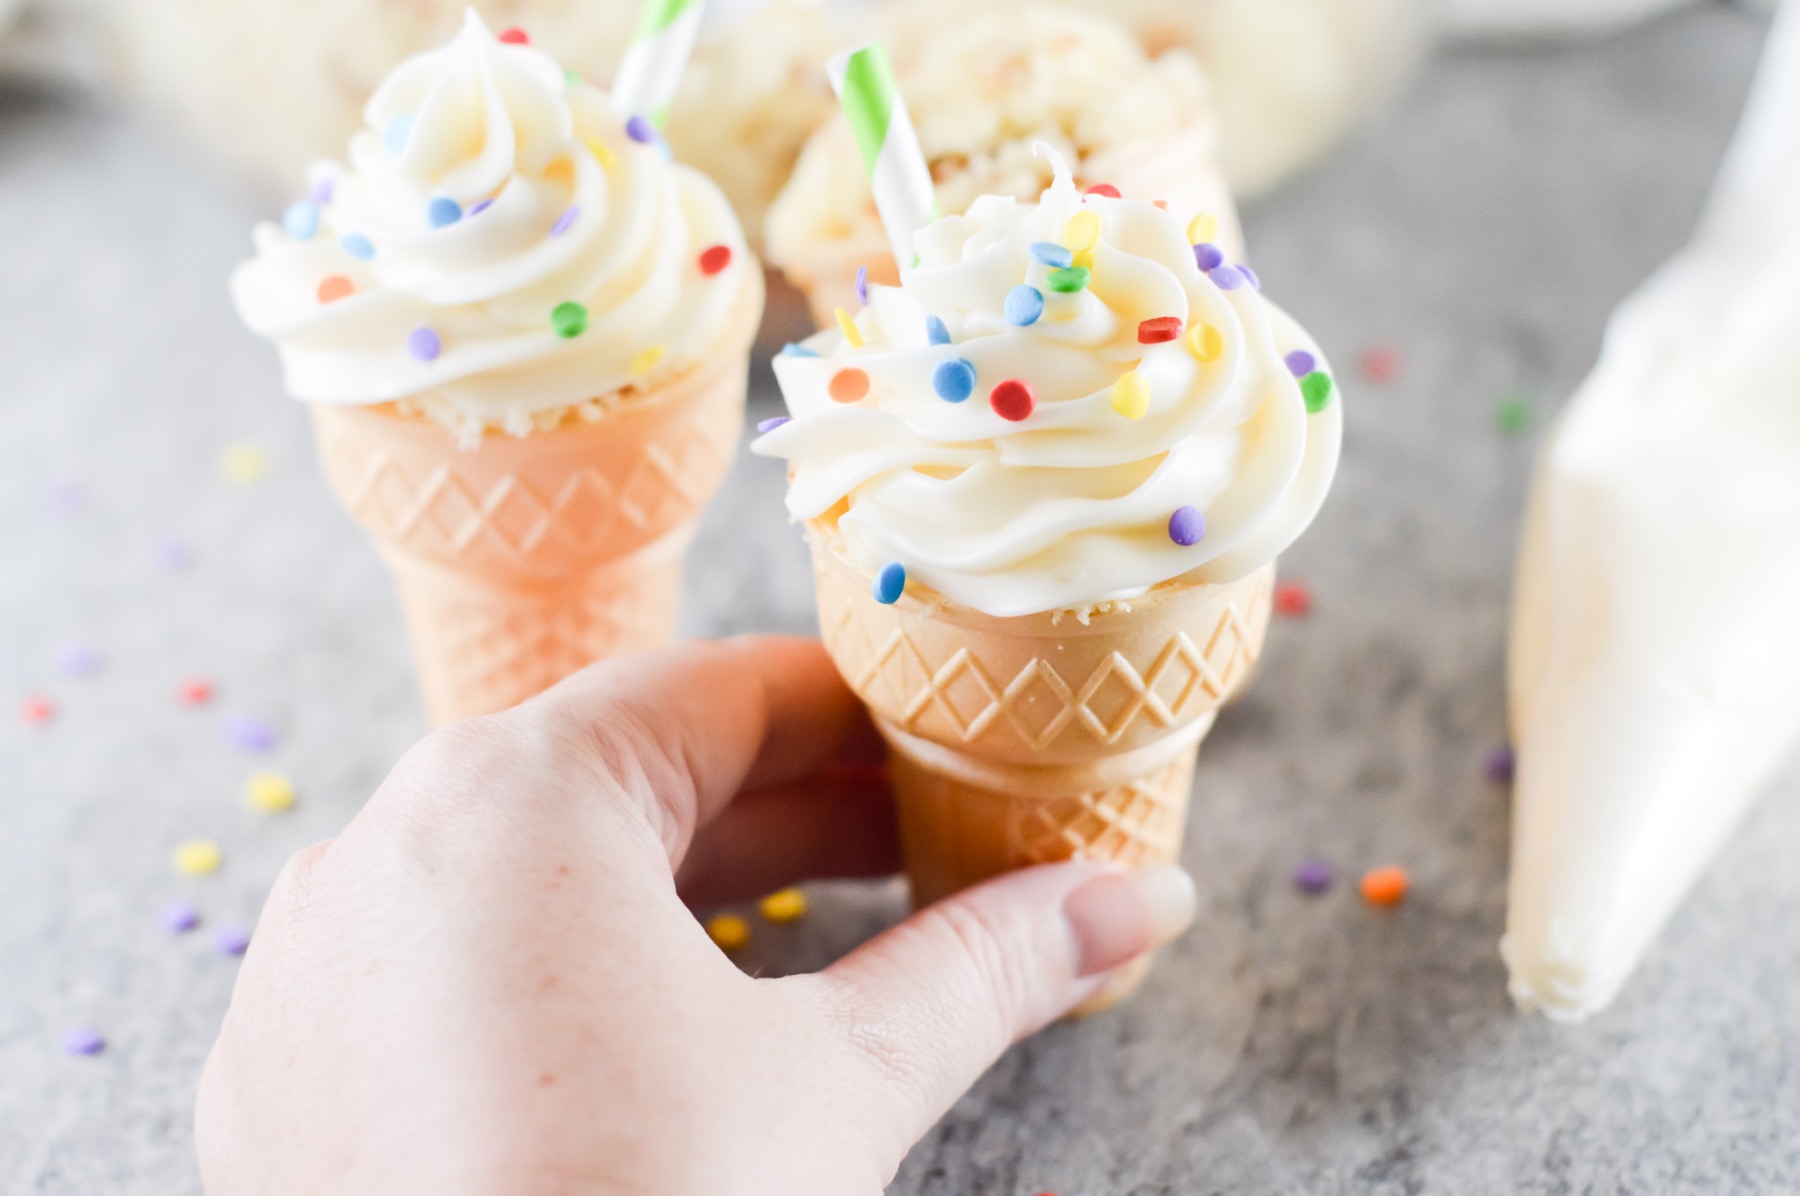
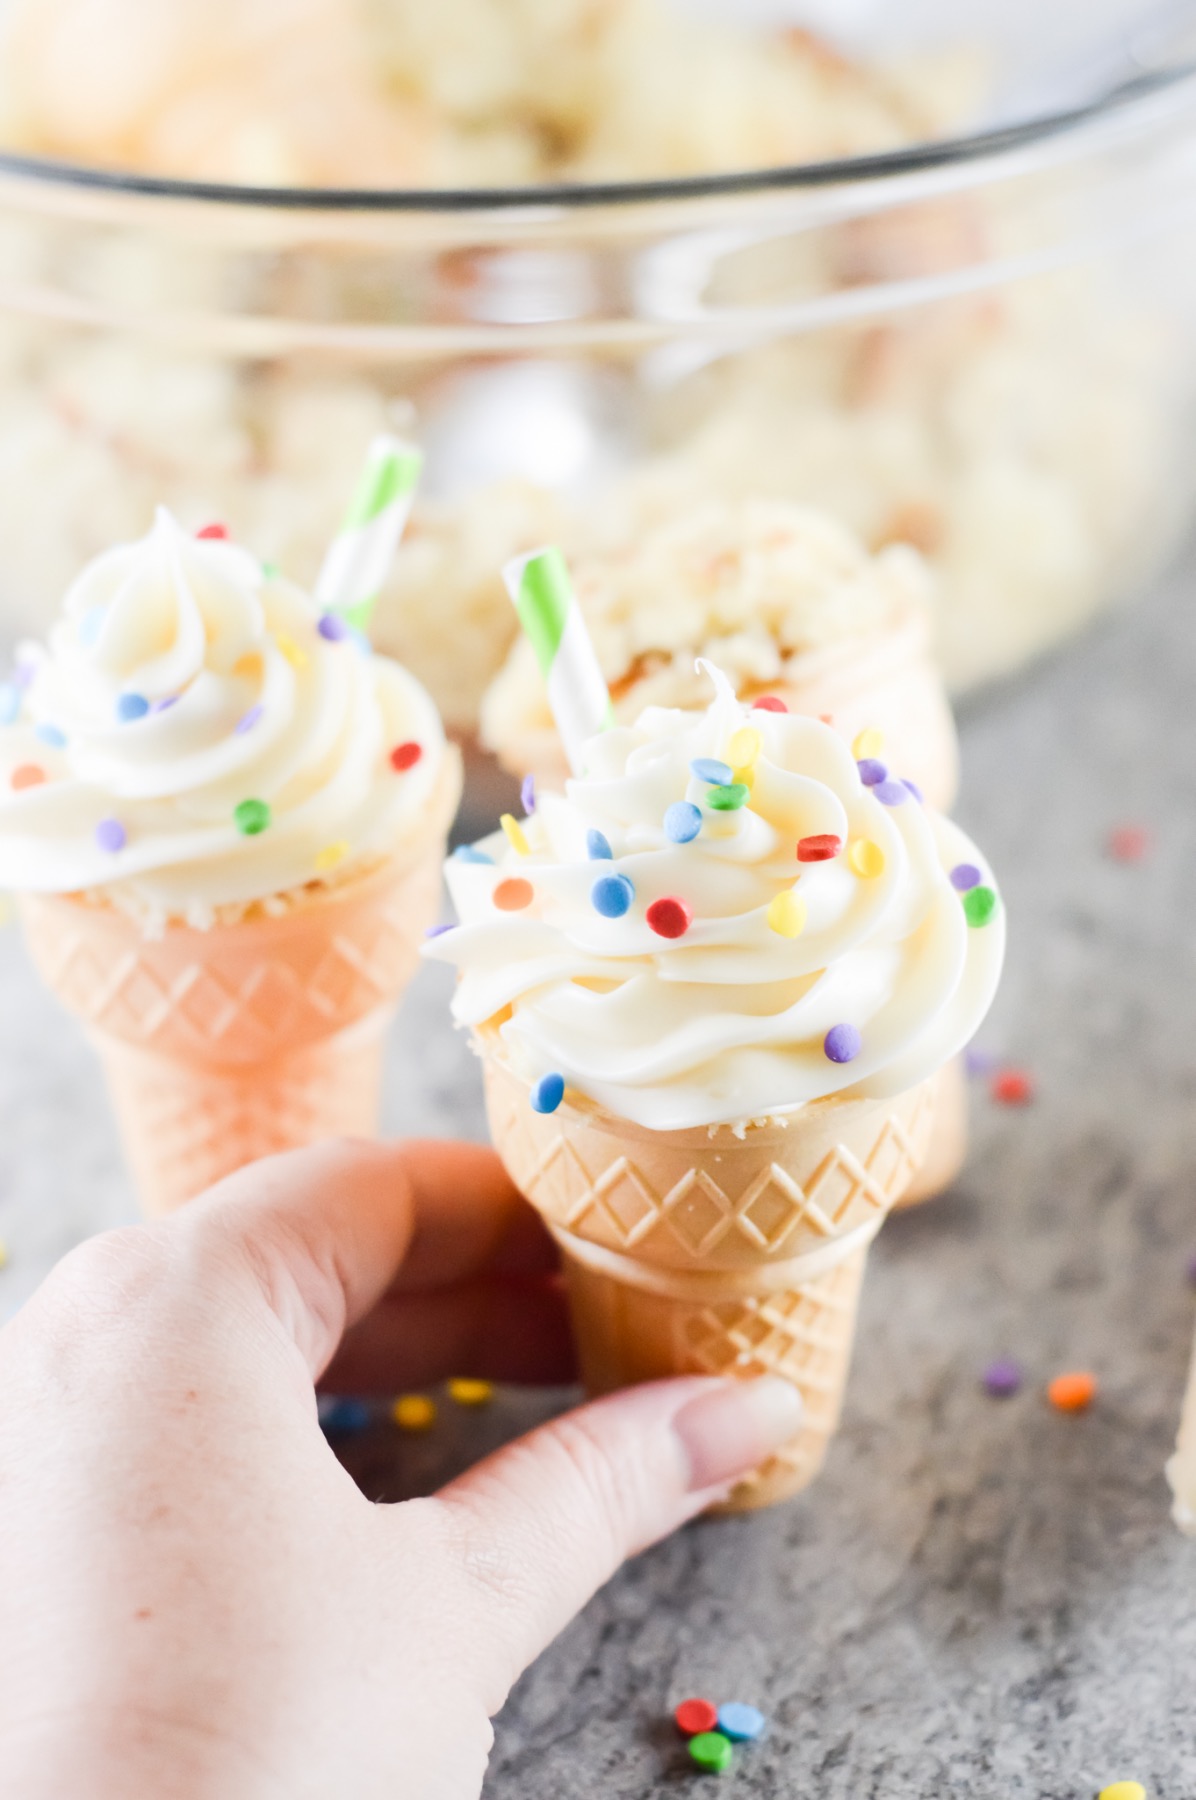
Scoop the cake into the ice cream cones and press it down gently. Make a heaping spoonful on top, just like an ice cream scoop!
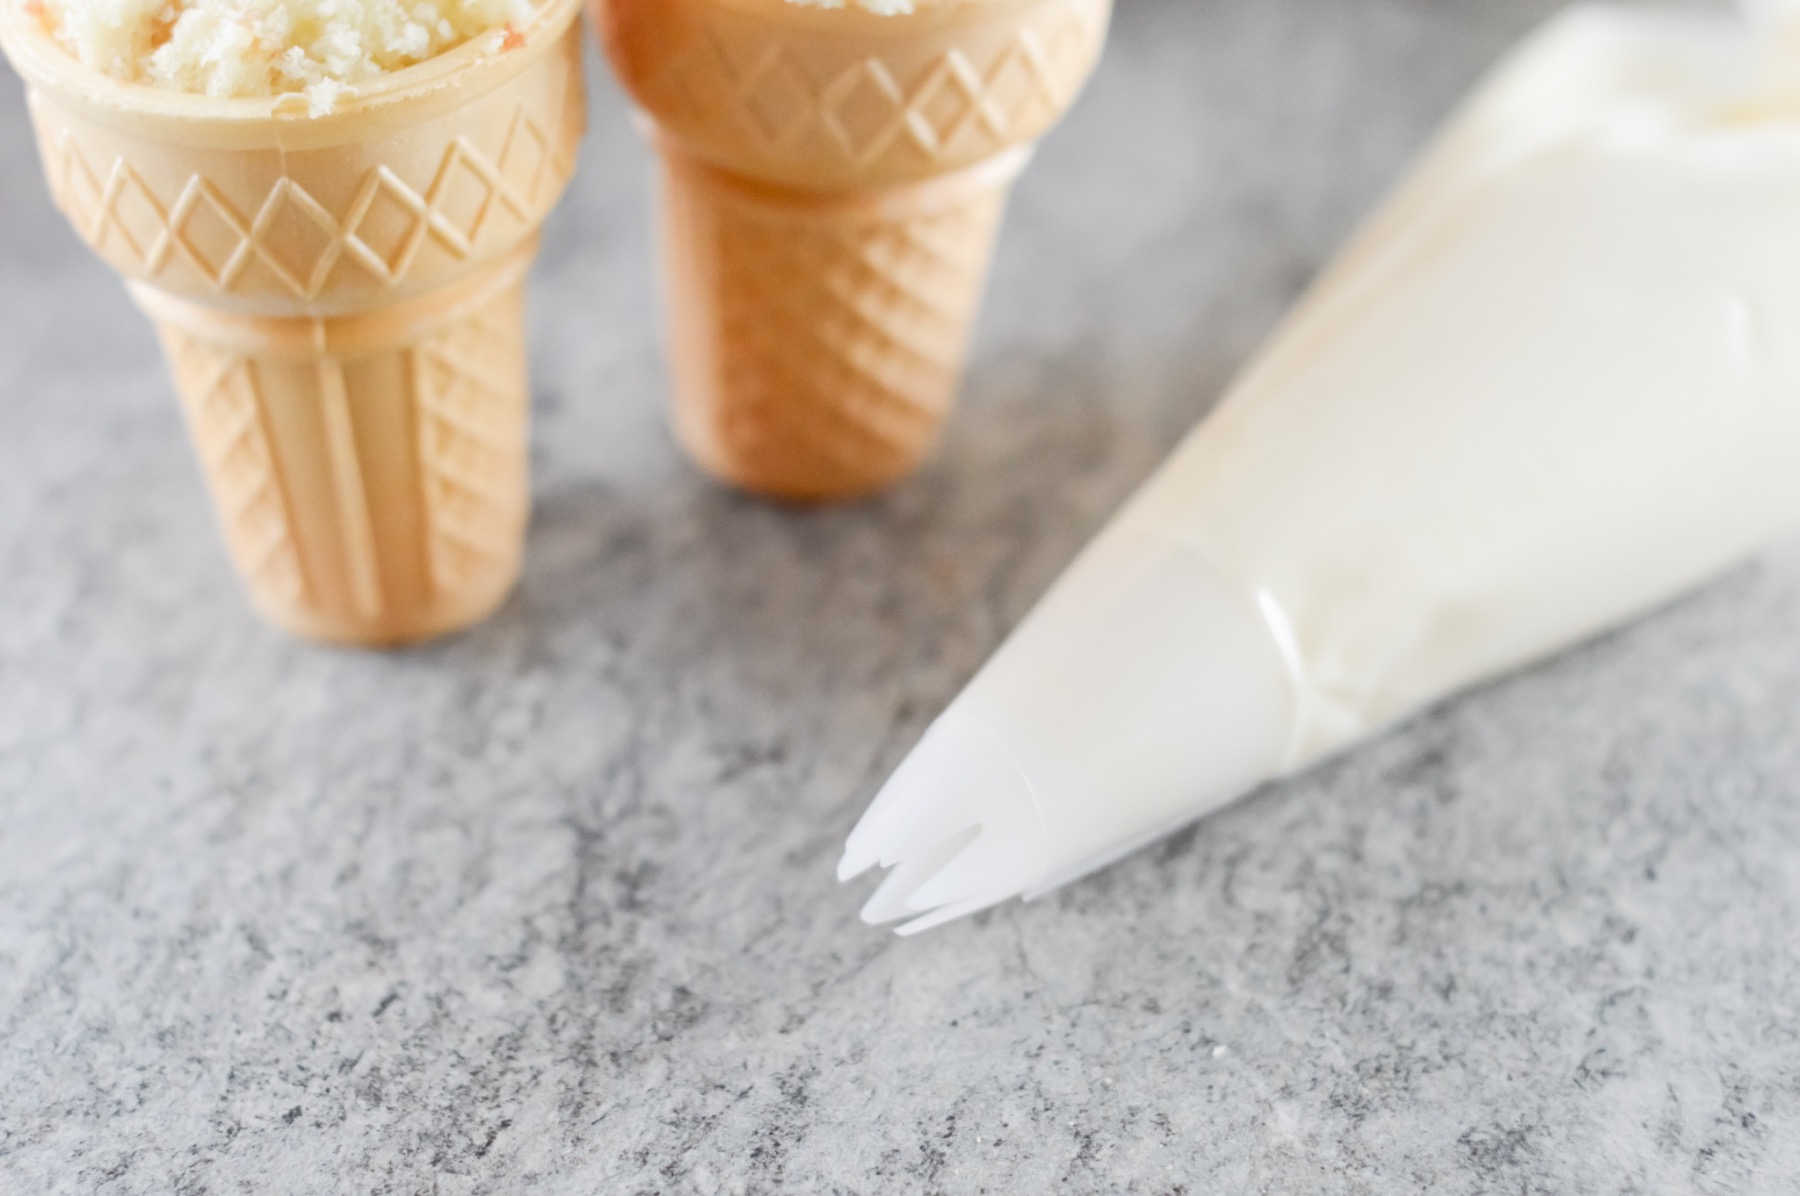
Now it’s all about the frosting. Before you get started, make sure your frosting is perfectly room temperature. Chilled frosting won’t do for piping a rosette or any other design techniques because the frosting is too hard.
Additionally, you can’t frost warm cake. Ever. Be sure that your cake is cooled to room temperature now if you got a little ahead of yourself before.
How to Make a Frosting Rosette
Piping a rosette is easier than you think! If you are nervous to start this technique with you cupcakes, practice first on a piece of wax paper. Once you feel comfortable, move back to the cupcakes.
To start, get your piping bag ready with the size of star tip you are comfortable with. I used a 1M.
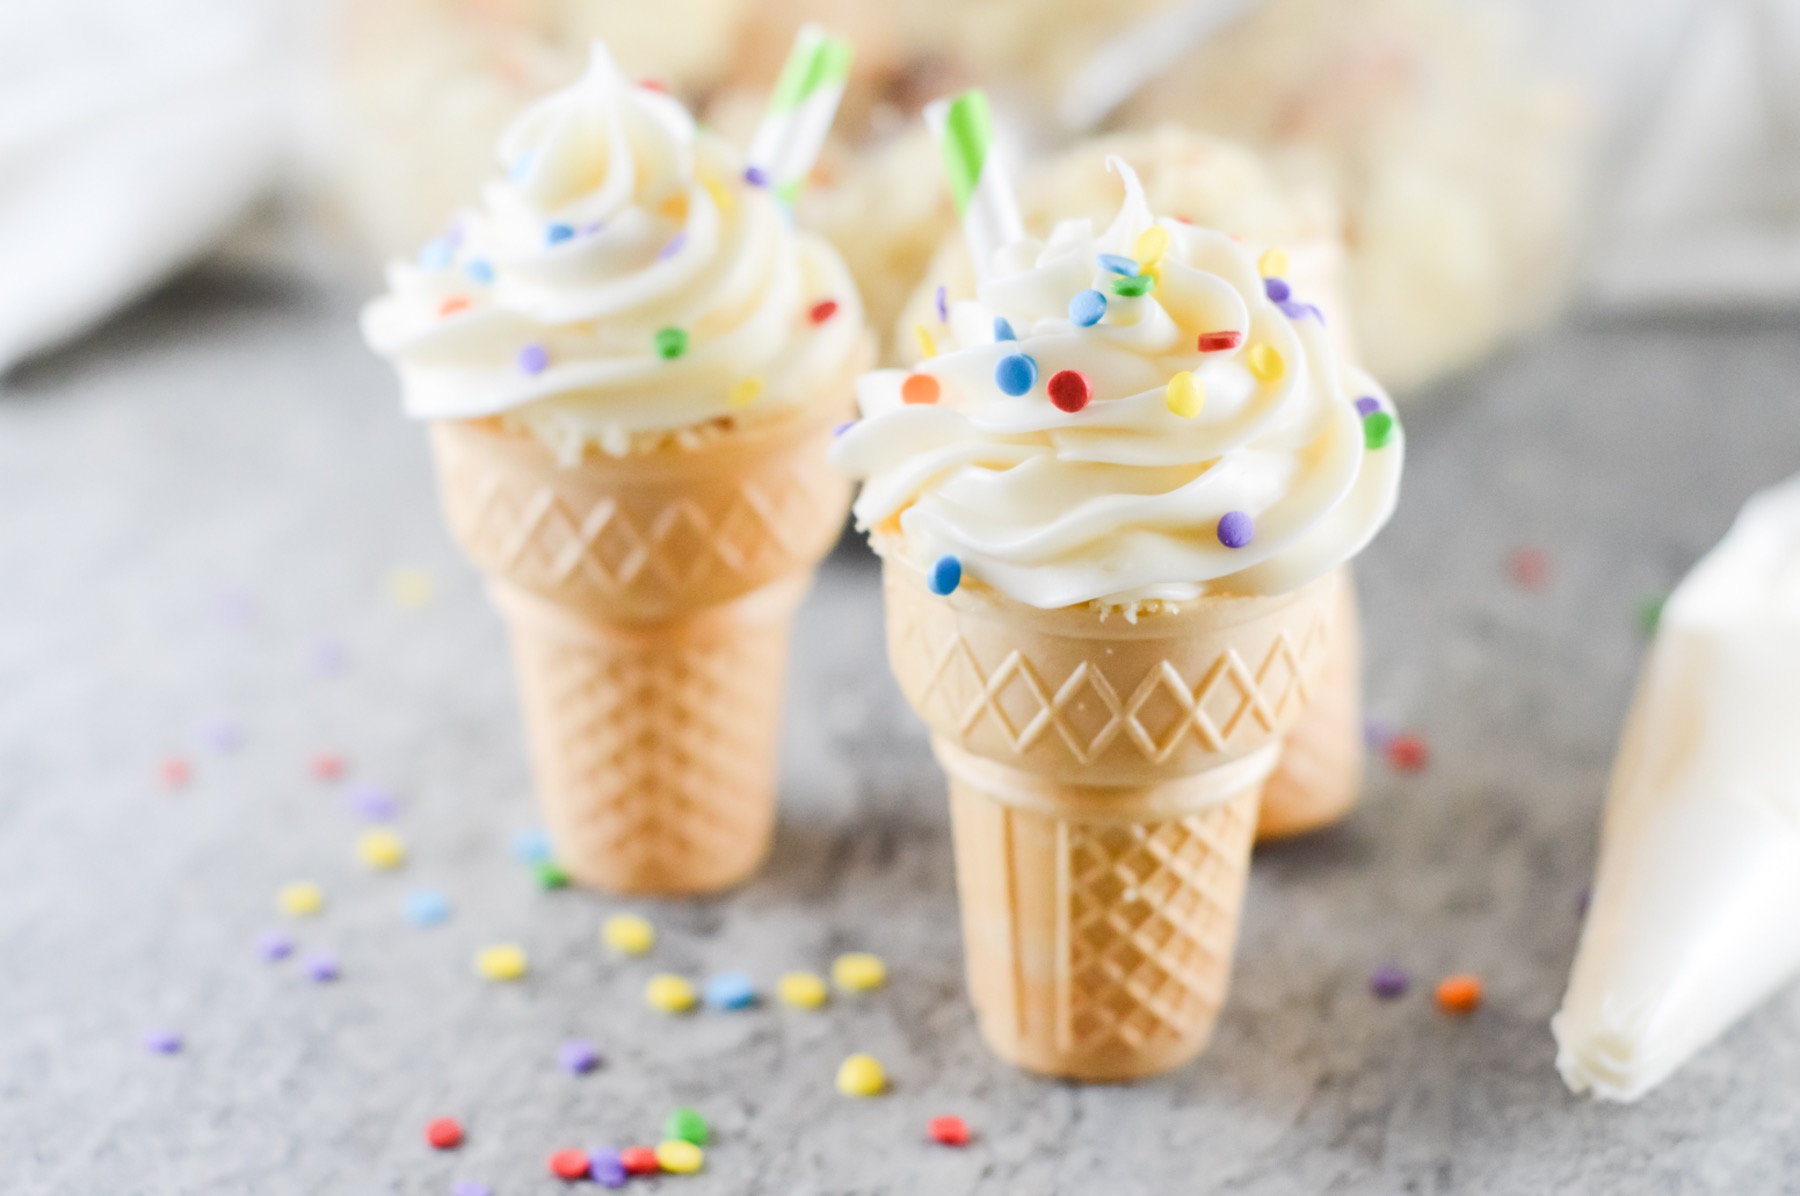
The motion is to hold the tip in the center of the cupcake around 1/4 inch above the cake. Squeeze a star shaped out and use a clockwise motion around the edge of the cone and lift up to make a second layer that is slightly smaller than the 1st layer of frosting. Continue your clockwise motion. To finish, quit squeezing and lift straight up.
A video is worth a thousand words, so here is an amazing Rosette Video Tutorial.
Decorate the Cupcakes
Last, before you serve these cupcakes, you have to add all kinds of cute! Of course, we need the rainbow sprinkles, otherwise these wouldn’t be Rainbow Sprinkled Ice Cream Cone Cupcakes. For the sprinkles, I dashed around 1/2 teaspoon per cone. Cherries would be a great addition because they are so perfect for ice cream. A chocolate syrup drizzle would be fun too but may be a little messy.
My choice was adorable paper straws! So this cupcake is part ice cream and part milk shake.

Rainbow Sprinkled Ice Cream Cone Cupcakes Recipe
Ingredients
- 1 White Cake Mix or your favorite vanilla cake recipe
- Plus eggs & butter or oil if you are using a box mix
- 20 Traditional Ice Cream Cones
- 2 16 Ounce Jars White Frosting or your favorite buttercream recipe
- Rainbow Sprinkles
Equipment:
- Frosting Piping Bag
- 1M Frosting Tip or any open star frosting tip of your choice
Instructions
- Mix, prepare, and bake the cake as directed on the box in 2 9 inch round pans. For a perfect cake, be sure that your cake batter is silky smooth with no lumps.
- Bake the cake until golden brown and a toothpick comes out clean. This should be around 28 minutes.
- Remove the cake from the oven and allow it to cool completely before moving forward.
- Chop the cake into 1 inch cubes or crumble the cake in a bowl.
- Optional: If your cake is dryer, you can add a small amount of frosting to the cake, like you would when making cake pops. This will help bind the cake together.
- Scoop the chopped cake into the ice cream cones and gently pack it down. Make a slight heap of cake on top, just like a scoop of ice cream!
- Place the frosting in a piping bag with a 1M or open star tip.
- To make a rosette, start by squeezing a star shape of frosting in the center of the cupcake with your tip around 1/4 inch above the cupcake. Swirl around the edge of the cone in a clockwise motion. Then make a second layer by continuing your clockwise motion and lifting up. Your second layer should always be smaller than your bottom layer. To finish your frosting, stop squeezing in the center of the cupcake, and lift up.
- Top each cupcake with 1/2 teaspoon or more of rainbow sprinkles and punch a paper straw into the cupcake at an angle.
- Enjoy!
Notes
Are you in love with these Rainbow Sprinkled Ice Cream Cone Cupcakes yet? And if you want to make a craft that matches these treats, check out these Summertime Shrinky Dink Printables – the ice cream cones are too cute! And if you need even more cupcakes in your life, I recommend these Pink Champagne Cupcakes.
Let’s Stay Friends!
Insta | Pinterest | Enews | TikTok